Verify Google Workspace Domain Ownership in Godaddy
- Hello and welcome back to our step-by-step Google Workspace Setup video guide for Godaddy.
- In our previous video we saw how we can sign up our Godaddy domain with Google Workspace.
- In this video, we'll take a step forward and verify our domain ownership to Google so we can start using Google services.
Why Domain Verification
- The main reason why Google requires you verify domain ownership is to prevent abuse of it's services.
- That is why Google makes it a requirement that you verify your domain ownership before you can start using your domain Google Workspace account.
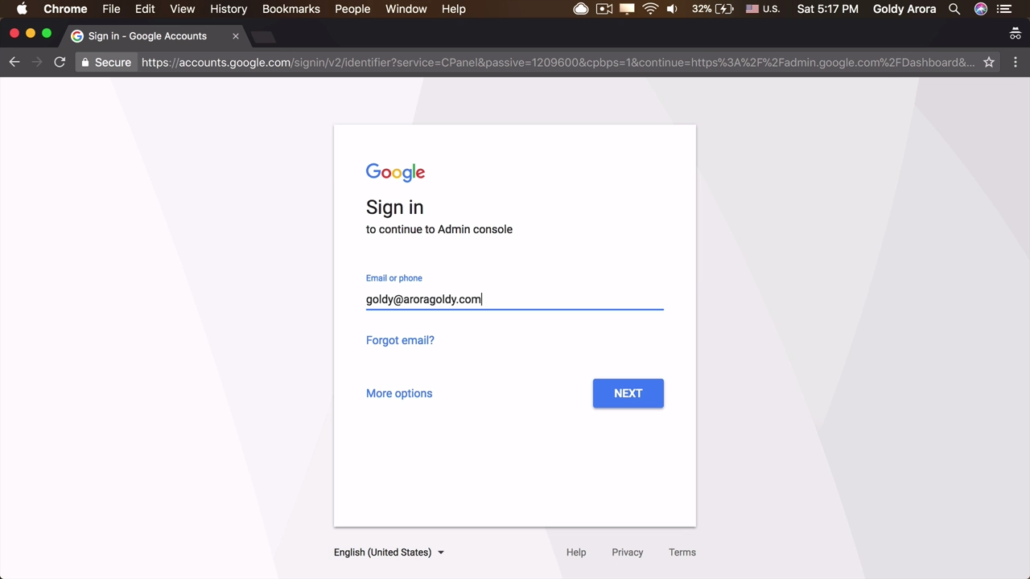
1. Sign in to admin console
- Now if you're coming from the previous guide you may skip this step because you're already signed in.
- However, if you're not you can go ahead and sign into your Google admin console by visiting "admin.google.com".
- So type your email and password you used to sign up for Google Workspace to login.
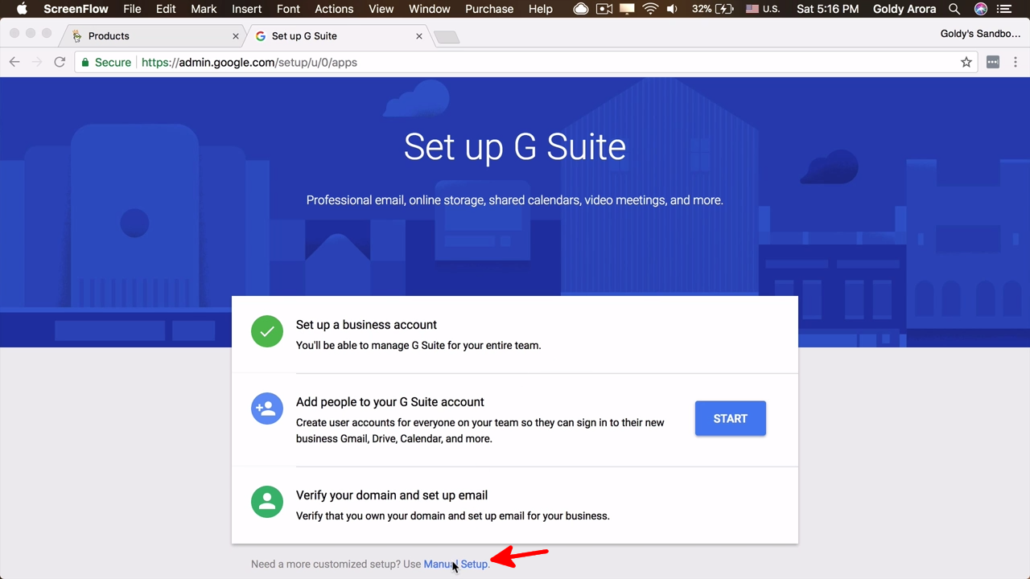
2. Click on "Manual Setup"
- In our next step (from the previous guide), Google will ask you to now set up your Google Workspace account.
- Here, you will click on "Manual Setup" option at the bottom of the page.
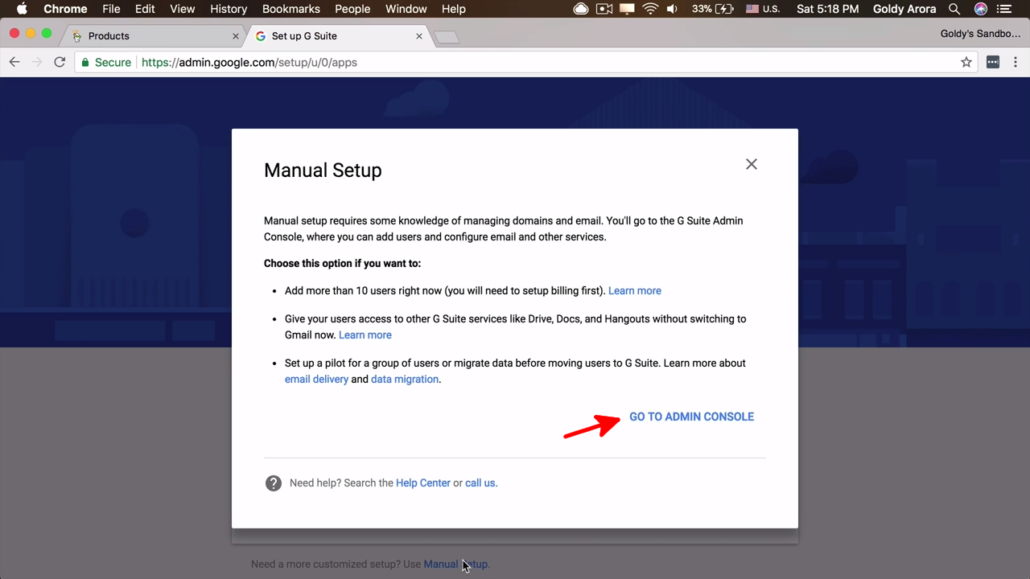
3. Go to Admin Console
- Google will give us some information such as adding a maximum of 10 users lest you setup billing first.
- And we should have knowledge to attempt manual setup. So, Click "Go to Admin Console" to continue.
- You maybe required to sign in, in which case you will have to type your email and password you used to create a Google Workspace account.
4. Click "Verify Domain"
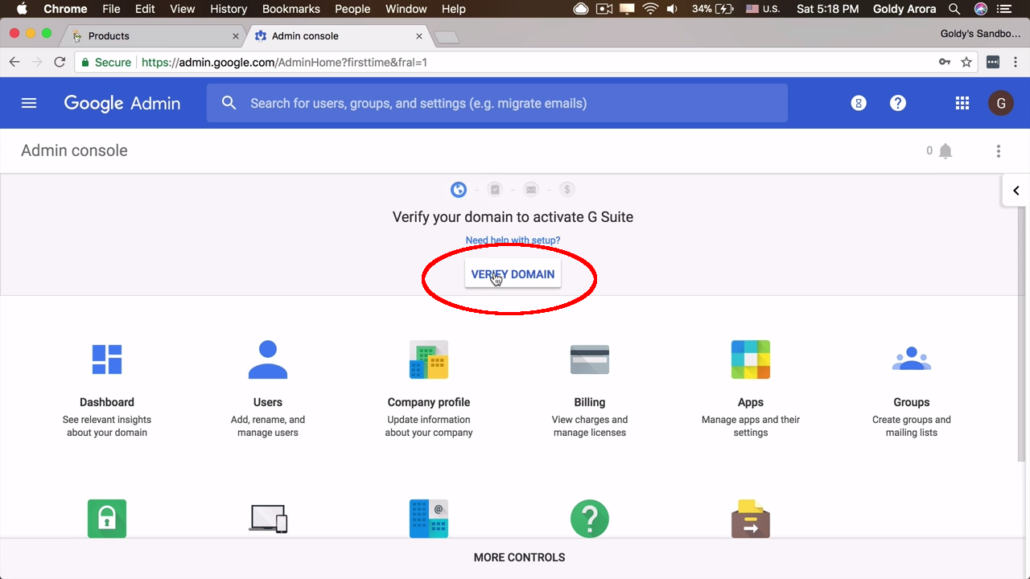
- Now you should have an option that lets you verify your domain.
- Click on "Verify Domain" and let's get started with our domain verification.
5. Click "No" for Manual Setup
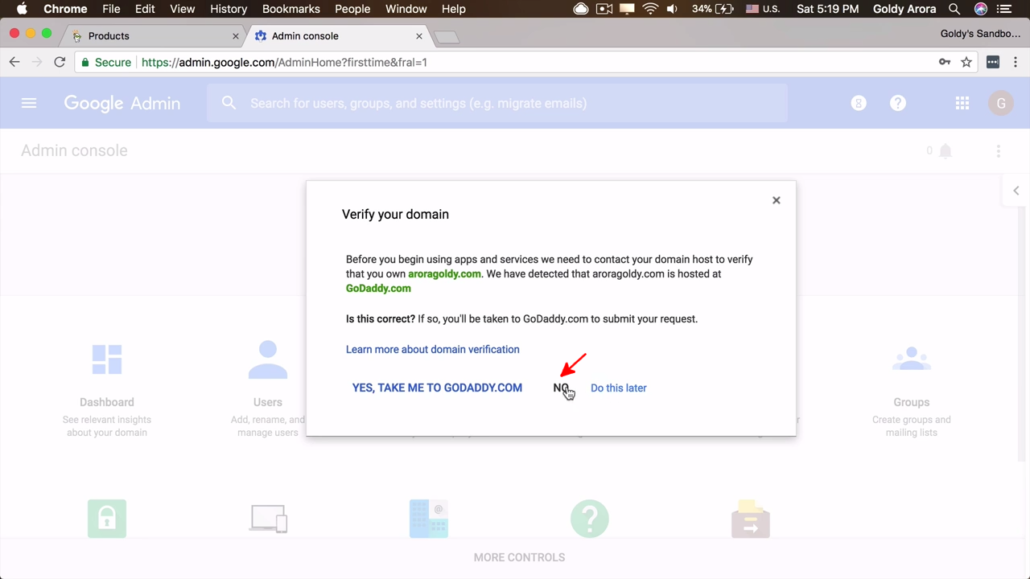
- Google has already detected that the domain is registered with Godaddy based on public DNS records.
- Google is also can take us to Godaddy and do the verification automatically. However, for our case we'll not go with this option as it takes more time compared to manual setup.
- So, click on "NO" so we get to manual setup.
6. Choose "Other" under domain host
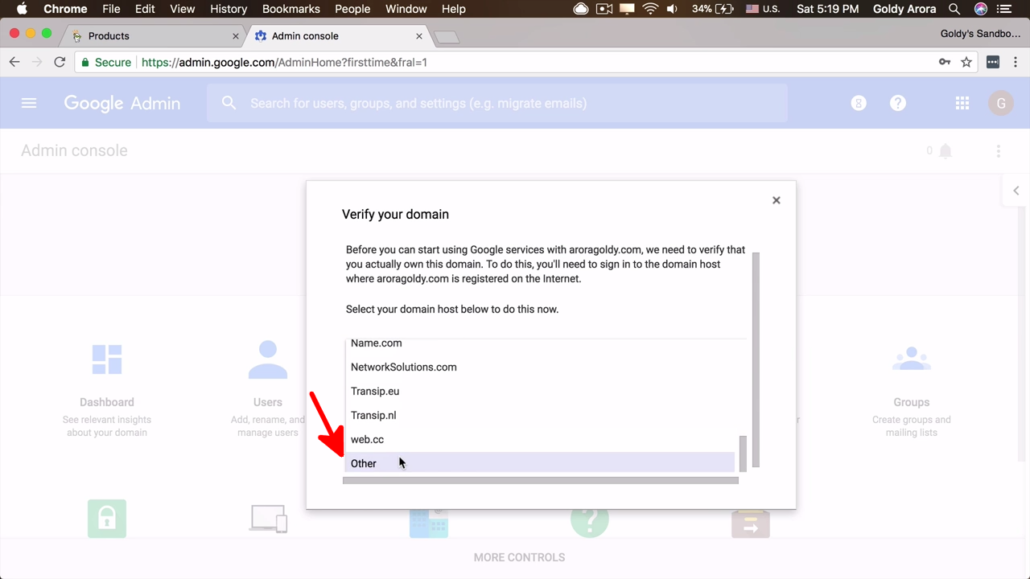
- On clicking "NO" from previous step, you get an option to choose your domain host.
- In this step, choose "Other" from the drop down menu.
- Then click on "Begin Verification" to continue.
7. Click on "Add a TXT record"
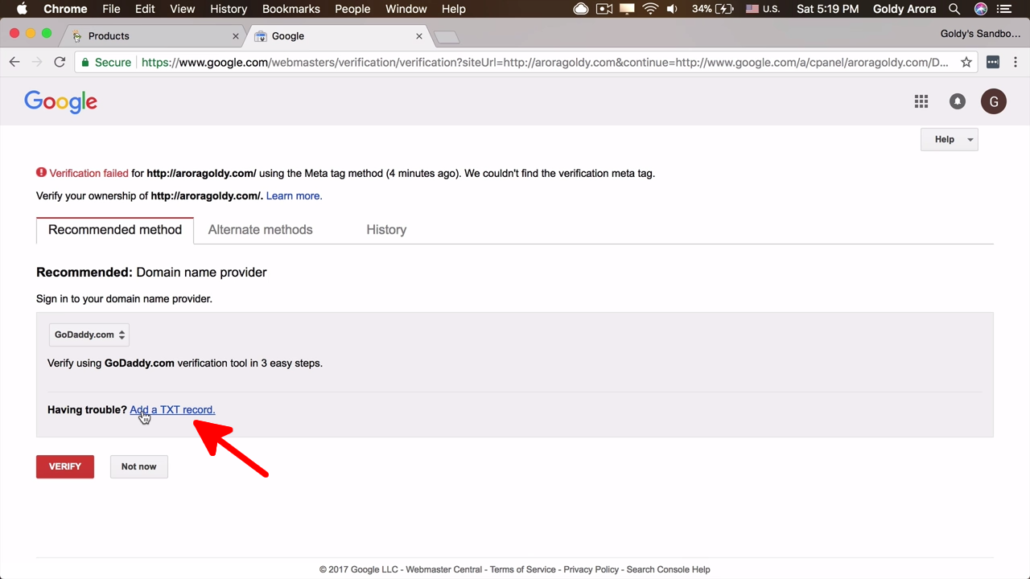
- Now Google will give us some manual options in this step.
- Click on "Add a TXT record" because that is the simplest method.
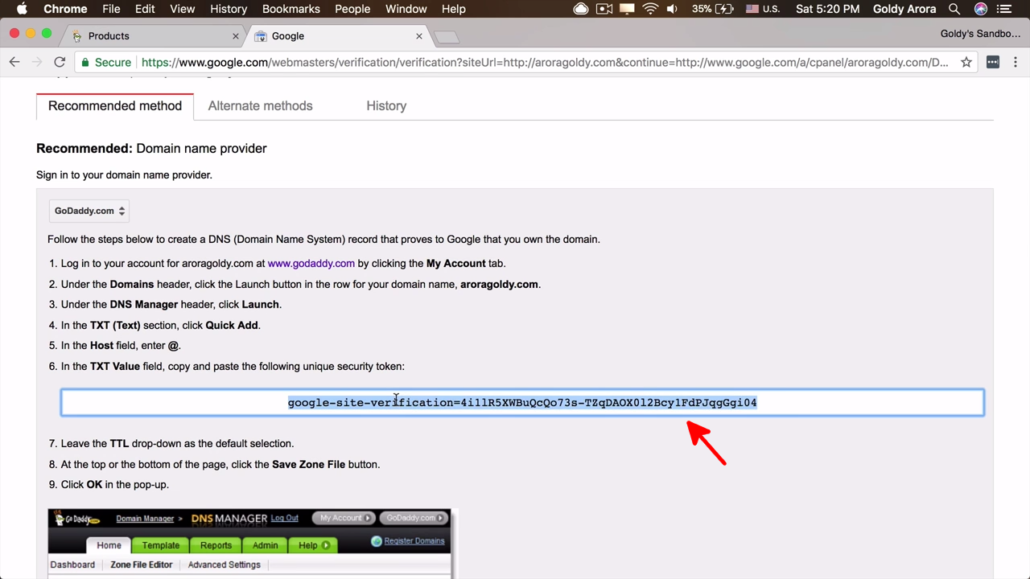
8. Copy generated TXT Record
- Now Google will generate a TXT record which it will use to verify your domain.
- So you'll be asked to create a DNS record on your domain which points to the generated values.
- So for now just copy the DNS value to your clipboard.
9. Add DNS to your Domain
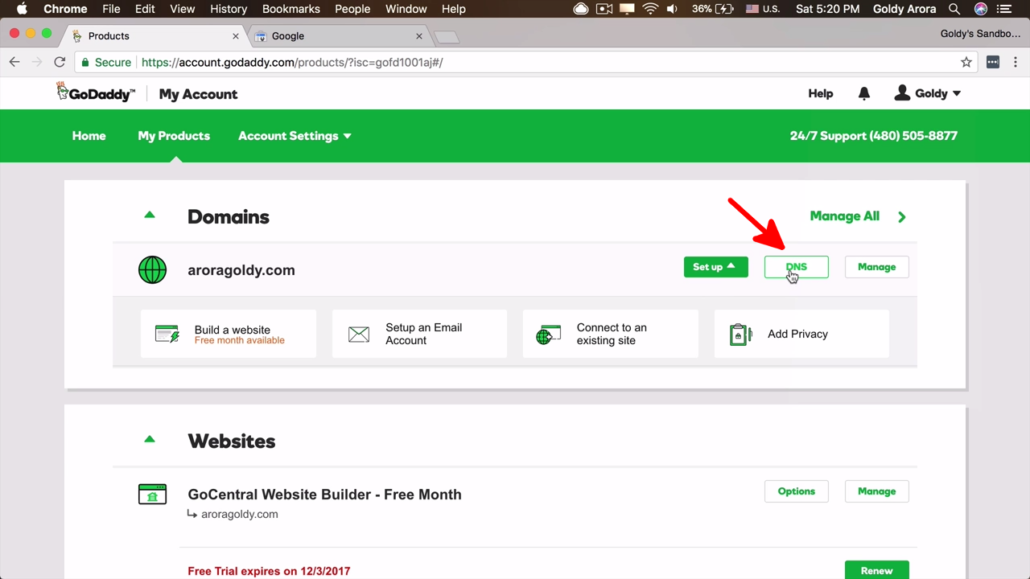
- In this step you'll want to go to your Godaddy account, then choose "My Products" from your profile drop down.
- Under "My Products" you then choose your domain and click on "DNS".
- Depending on the time you're reading this guide, the interface might change but essentially all you need to do is get to your DNS management.
10. Click "ADD"
- From the previous step you should get this step that allows you to add a DNS record.
- So all you have to do is scroll down and click on "ADD" to start adding your record.

11. Add DNS Record
- So to start adding your record, choose "TXT" under "Type" select field.
- Then under "Host" type "@" symbol.
- Then paste TXT value you copied in step 8 above.
- Now click on "Save" to create a record as per Google's instructions.

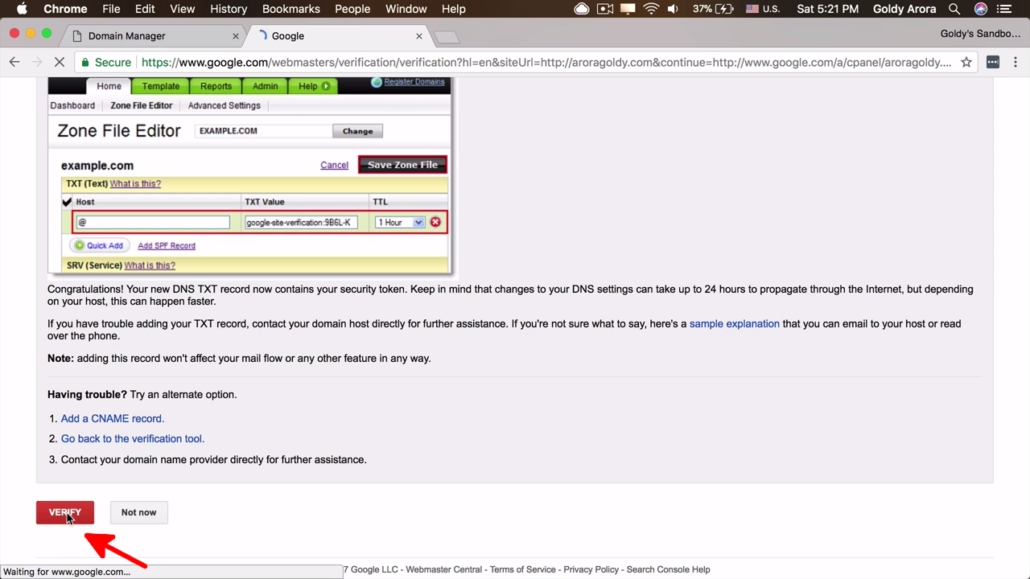
12. Click on "Verify"
- Now that we've created our DNS Record from Godaddy, we can ask Google to verify.
- So go ahead and click on "Verify" to let Google verify ownership.
14. Then click "Continue"
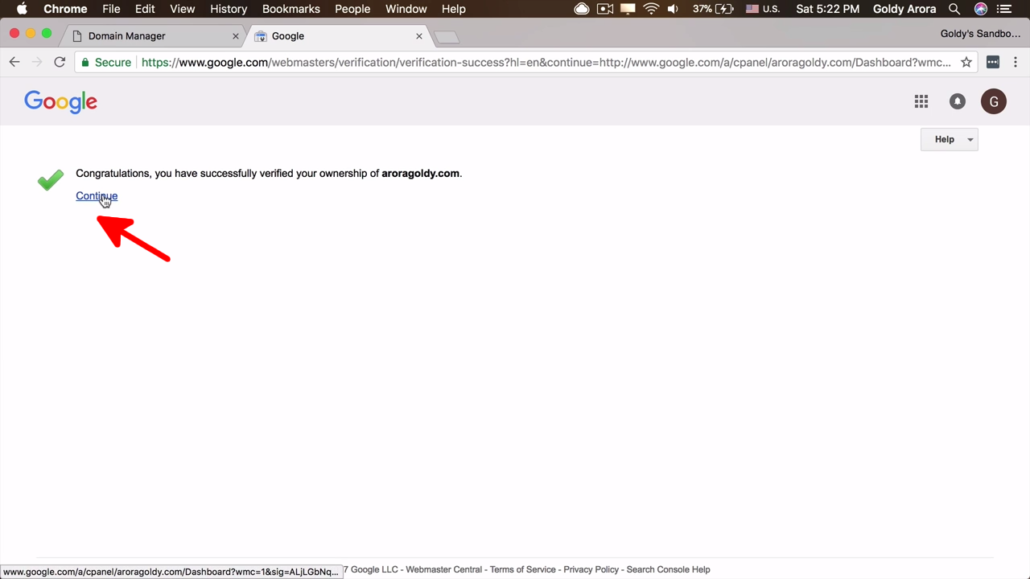
- If everything up is correct and you correctly created your DNS Record on Godaddy, everything should be fine now.
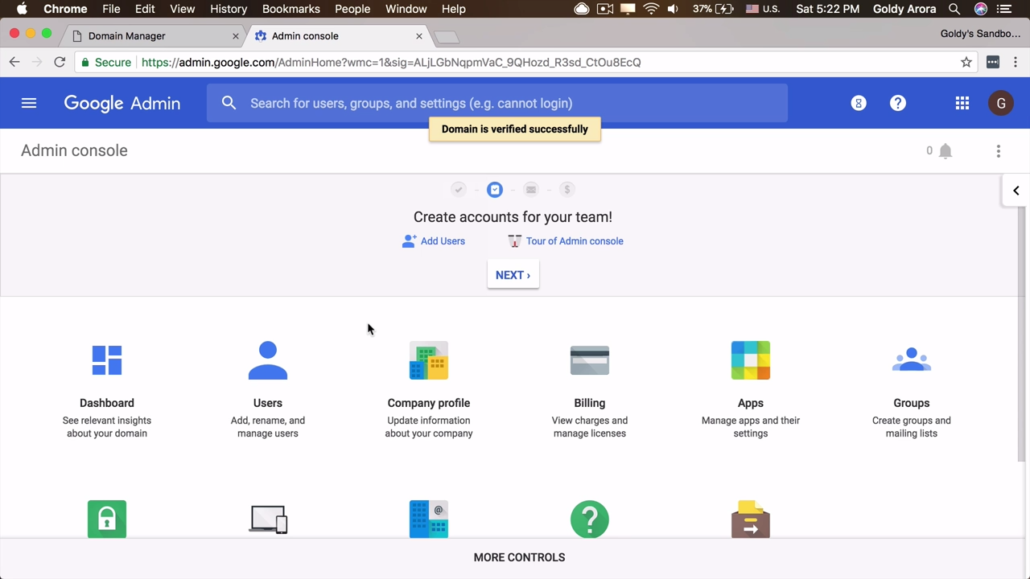
- Now all you have to do is click on "Continue" and you'll be redirected back to your Google Workspace dashboard.
Domain verified successfully
- So now that you have your domain successfully verified
- In the next step-by-step guide we'll go ahead and setup email services so you can start receiving emails on your Google Workspace mailboxes
- If you have any questions, feel free to leave them in the comment and I'll be glad to help. See you in the next guide.
Related Posts
....


