

Google Workspace SPF Records Setup - Setup Google Workspace SPF record in Godaddy
- In previous videos we have covered a number of topics already including creating MX Records.
- Let's now create SPF (Sender Policy Framework) and increase our chances to land in recipients inboxes.
SPF Record Overview
- When you send an email to your recipient, your recipient would want to check if these emails are actually coming from you and someone else pretending to be you.
- So you do this by telling the world which servers you're authorizing to send emails on behalf of your domain.
- Now when an email appears to be sent from you but does not match the server you authorized, the recipient has a reason to mark such an email as spam.

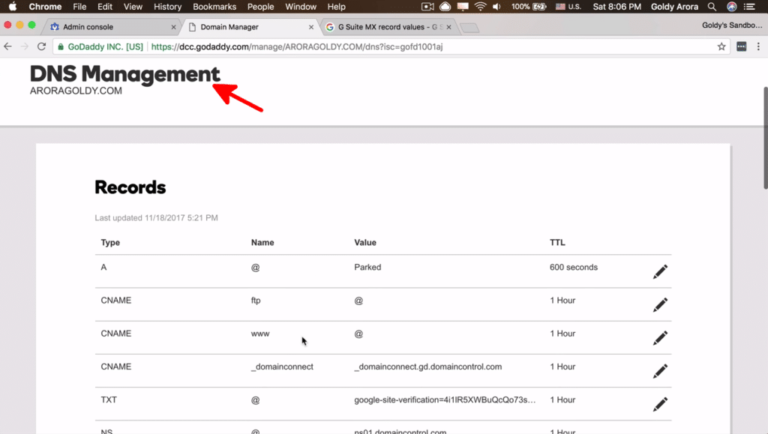
1. Log into GoDaddy DNS Management
- In our first step, you will have to login into your GoDaddy account.
- Next, click on "My Products" from drop down icon next to your username on Godaddy.
- Then select your domain and click on DNS to land on a page where you can create the records.
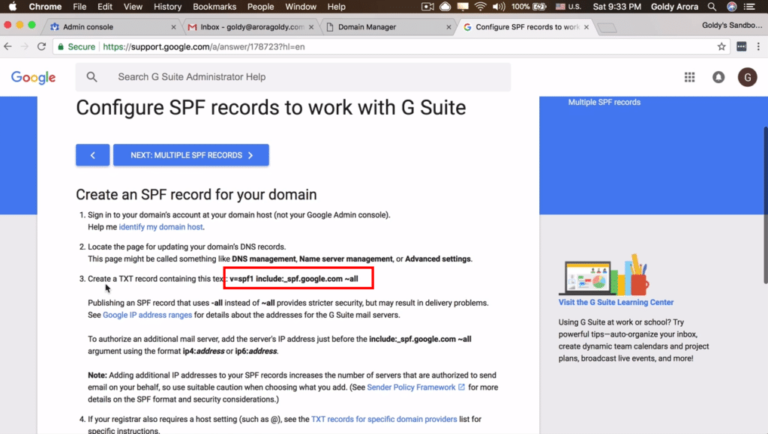
2. Search for "Google Workspace SPF Records".
- In the next step, you will find Google Workspace SPF Record value.
- To do this, go to Google search and search for "g suite spf record".
- Click on the first link from Google and you will land on the page like one in the screenshot.
- Now all you need is to copy SPF Record value from this page as we'll be using it in the next steps.
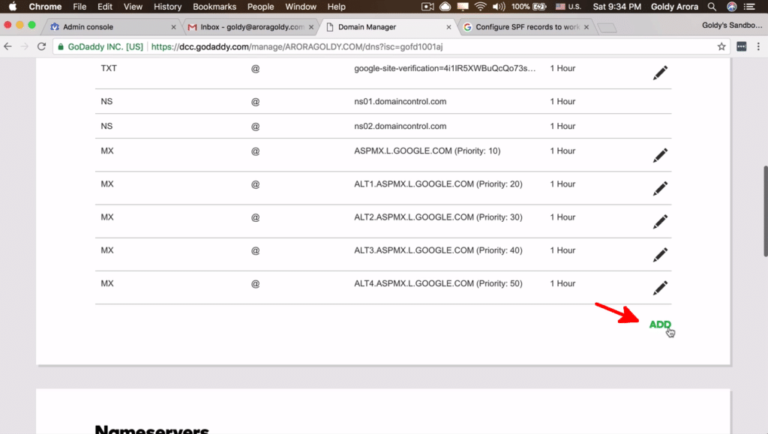
3. Click "ADD" to Add New Record
- So now you'll go back to GoDaddy DNS Management page.
- Click on "ADD" to add a new record with value you just copied in previous step.
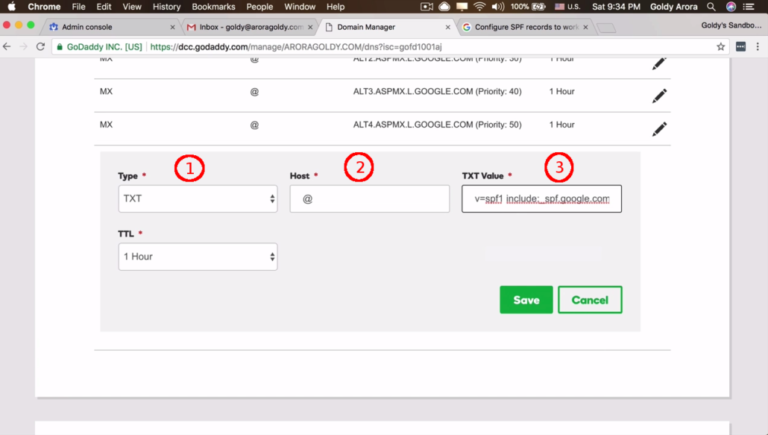
4. Add SPF Record
- From previous step, you now have a form to fill with some values.
- But before you add another SPF record, make sure you don't have an SPF record added already.
- In the first field, choose "TXT" as your type, then type "@" for host in the second field.
- Now in the third field, paste the value you copied in step 2 of this guide and then click on "Save".
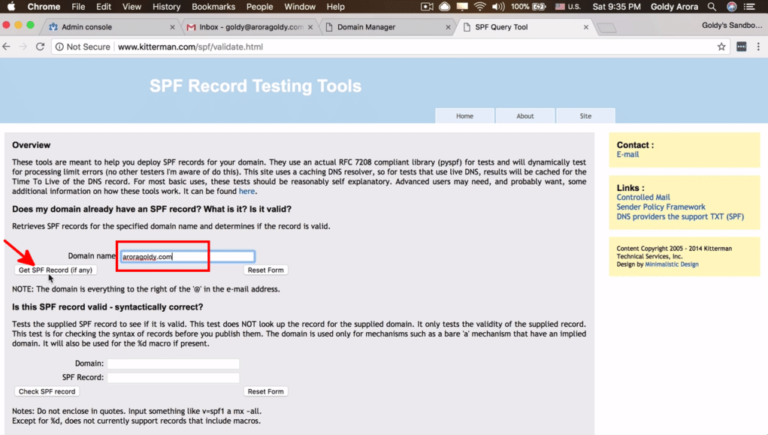
Test your SPF Record
- It is a good idea to go ahead and check to see if your SPF Record was added correctly.
- So to do that, just go to Google search and search for "kitterman spf" which is handy tool for testing SPF records.
- Once you're on this page, type in your domain name and click on "Get SPF Record).
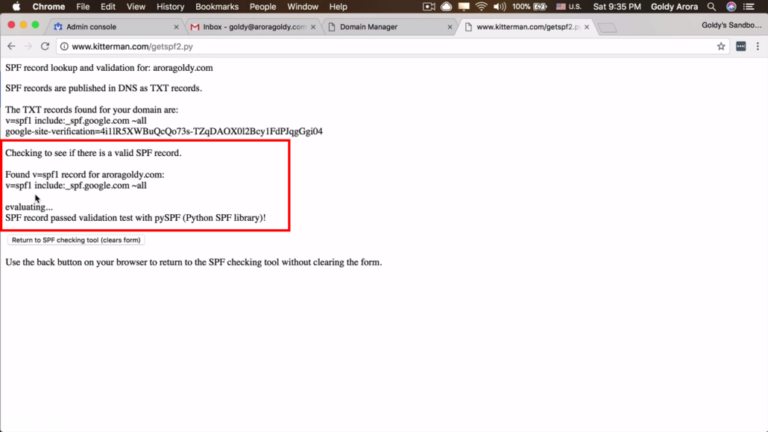
SPF Record Test Results
- As always, in every test there're results. So from the previous test above we should be able to read the results.
- And as you can see, an SPF record was found in my domain and it also passed the validation test which means it was correctly added.
- Now in our next guide we'll go ahead configure DKIM to help prove that an email is actually coming from your domain.
- Stay tuned, and if you have questions I'd love to help you when you leave them in the comment section. Thank you!
Related Posts
....


