Google Workspace DKIM Setup
- In the previous tutorial we set up SPF Record to differentiate genuine emails from spam emails.
- In this part of Google Workspace Setup guide, I will show you how to set up another security measure called DKIM (Domain Keys Identified Mail).
- Watch a video guide or continue reading to learn how you can correctly setup Google Workspace DKIM with your domain.
DKIM Overview
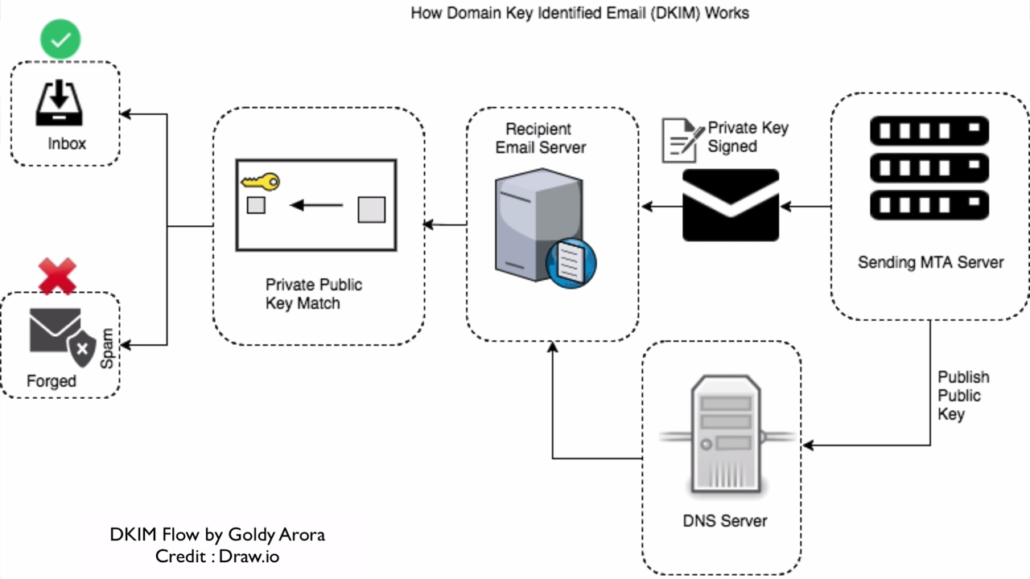
- Using a simple analogy of a bank, let me try to help you understand how DKIM basically works.
- When you send someone with a check, a bank verifies your signature with what they have stored in their database.
- If the signature doesn't match, it's considered forgery. More or less, DKIM works in a similar fashion.
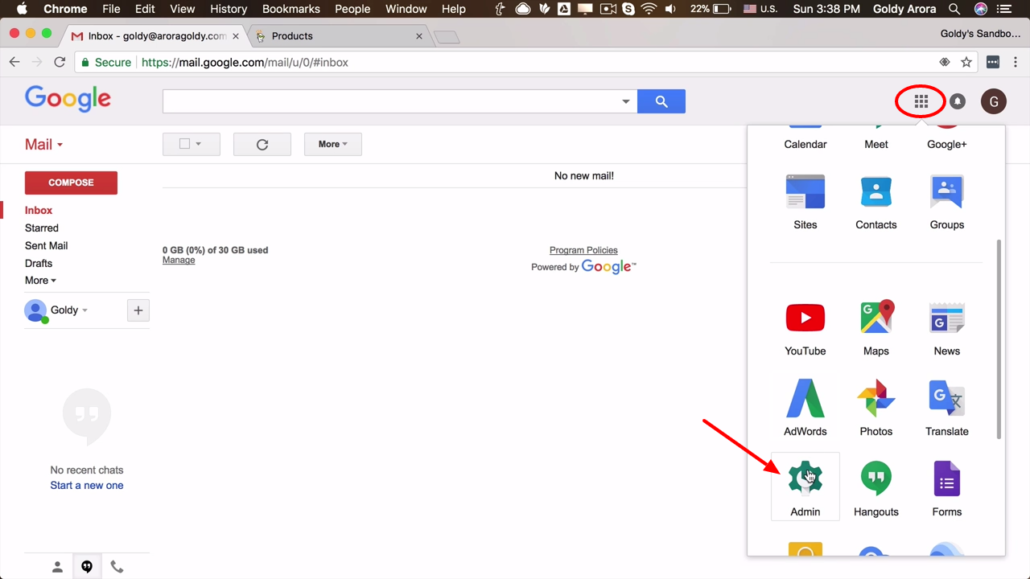
1. Login to Google Workspace console.
- To begin DKIM setup, first login to your Google Workspace admin console.
- To do that, from you Gmail inbox, click on the dotted square icon on the right, then click on 'Admin'.
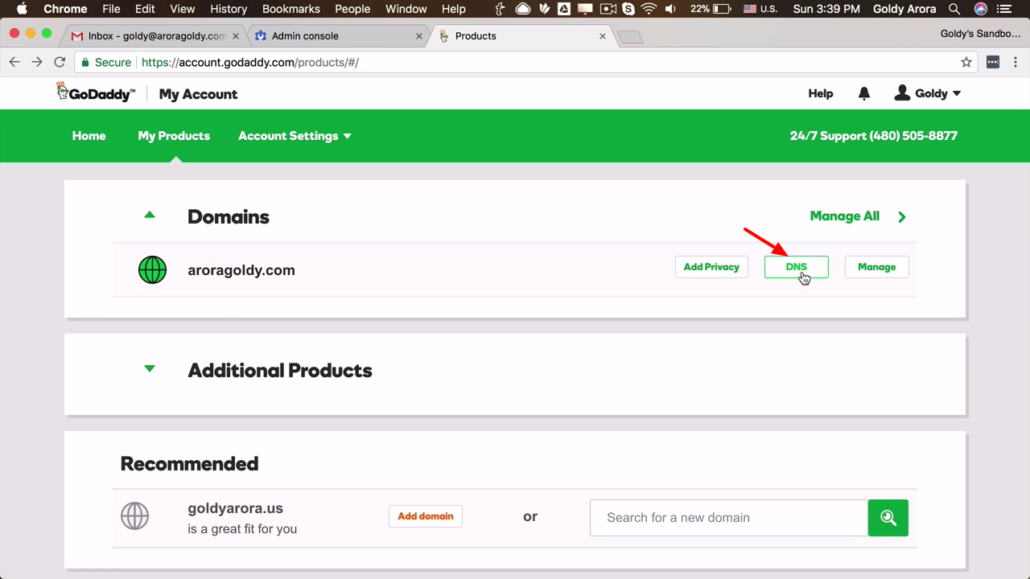
1. Login to Godaddy
- In this guide, I show you how to setup DKIM using Godaddy but this is a similar procedure with a different domain provider.
- On Godaddy, login then go to "My Products" page then under domain click on "DNS"
3. Search 'DKIM' from Google Workspace Console
- Next, go back to your Google Workspace admin console and search for 'DKIM'.
- From the search results, click on 'Authenticate email'.
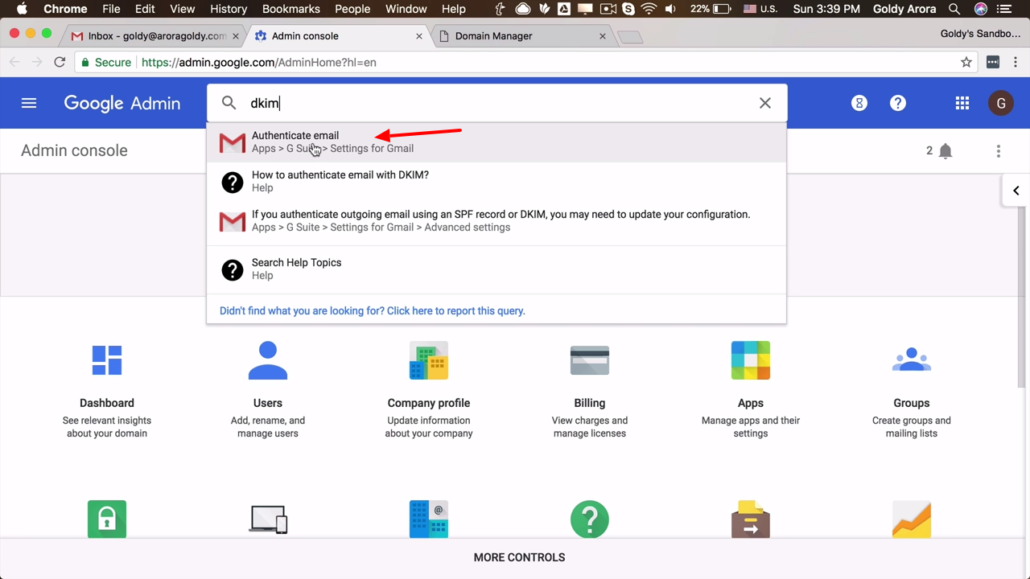
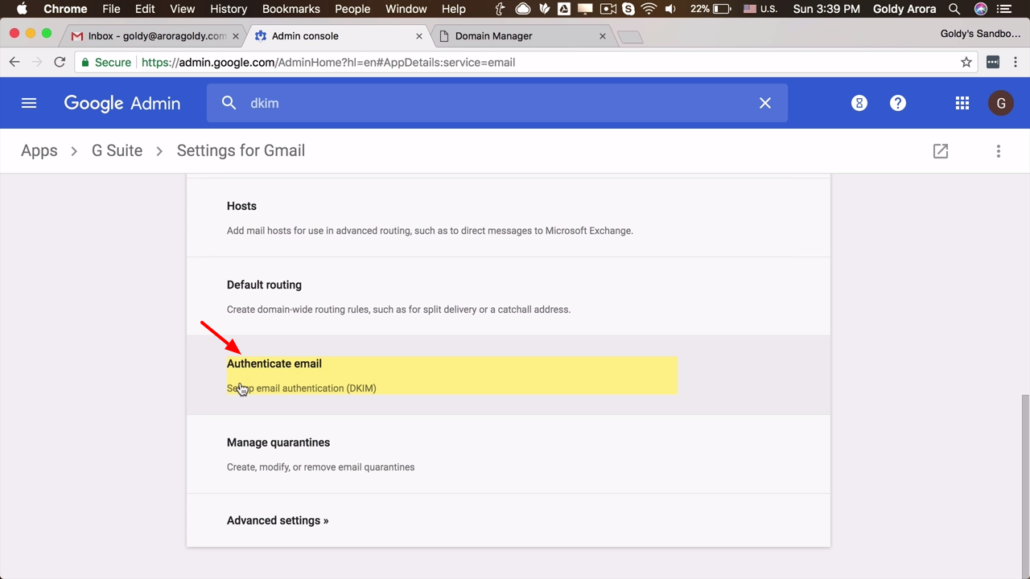
4 Click on 'Authenticate email'
- From step 3 above, you'll land on a similar page in the screenshot.
- Click on "Authenticate email" link from list
5. Generate new record (Part 1)
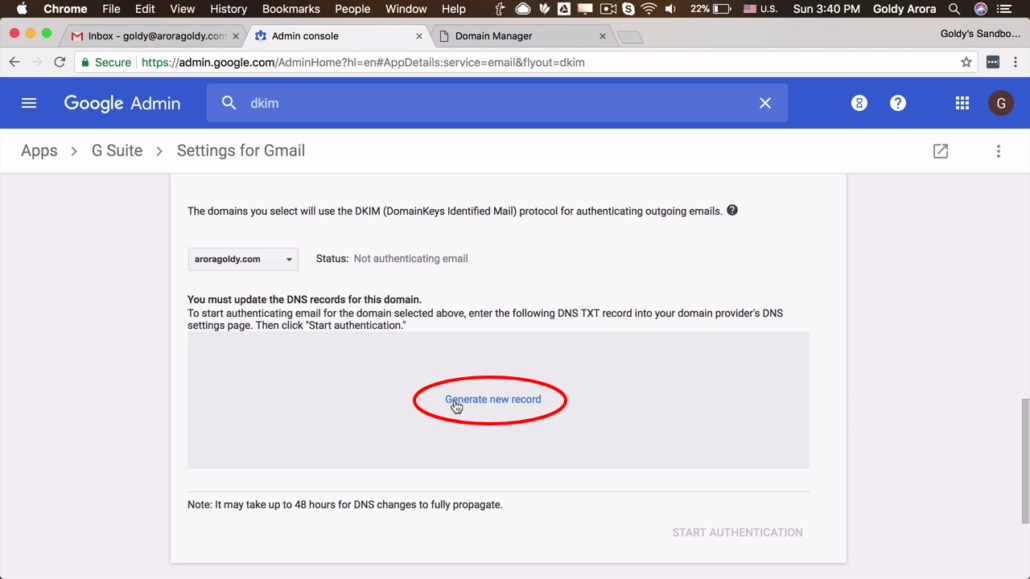
- To generate a new record, firstly choose a domain you want to generate a new record for. That's if you have more than one.
- Next, click on "Generate new record" link then continue.
6. Generate new record (Part 2)
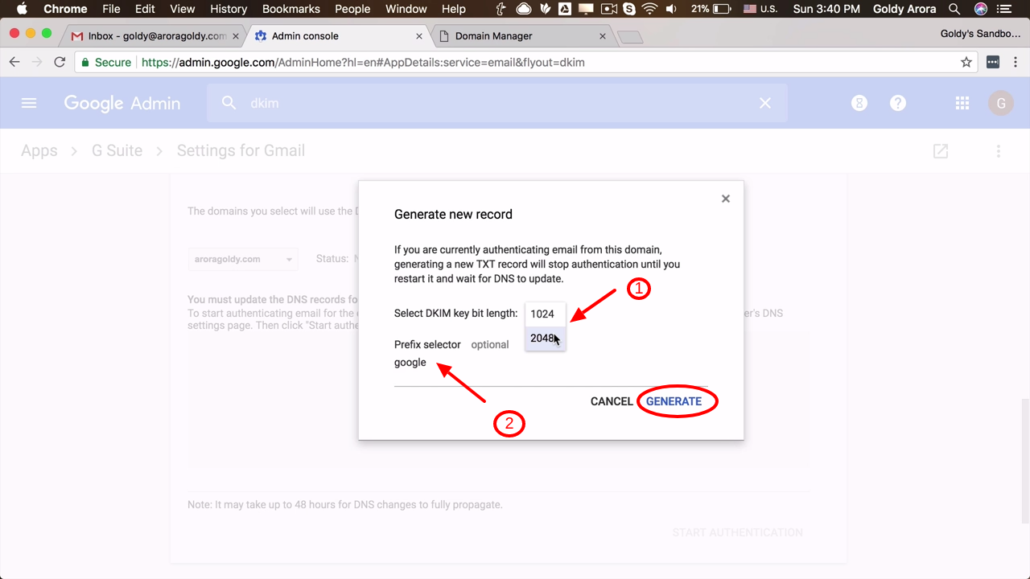
- From above step, you will see similar form like one in the screenshot.
- In the first part, you select DKIM length. I recommend you choose 2048 value because the longer the key the more secure it. Unless advised by your registrar.
- In part two, you can type a text for your reference. You may leave it as it is. Then click on "Generate" link.
7. Copy generated record
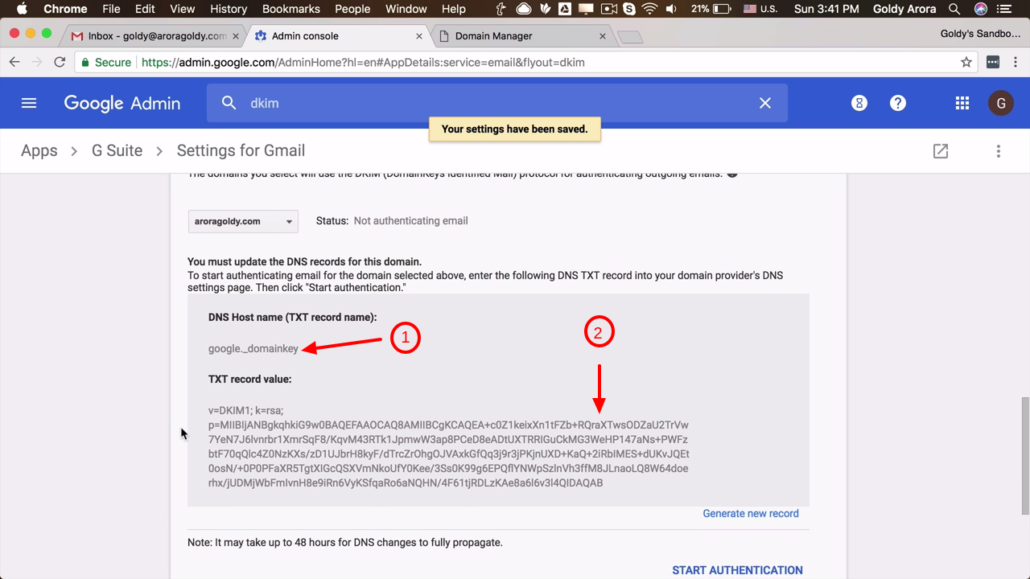
- This screen shows that you've successfully generated a new record value which you'll use in our coming steps.
- You'll copy and use these values in our next steps.
8. Create TXT record in Godaddy
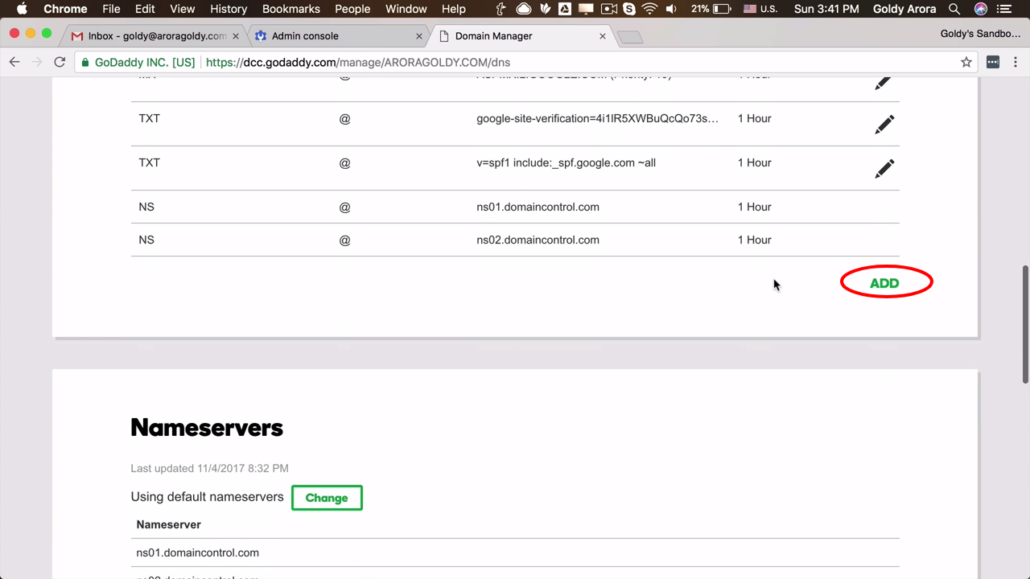
- Now go back to your registrar, Godaddy in this case and create a new TXT record.
- To create a new TXT Record in Godaddy, click on the "ADD" button from DNS page.
9. Paste in Record values
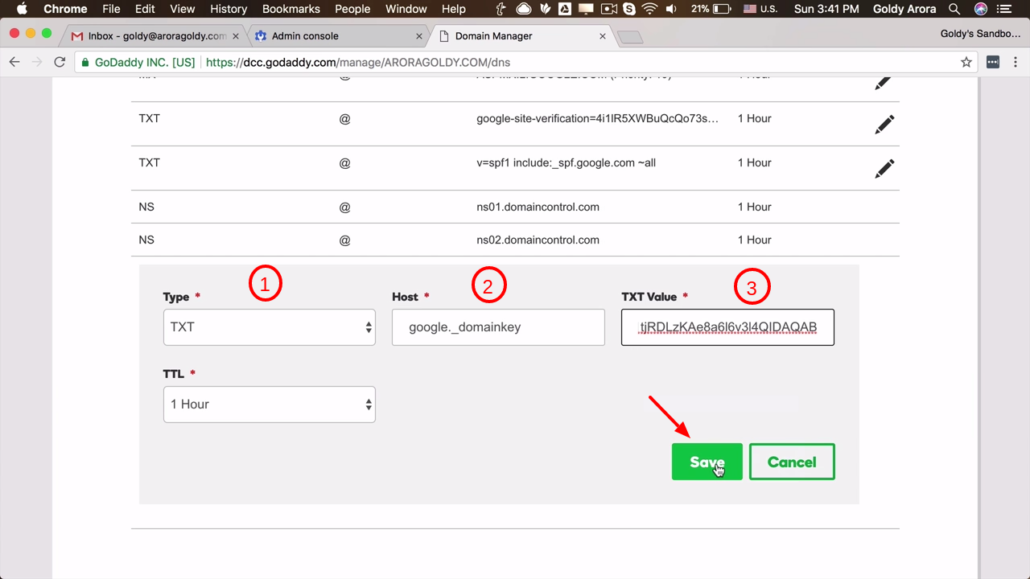
- From previous step you see a similar form. First choose "TXT" in field (1) as record type.
- In field (2) copy and paste host value from our step 7 above.
- Field (3) of the form is where you paste TXT value you generated in step 7 of this tutorial. Then click "Save".
10. Click "Start Authentication"
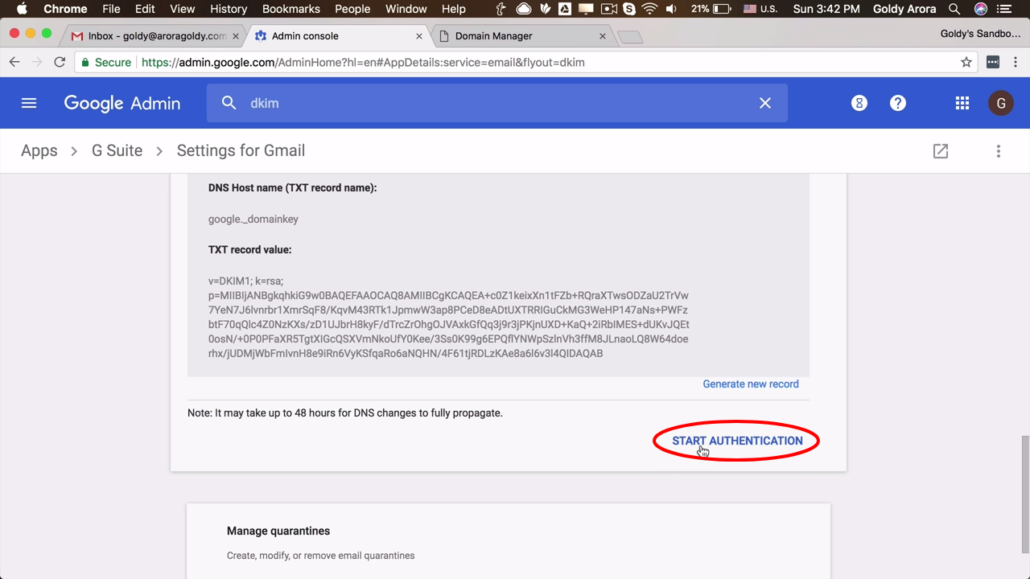
- Lastly, you will let Google Workspace authenticate the record you just added. You do that by clicking on "Start authentication".
- However, you may have to wait for some time and try again if the first attempt fails. In my experience it takes less than 30 minutes.
Successful Authentication
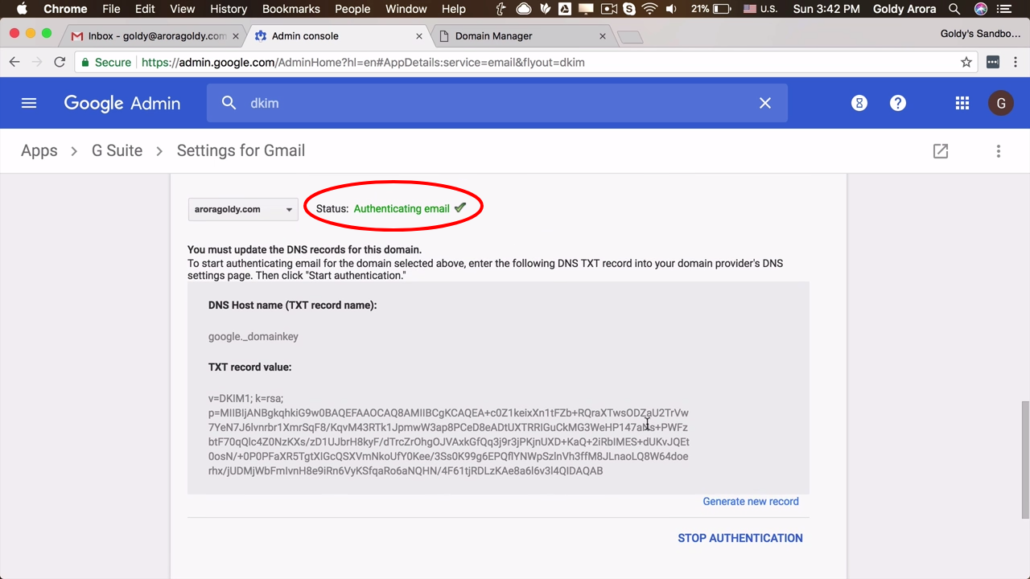
- On a successful authentication, Google Workspace will give you a green notification like one in the screenshot.
- This means that your DKIM record has successfully been set up and your emails will now be super secure.
- That is it, for comments and questions, leave them in comment section below and I'll be happy to help.
Related Posts
....


