

Google Workspace Domain Registration - Godaddy
- Hello and welcome to our second video of Google Workspace Setup video guide.
- In our previous video we learnt how we can purchase a domain from Godaddy. In case you missed that part, you can watch it here.
- So in today's guide I will show you how you register your domain with Google Workspace.
1. Search for Google Workspace
- So head over to Google or any search engine of your choice and search for "g suite".
- A number of links show up including ads but click on the first link from the search results.
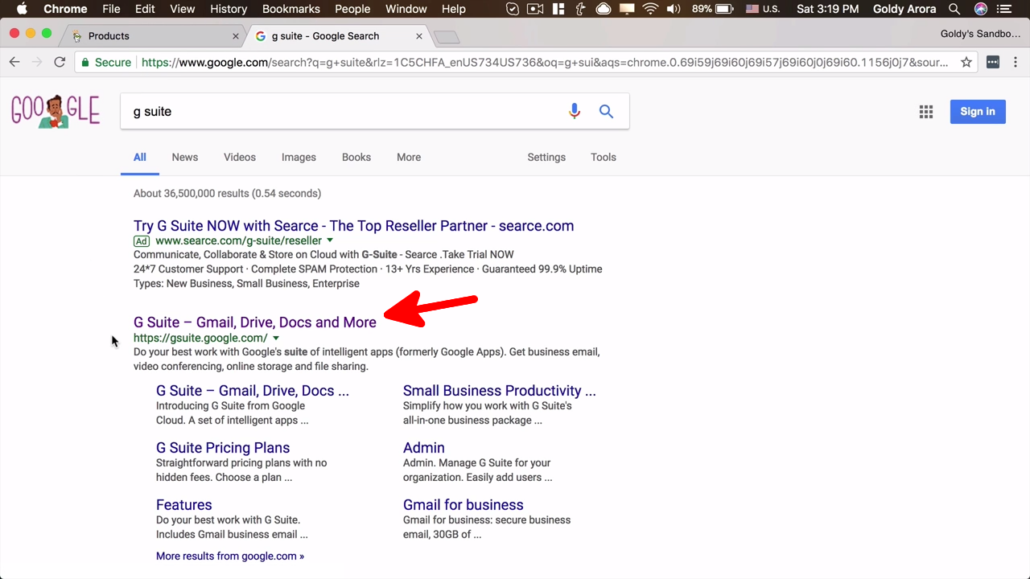
2. Click on "Get Started"
- From the previous step you should land on a page similar to the screenshot provided.
- Click on "Get Started" button to start on the process of creating your Google Workspace account.

3. 14 day trial from Google
- Currently, Google is offering a 14 day trial with no payment.
- So go a head click on "Next" to continue.

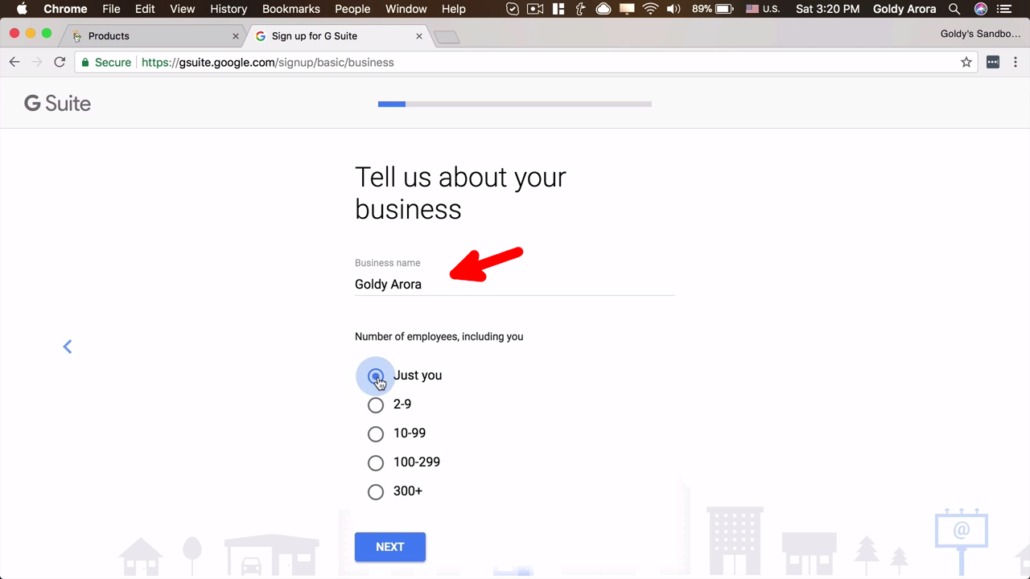
4. Add Business information
- Now Google will ask for your business information such as name and number of employees.
- So type you business name and choose the number of employees in your business.
- In my case, because I'm an individual I will just type my name and choose "Just you" under number of employees.
- Then click on "Next".
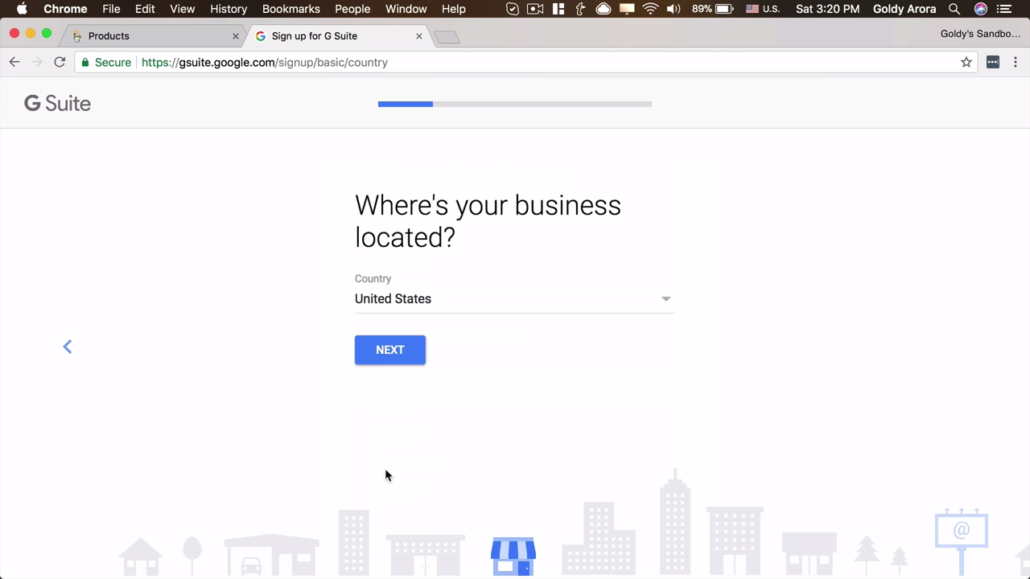
5. Business Location
- So in this step you'll be required to choose your or your business location.
- Now this information is important because Google has geographical based pricing. For instance, prices those in India pay may be less compared to what those in United states pay.
- Changing this information is not as such simple because you'll have contact Google and answer some questions before this is actually changed.
- So make sure you choose your or your business' country correctly. And then click on "Next".
6. Add your current email
- So now you'll be asked to provide your current.
- This an email where information such as terms and conditions are sent to.
- So go ahead and type you current email address and click on "Next".

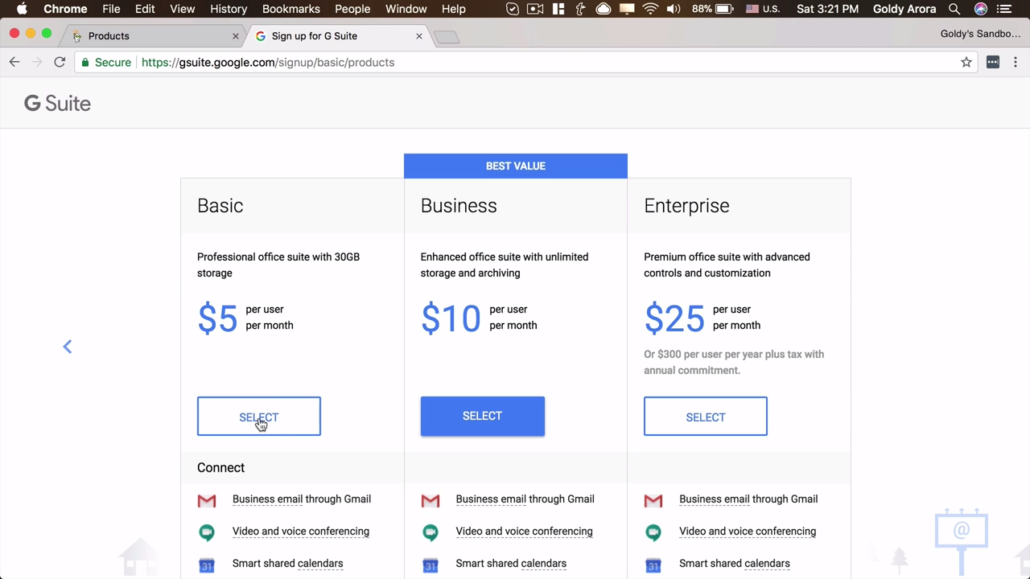
7. Choose Google Workspace edition
- Google will now ask you to choose from the editions they have.
- Some of the features that distinguish these editions are listed below, so you can scroll down to look at them.
- In my case, a basic edition is just enough. So, go ahead and click on the edition that works for you or your business.
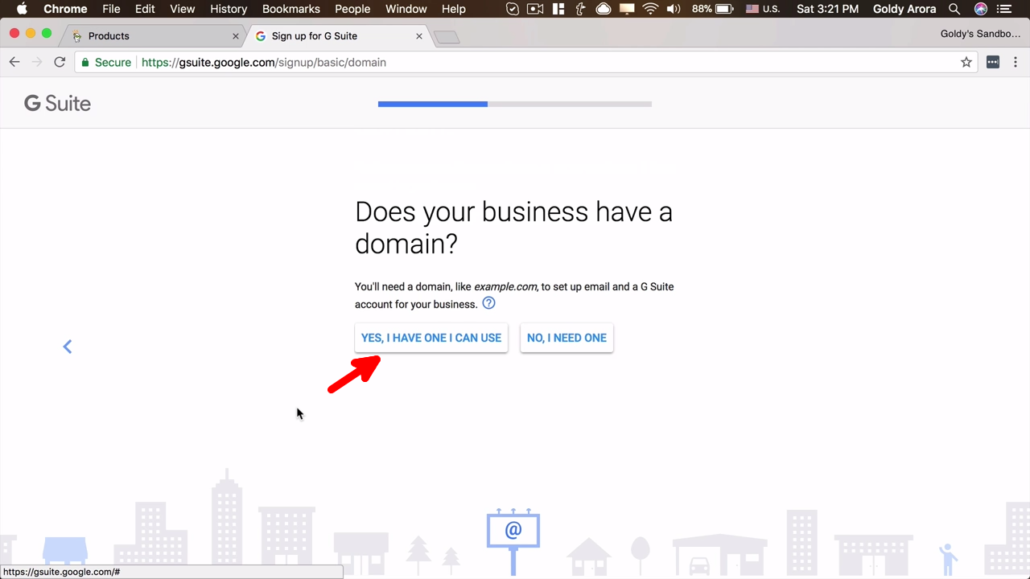
8. Choose whether you have a domain.
- In this step, you'll be asked whether or not you already have a domain.
- Because in our previous guide, we already purchased a domain from Godaddy so I will click on "Yes, I have one I can use" option.
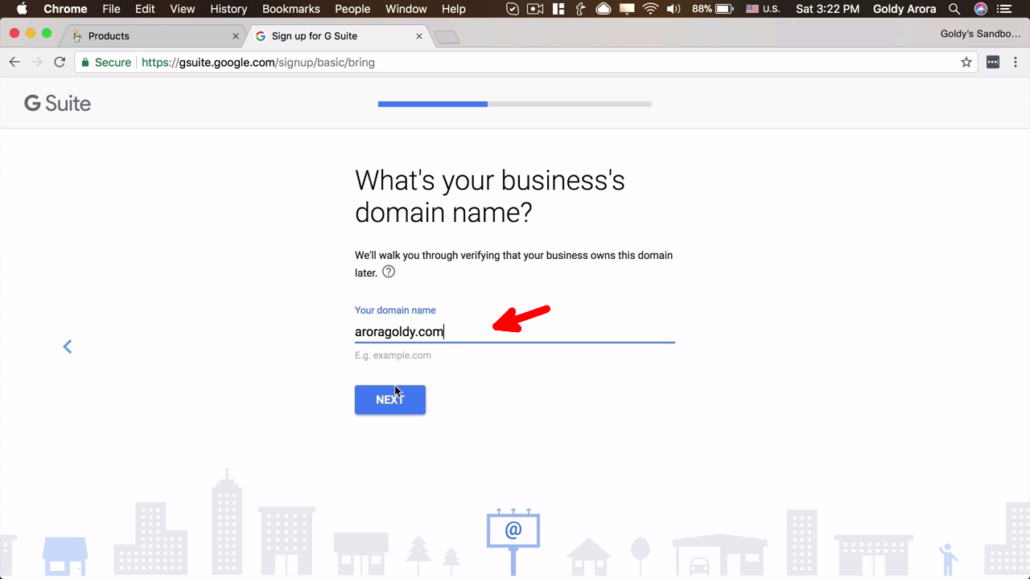
9. Provide business's domain
- So in this step go ahead and type your domain name.
- You can also just go copy and paste the domain from Godaddy to avoid spelling mistakes.
- Then click on "Next" to get to the next step.
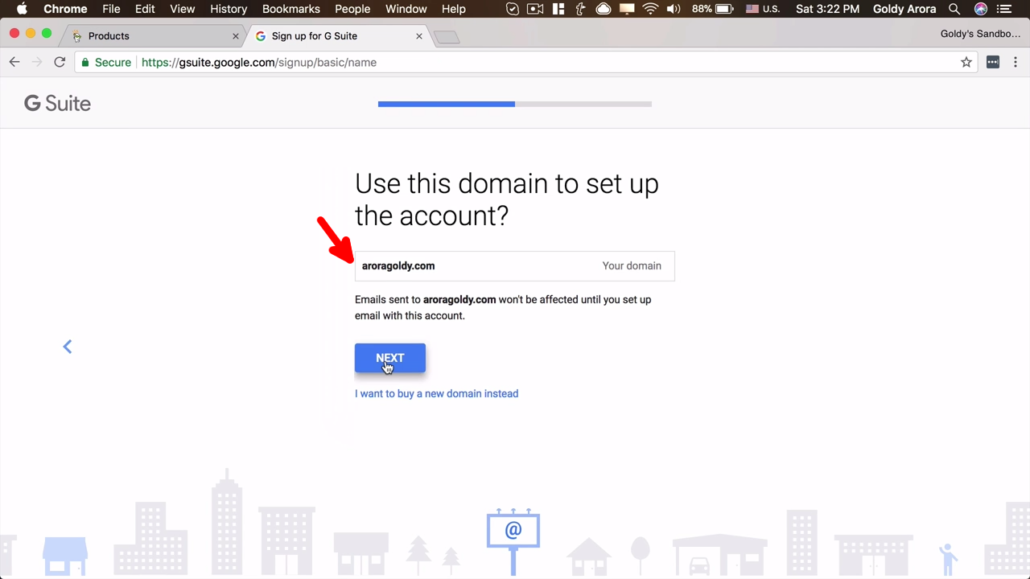
10. Domain Emails unaffected
- Google will now give you some assurance that emails sent to this domain will not be affected until you setup email with this account.
- So click on "Next" to proceed.
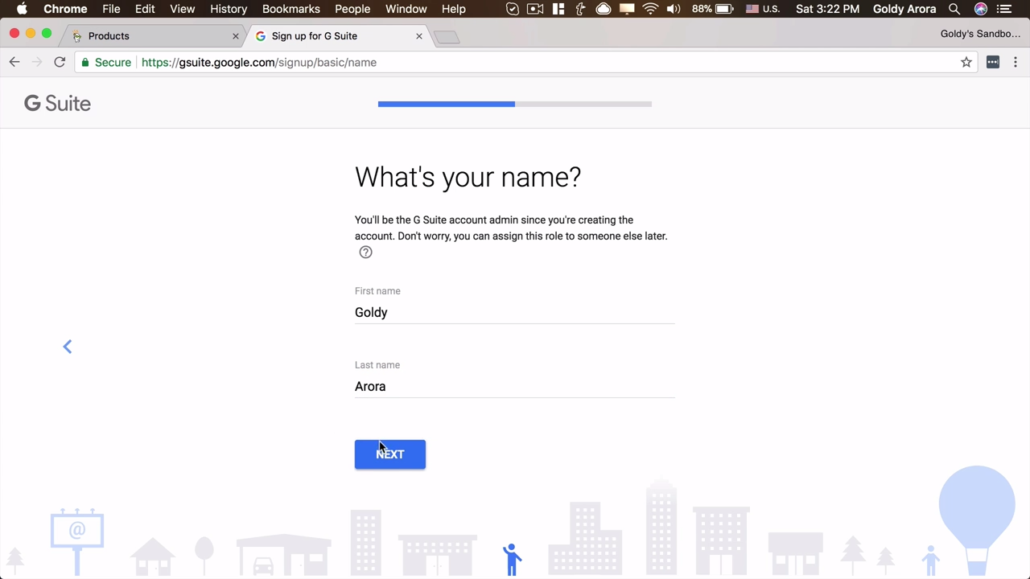
11. Account Name
- In this step, Google will ask you to create your first Google Workspace account.
- This account will also be the super administrator which means this account will be able to even delete the account.
- So provide your name and click on "Next"
12. Create Username and Password for your account
- Now you'll be able to create a username and password for your first Google Workspace account.
- Type a username and password then click on "Next".
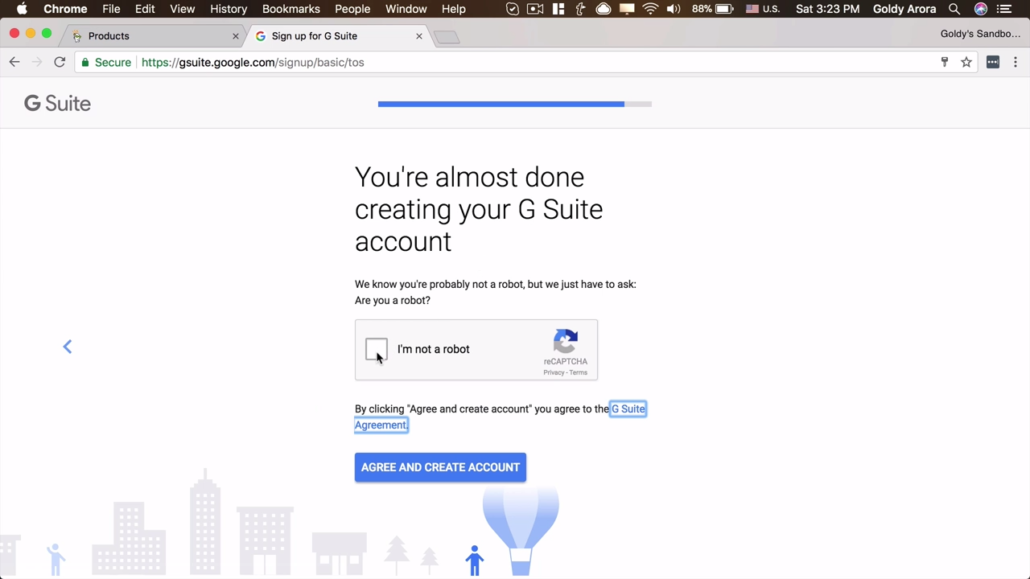
13. Complete Captcha
- Now you'll be asked to complete a captcha challenge to prove that you're not a robot.
- So click on "I'm not a robot" then you'll be given a challenge to complete.
- When you pass the challenge, you can then click on "Agree and Create Account".
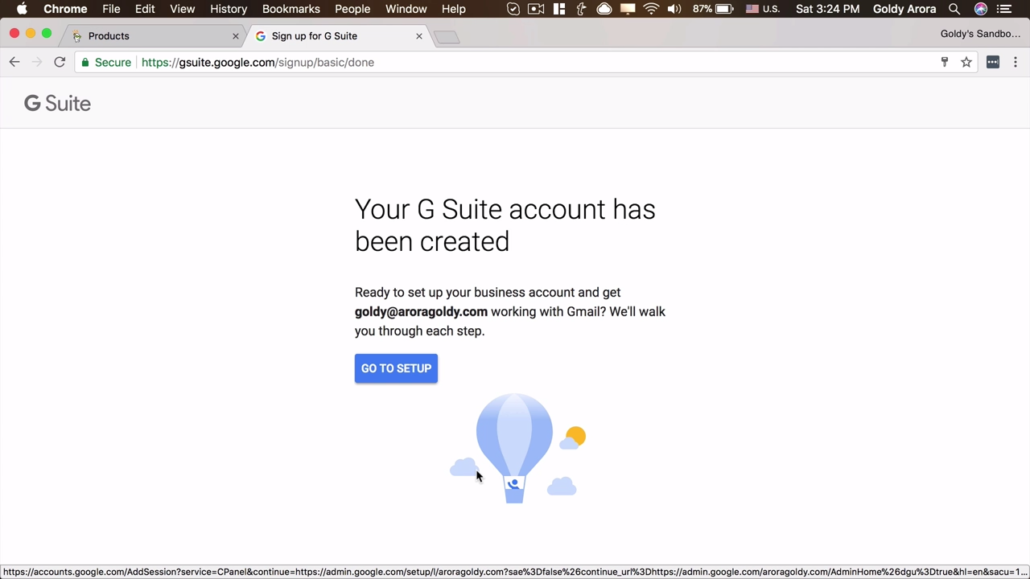
Google Workspace Account created
- Now if passed the previous steps, you should now have your Google Workspace account created and ready for setup.
- In our next guide, we will be setting up the account including verifying domain name.
- If you have any questions please leave them in the comment section and I will be glad to help. Thank you!
Note-: Google also offers 20% discount to new customers, you can learn more about it at Google Workspace Promo Code
Related Posts
....


