Google Workspace Email Alias - Create additional emails for free
Google Workspace (Google Apps) Email Alias
- If you need additional email addresses in Google Apps, instead of buying new licenses, give it a thought.
- You can save money by creating Email Alias (nick name) OR Google Groups.
- It is also possible to send emails from these alias email ids, though this video is focused on creating, receiving and sending from Email Alias in Google Workspace, here is a tutorial to do this with Google Groups
Email Alias Vs Google Group
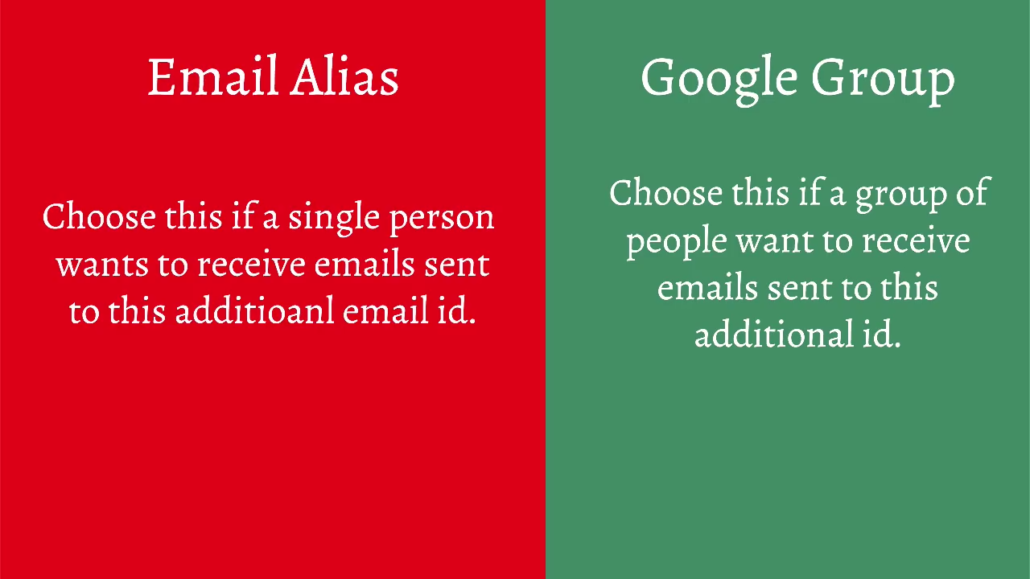
- There are two ways to save money instead of paying to Google and buying additional license. First way is to create nicknames which is also called "Email Alias" in Google apps, second option is to create Google Groups.
- If you have a group of people behind your multiple email addresses then it's better to go with Google Groups but if you are a single person who would be receiving emails from these multiple email addresses, then it's recommended to go with nicknames.
- In this tutorial we will focus on creating nickname in Google apps.
1. Log into Google Apps Admin Console
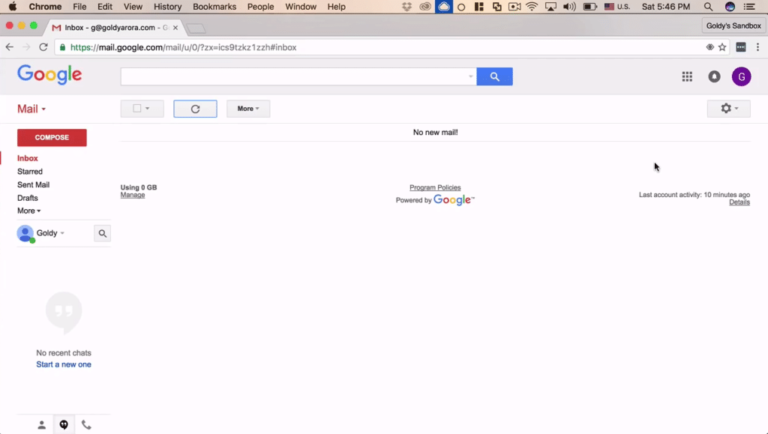
- First step is to log into your Google Apps admin console and I'm assuming that you already have admin access.
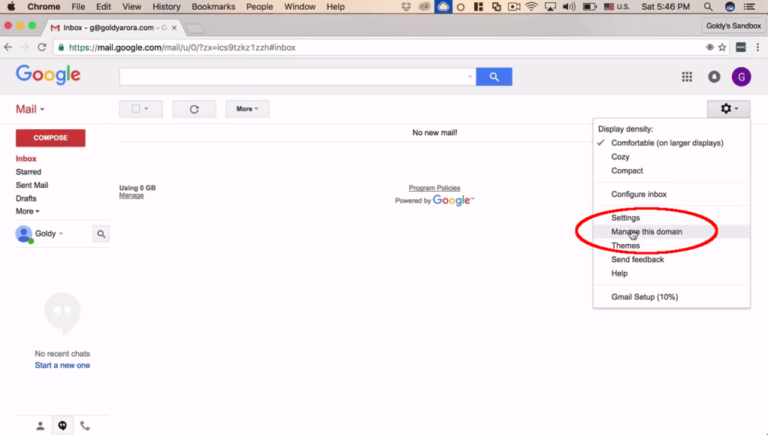
2. Click on "Manage this domain".
- So once you are in Gmail just click on the settings icon and then click on “Manage this domain” to log into your Google Apps admin console.
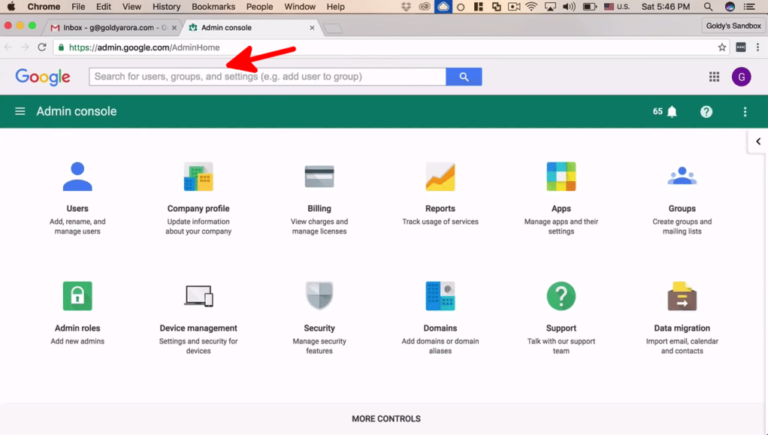
5. Search for user you want to create nickname for.
- Once you’re in "Manage this domain", you can search for the user for whom you want to create a nickname.
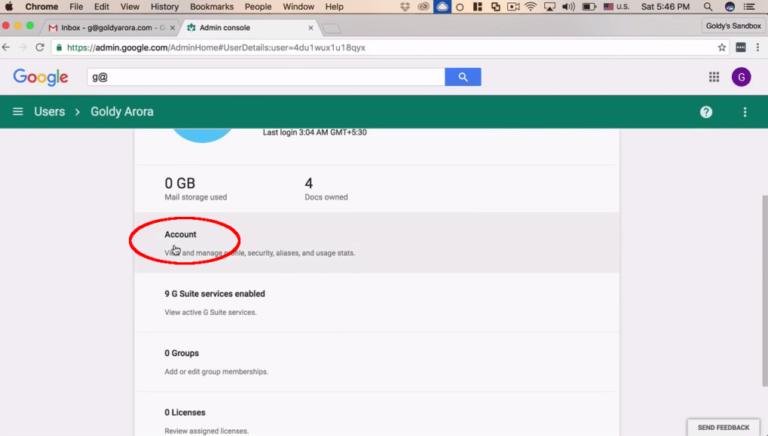
4. Scroll down and click on "Account"
- So I will be creating for this user (Goldy Arora). Once you land on a user's detail page just scroll down and click on “account” because that's where we manage the email aliases.
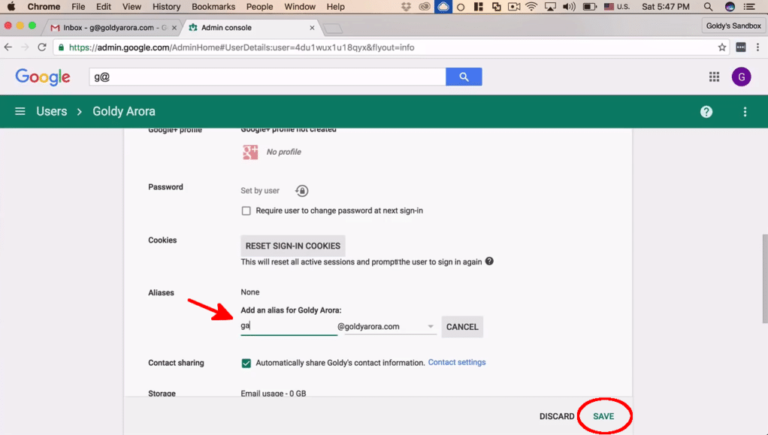
5. Click on "Add Aliases"
- Scroll down and you will find “Aliases” click on “Add alias”, give it a name. You can also click on drop down and select the domain if you want to associate it with any other domain. Then click on “Save”.
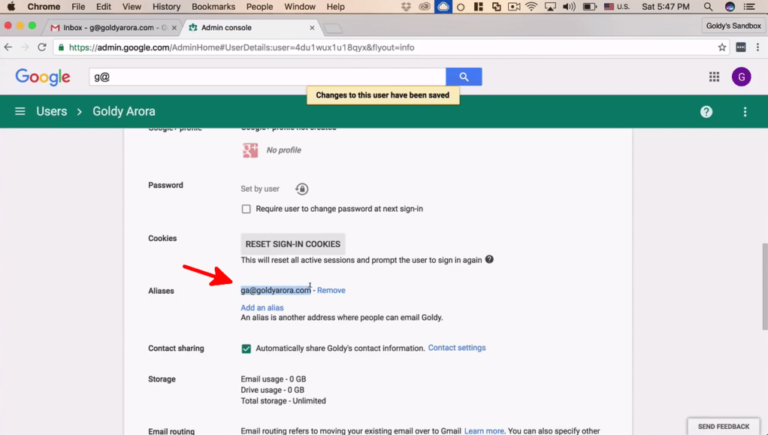
Additional Email address created.
- So what I have now is an additional email address without paying extra to Google on which I can receive emails. This is not a dedicated mailbox, every email which is sent to this nickname will be landing to my primary mailbox (g@goldyarora.com).
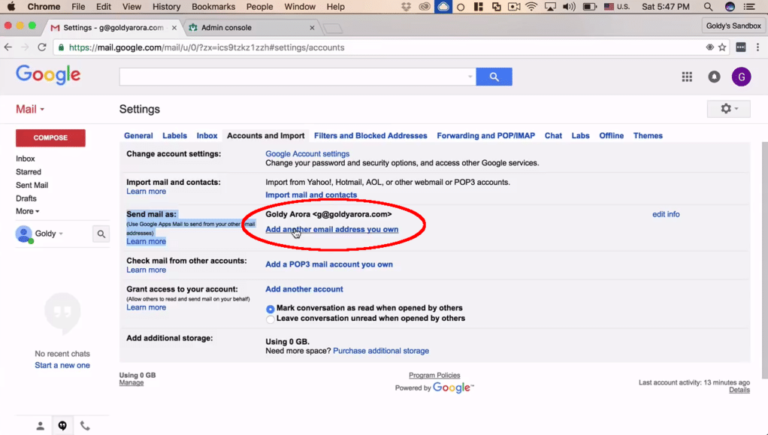
6. Click on "Accounts and imports".
- So now there might be situations where you want to send emails from this email address and this is very much possible and let's see how we can configure it.
- I’m going to copy “ga@goldyarora.com” and go back to my Gmail box click on “Settings”, under settings I will click on “Accounts and import”.
- You will see a future called “Send mail as” where Gmail allows you to send emails from multiple email addresses until the time you can provide ownership verification for the email.

7. Click on "Add another email I own".
- I'm going to click on “Add another email which I own”.
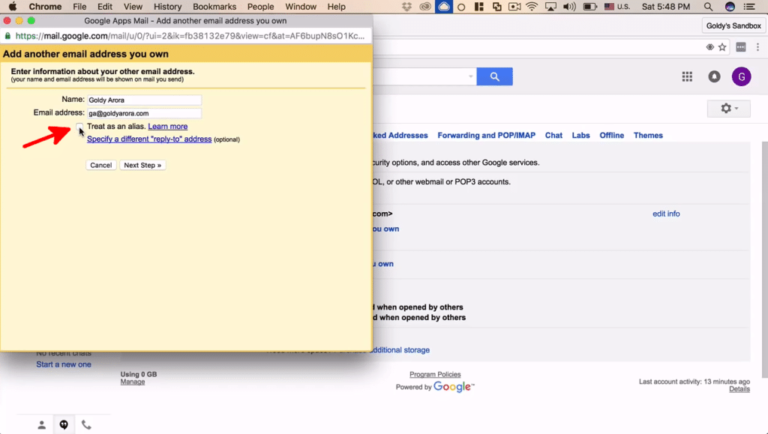
8. Paste email address and uncheck "Treat as an alias"
- Paste the nickname you just created (in my case "ga@goldyarora.com").
I would suggest you uncheck “Treat as an alias” I’m not going to go much into details but you can click here to learn more as to why I recommend not to keep it not checked.
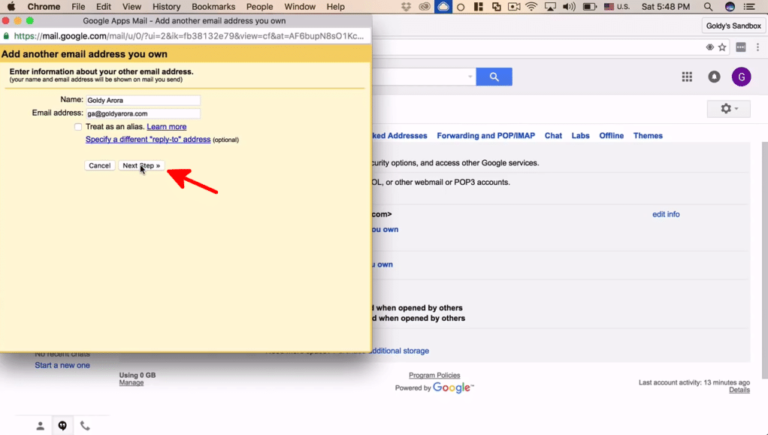
9. Click on "Next Step".
- Click on “Next Step”. If you are configuring on any other domain like Gmail or Outlook, it will ask you to verify by sending a code to that email address which you can just copy and paste it here and you should be good to go.
10. Keep "Reply from same email address" checked.
- Under "When replying to a message" you see two options. If somebody sends you an email on this nickname how would you want Gmail to behave. Should it send a reply from the same nickname email address or the replies should be sent from your primary mailbox?
- Keep "Reply from the same address" checked to let Google send replies using the nickname you've created.
Related Posts
....
....

