Gmail Undo Send - Recall even after 30 seconds
Gmail Undo Send
- It is not unusual to click on send button in Gmail, then realize you want to recall the message.
- Gmail offers a feature called “Gmail Undo Send” which allows you to undo your send email action within 30 seconds.
- With the recently updated Gmail App, now you can use Undo Send on your mobile device too.
- I show you how to setup undo send to recall message within 30 seconds AND a way around to undo send gmail after 30 seconds (works with Google Workspace subscription too)
1. Go to Gmail Setting
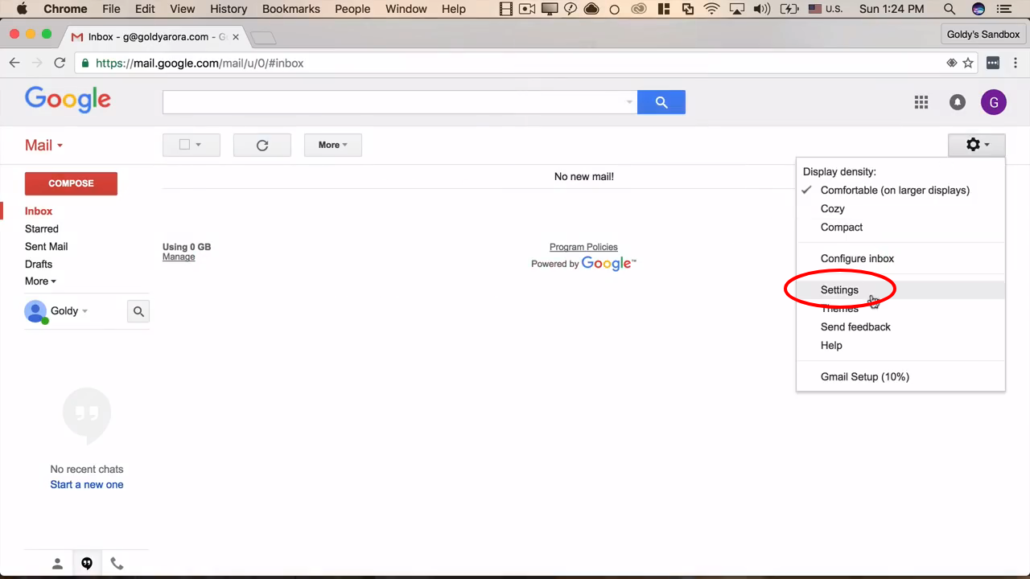
- Once you're logged in, click on the settings icon on the top-right corner of the page.
- Then click on 'Settings' option from the drop-down list of items.
2. Enable 'Undo Send'
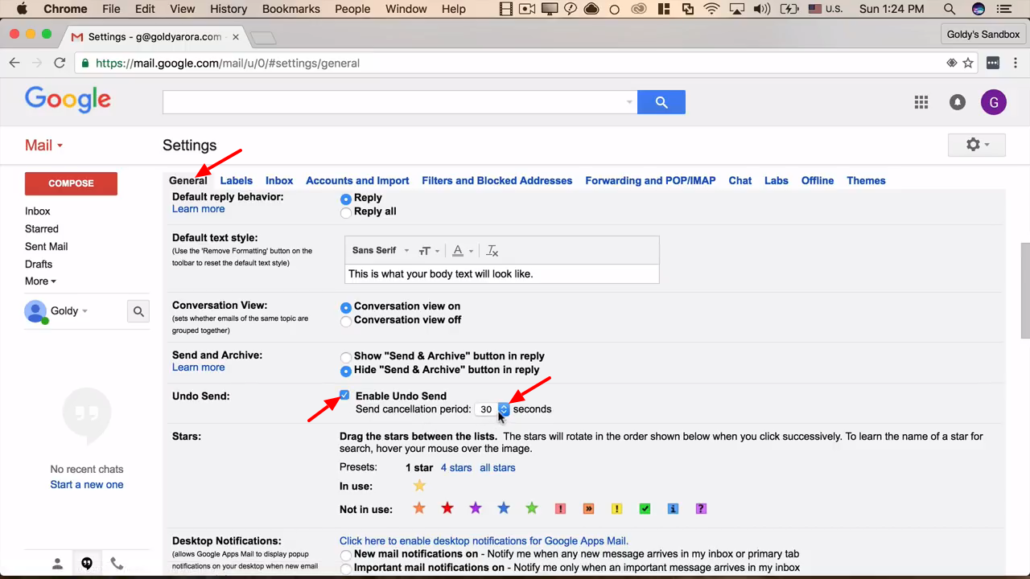
- Enable undo send by checking the box if it's not. then choose cancellation period from 5, 10, 20 or 30 seconds.
- Side note: The way 'Undo send' works is not by sending the message to your recipient then withdrawing it. No, it basically delays the sending of the message.
- After choosing cancellation period, scroll down and click save.
3. Undoing Send
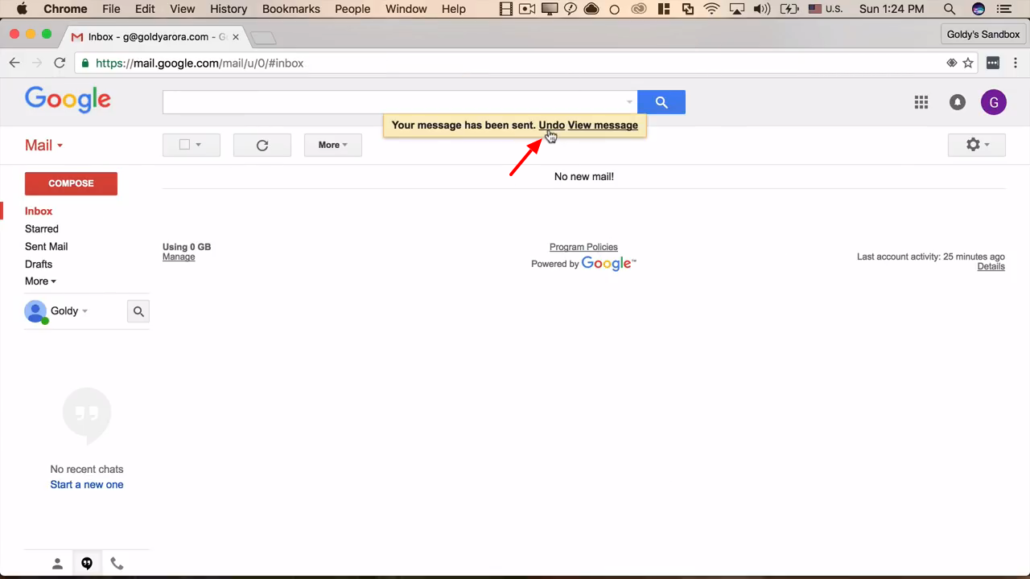
- Now when you compose and send a new message, you are able to undo the send action before the seconds chosen in previous step expire.
- So now when you get a second thought about that email you were about to send, you can quickly stop it from going even after clicking send button.
4. How about more than 30 seconds?
- Sometimes you're sending something confidential and maybe would want your recipient to access it for hours or days after which they shouldn't.
- There is no way to do this directly in Gmail however, we can still achieve this with Google Docs.

5. Type message in Google Docs
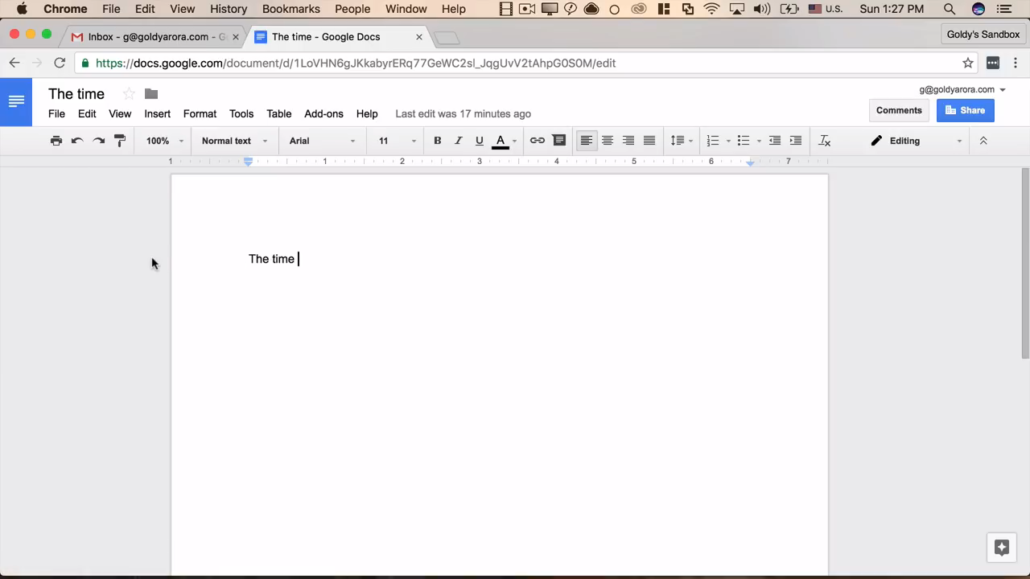
- Use Google Docs to type your message instead of typing it directly in the compose form.
- Remember your can as well use Google sheet, slides, whatever suites your purpose.
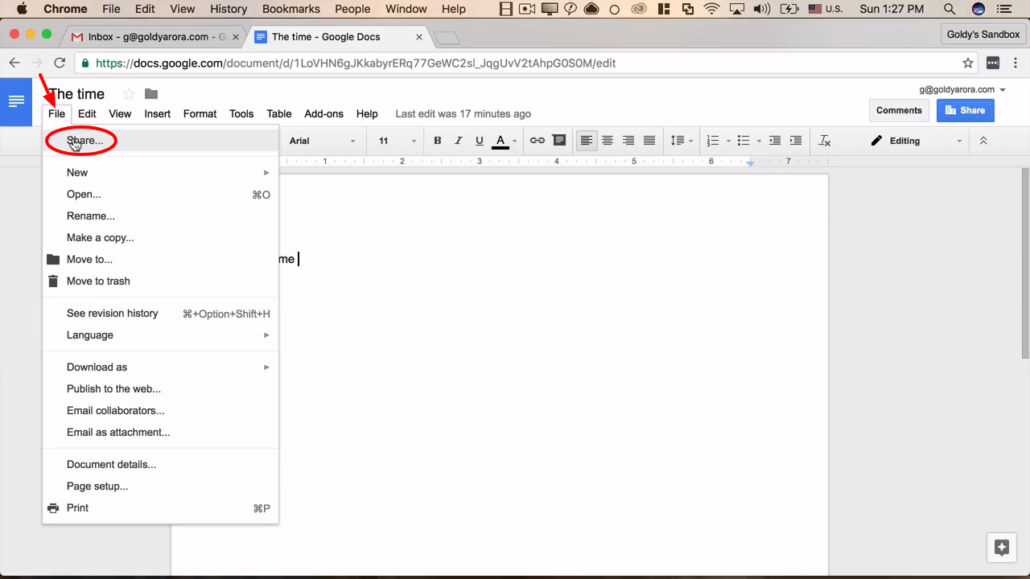
6. Go to 'Share'
- Go to 'File' then click on 'Share' option.
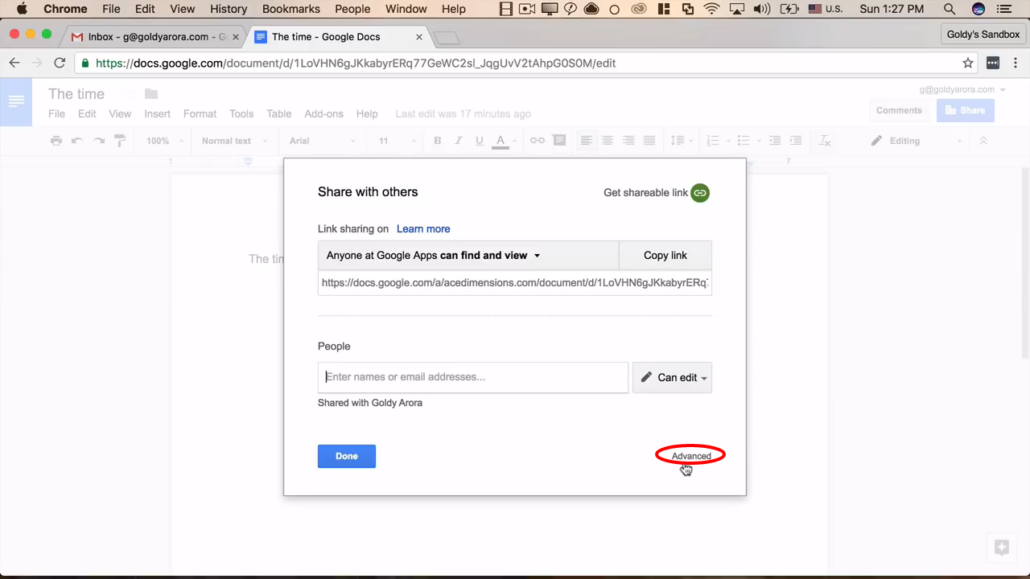
7. Click on 'Advanced'
- Next, click on 'Advanced' link at the bottom of the popup window.
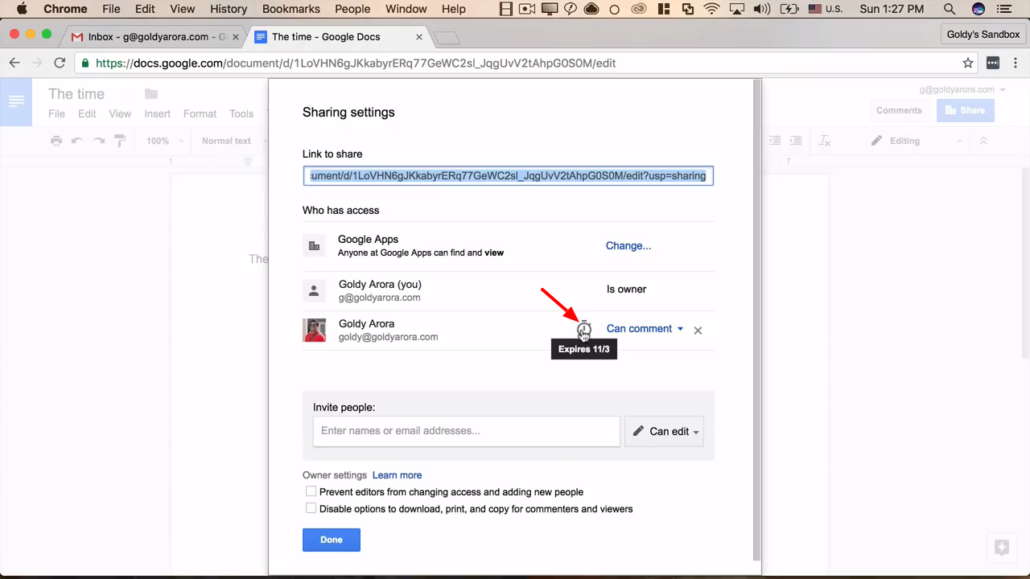
8. Click on clock icon
- To set document expiration time, click on the clock icon.
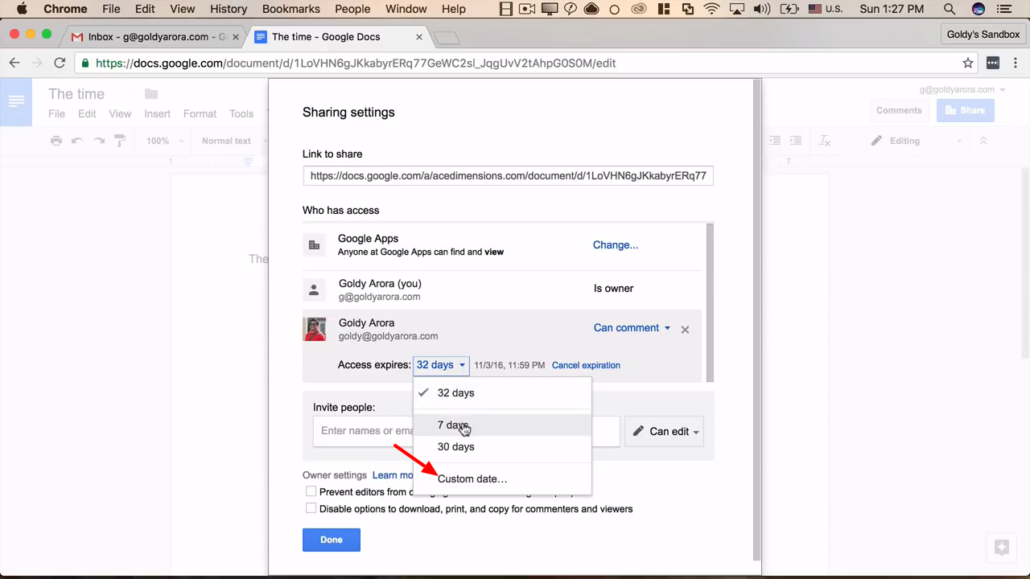
9. Set expiration period
- You choose from predefined dates, or choose a custom date from a calendar.
- After you've set your preferred time of expiration click 'Save' button.
10. Click on 'Drive' icon
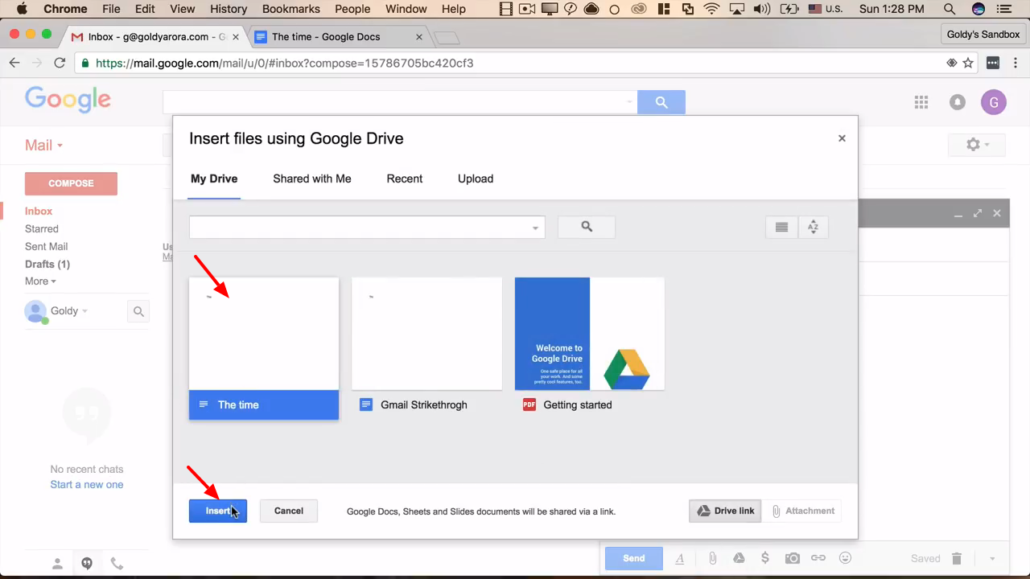
- Now compose new email then click 'Drive' icon to include the document you just created in previous steps.

11. Insert file
- Choose the file then click insert.
12. Send message
- Now your email is ready to be sent.
- So what happens when you send this message is that your recipient will be able to access and read the document with any document.
- But when the set time expires, they will not have access to the document anymore.

That is all.
- So that is all to it. It's not a straight forward way of doing it however, it's a way around recalling your message even after 30 seconds.
- I hope you found this helpful, for questions and comments, don't hesitate to leave them below and I will be more than happy to respond.

Related Posts
....
....

