

Easily send and receive emails in Google Workspace Groups
Send & Receive Emails From G Suite Groups
- You can leverage Google Workspace groups to create additional emails without having to purchase an extra license.
- This includes use-cases where you'd like your team to receive and reply to emails sent to a group email address such as sales@yourdomain.com
- In this video, I explain how to create Google Workspace groups and how you can send and reply using a group email address.
1. Login to Admin console
- To be able to create and manage groups, you must be a Google Workspace admin, if you're not you can ask your administrator to delegate administration permissions to you.
- From Gmail, click on settings icon then click on 'Manage thid domain' to login with your admin username and password.
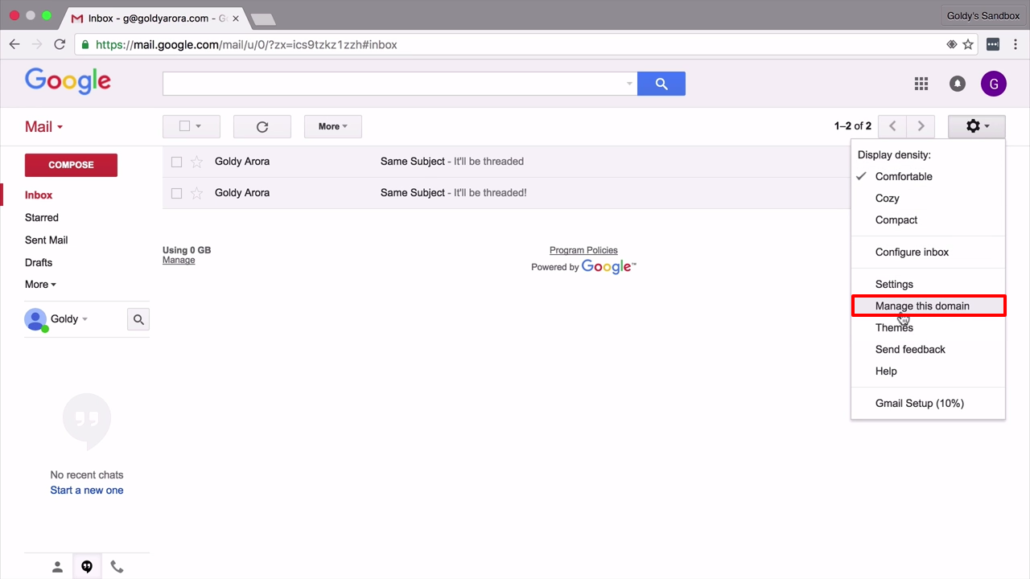
2. Click on "Groups"
- Having logged into Google Workspace admin console, now click on 'Groups'.
- If you do not see groups, you need to click on 'More controls' then you'll be able to drag and drop it to the list of Google Workspace services.

3. Click '+' icon to create new Group
- If you already have groups created, you will see them listed from where you can choose to manage them.
- However, to create a new group, click on a '+' icon at the right-bottom of the page.
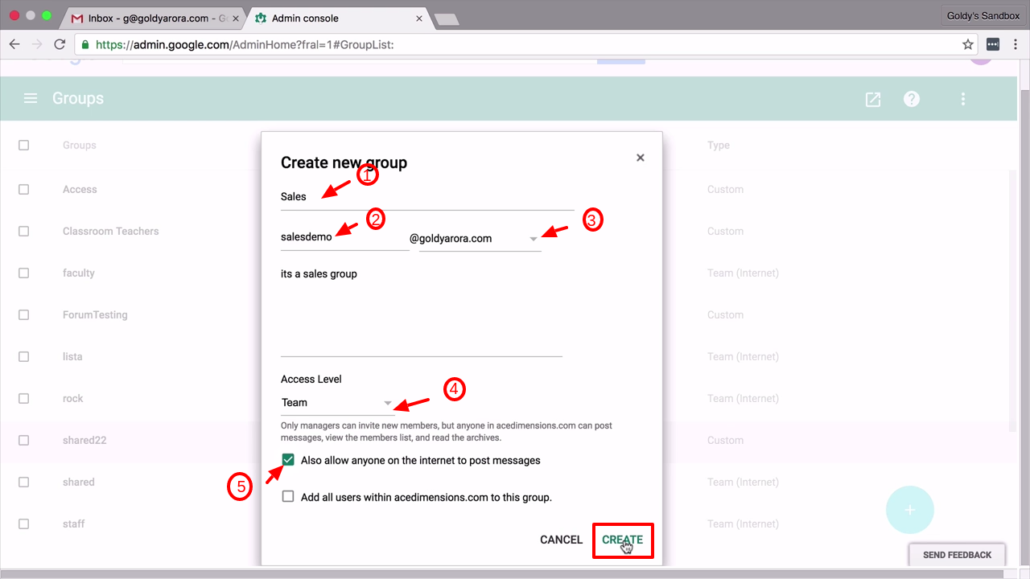
4. Create new Group
- To create a new group complete a form as required. In field (1) type new group name followed by a group username in field (2).
- If you have more than one domains, you can choose which domain you want to associate this group to in field (3).
- Then choose access level from drop down (4). There're different access levels, you can read a description on each access level to choose one that suites your use case.
- To be able to receive emails from addresses outside your domain, check option (5). Then click 'Create' button.
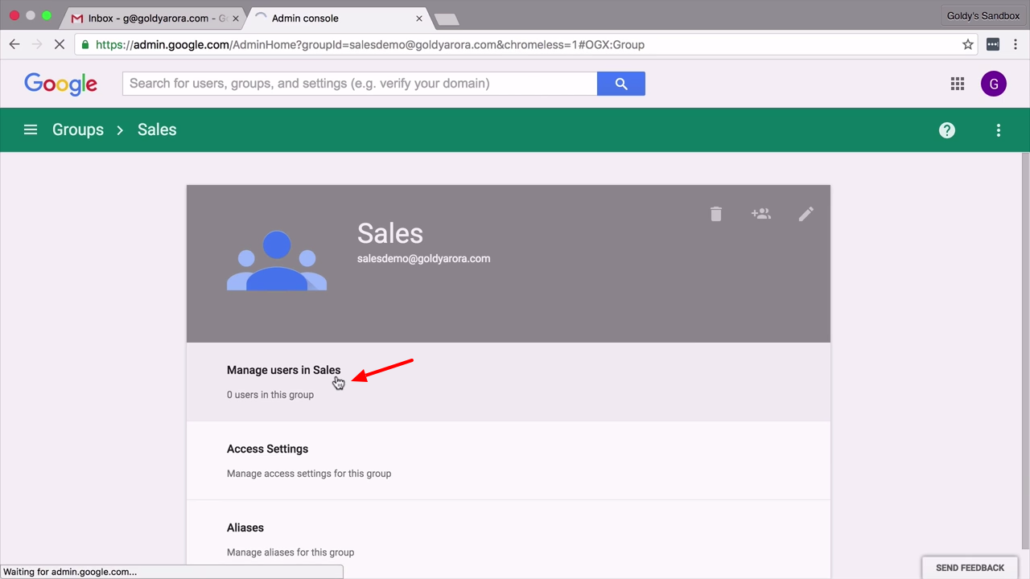
5. Manage users in Group
- G suite gives you different ways to manage your groups including creating nick names (aliases), managing access levels, etc.
- For this, you will click on 'Manage users' option to be able to add and manage users in your group.
6. Add members to Group
- Clicking on 'Manage user' from previous step leads you to a form where you can add new members.
- To add a member, type their email address in field (1). This can as well be an email address outside your domain.
- Next, select whether a user should be a 'member' or 'owner' from option (2). Then click on 'Add' button to create new user.

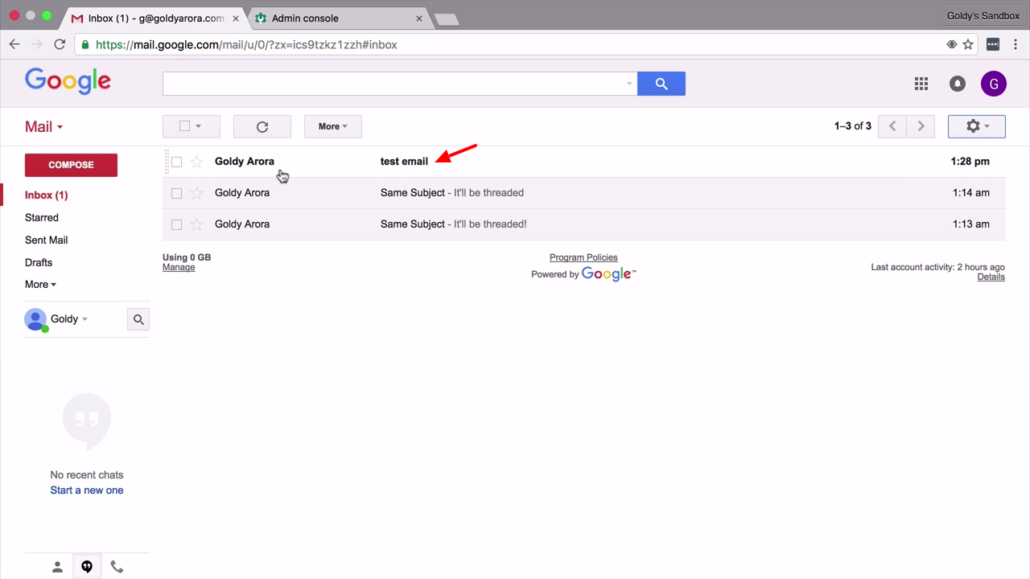
Test if users receive email
- What should now be happening is, whenever an email is sent to the group email address, all members under that group should receive that email.
- For instance, If I send an email to 'salesdemo@goldyarora.com' , 'ga@goldyarora.com' should receive this email too.
Test results
- As expected, a member under sales group receives an email sent to the group email.
- Now what if this user wants to send and reply to emails using group email? Read on to find out how.
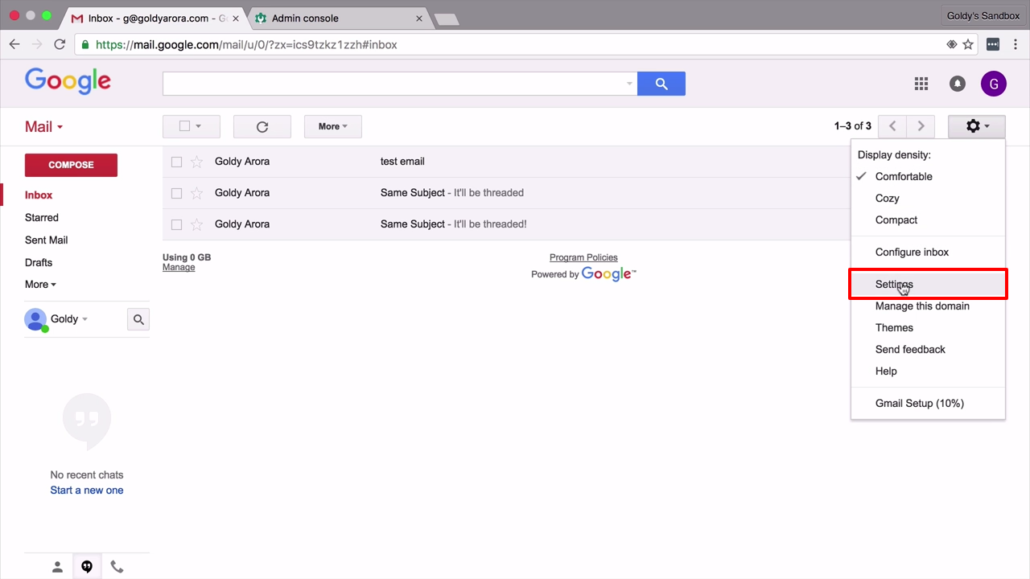
7. Configure 'Send mail as'
- To let members send and reply to emails using group email 'Send mail as' feature has to be configured on a member's Gmail account.
- From a member's email account, click on the settings icon then click on 'Settings' from drop down menu.
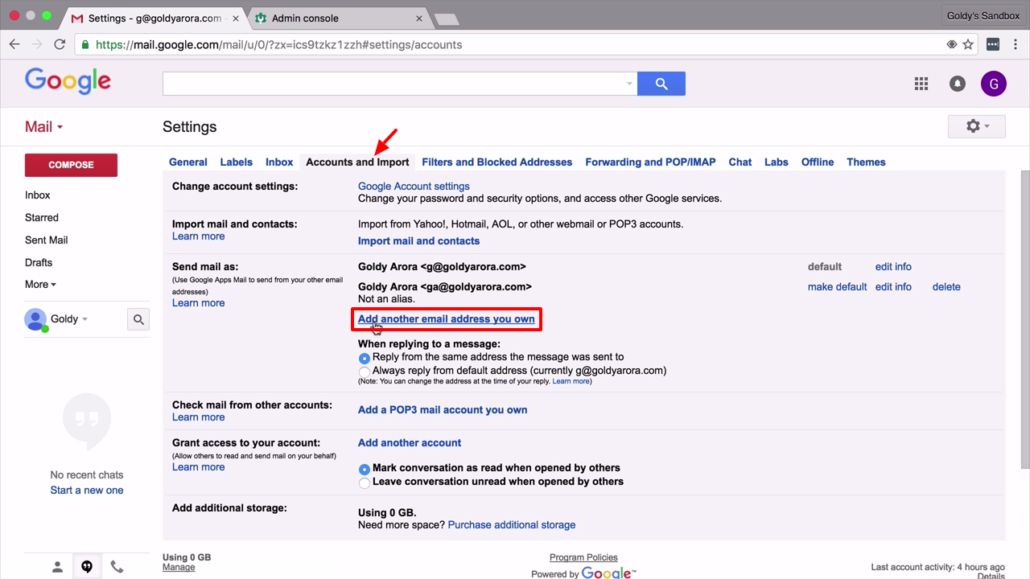
7(b). Add another email
- On the settings page, click 'Accounts and imports' tab.
- In 'Send mail as' section, click 'Add another email address you own' option.
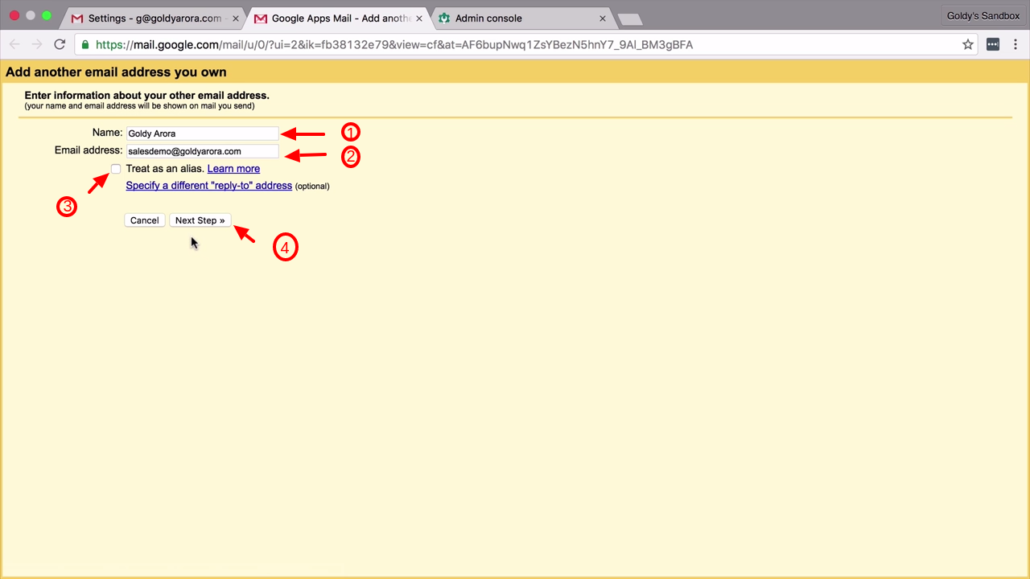
7(c). Add group email
- In the form provide, in field (1) type a name that shows up when you send an email with this address.
- In field (2) type in the group email address. Uncheck option (3) so this email is not treated as your nickname.
- Click on 'Next step' button to proceed to following step.
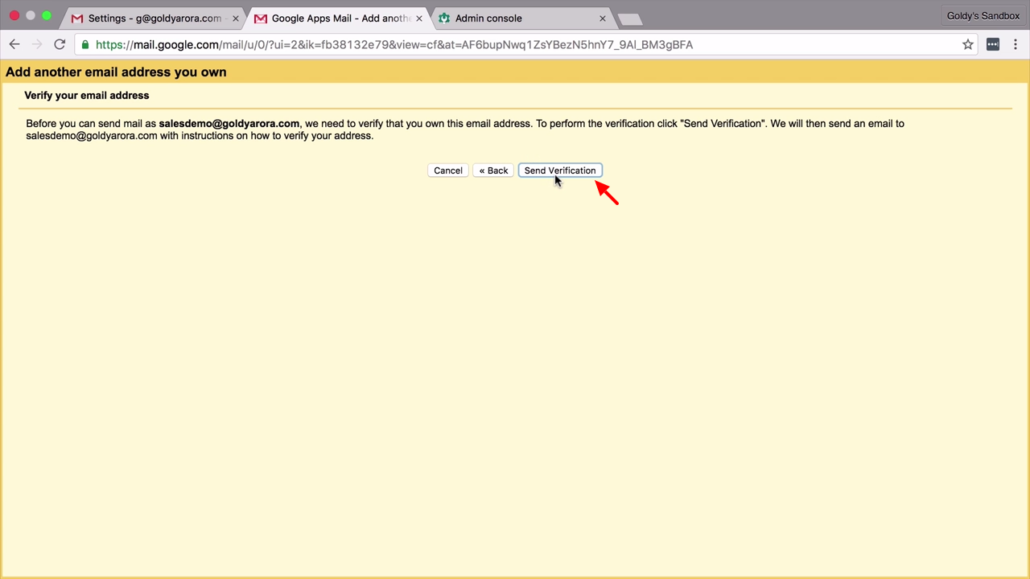
8. Verify email ownership
- Before using this email address to send emails, Google requires that you verify this email ownership.
- Click on 'Send verification' button to let Google send a verification code to the group email
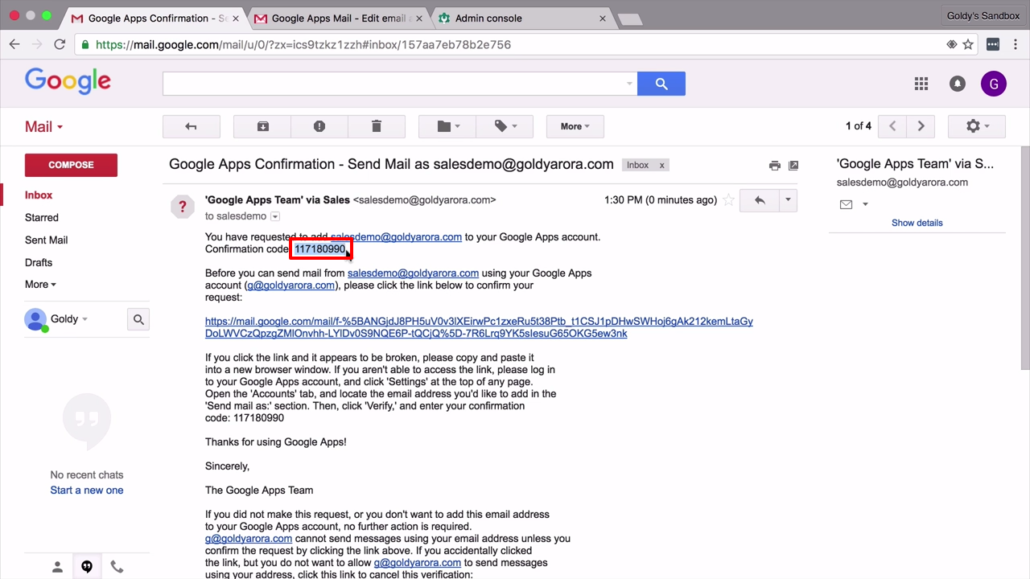
8(b). Copy verification code
- When Google sends a verification to the group email email, you also receive it in your personal email inbox since you're a member of that group.
- So, just copy the code and move on to next step.
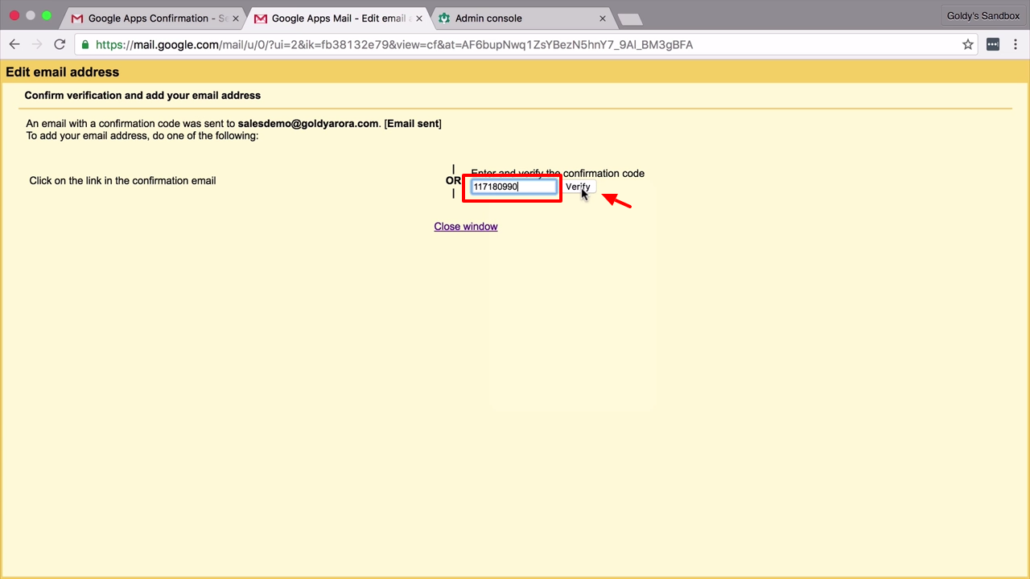
8(c). Paste code & verify
- Next, go back to verification page then paste the code you just copied from your inbox.
8(d). Confirm 'send mail as'
- If all is set properly, you should now see your group email added in the 'Send mail as' section.
- If you would like to reply to emails sent to group email address using a group email, leave 'Reply from the same address' option checked.

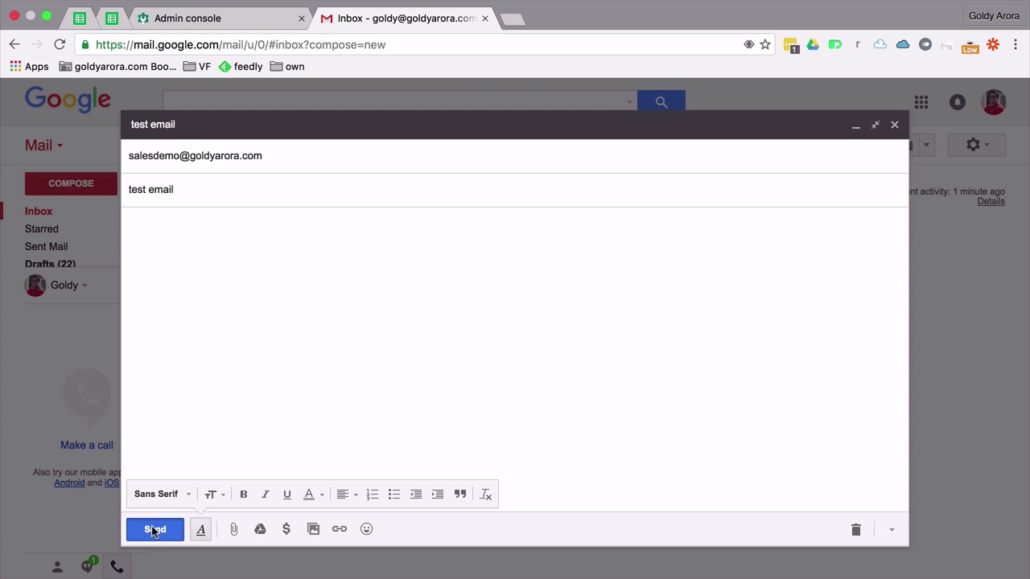
9. Sending an email using Group email address
- Now as a member of the group, you don't stop at only receiving emails sent to group email. But also send and reply to emails using group email.
- During email composition, just click on the dropdown icon to choose a group email address.

That is it!
- That is all to it. You just learnt how to create new groups, add new members to it, and configure 'Send mail as' to let a member send and respond to emails using group's email address.
- But if you still face some problems, don't hesitate to leave your questions and comments below so I can help
Related Posts
....
....