Labels Manager for Gmail - Installation
How to install the Labels Manager for Gmail add-on
Note: This add-on works for an individual user. That is, if you are an individual Gmail user then you install this labels manager for Gmail add-on. If you are a Google Workspace admin and you would like all your users to be able to use this add-on, here is the link [hyperlink] where I explain how to install the add-on as a Google Workspace admin and then “push” it to multiple Google Workspace users within your domain.
1 Open a new Google Sheet and name it appropriately. For my example, I have named the Google sheet as “Labels Manager for Gmail”.
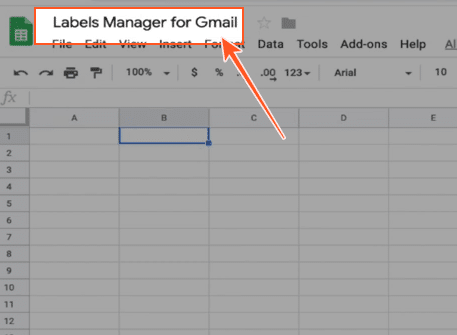
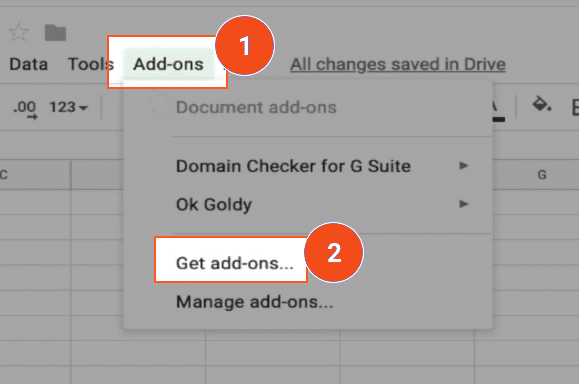
2 Install the “Labels Manager for Gmail” add-on.
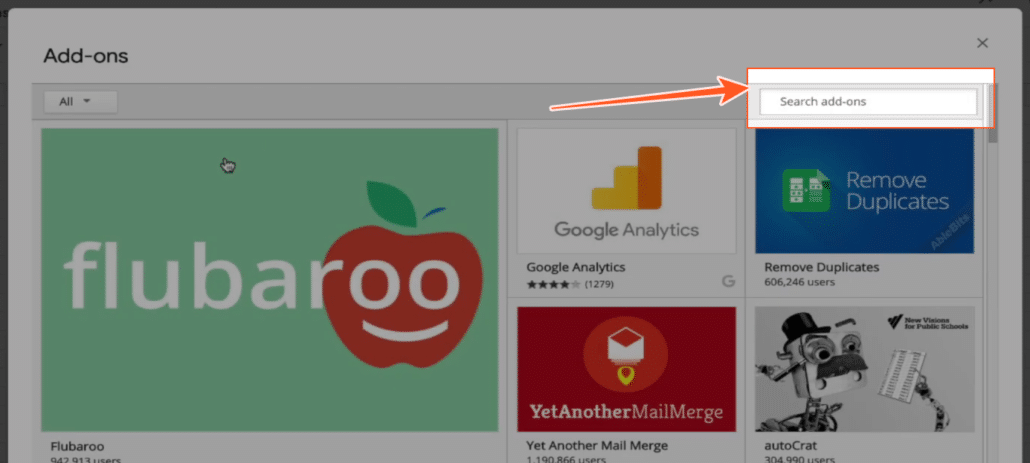
3 Search for the add-on in the add-on store. Type in “labels manager” in the search box.
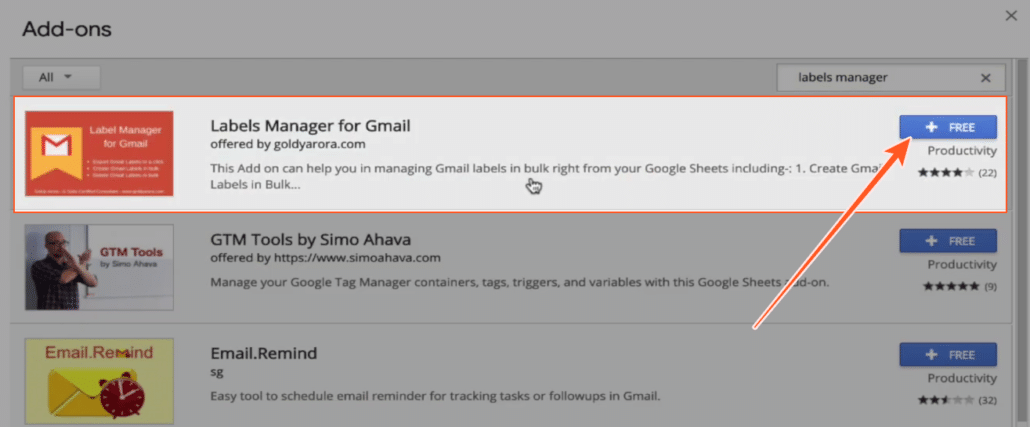
4 Install the add-on by clicking the “Free” button. Yes, it’s a free add-on.
5 Log into the Google account where you would like to install the “Labels Manager for Gmail add-on.
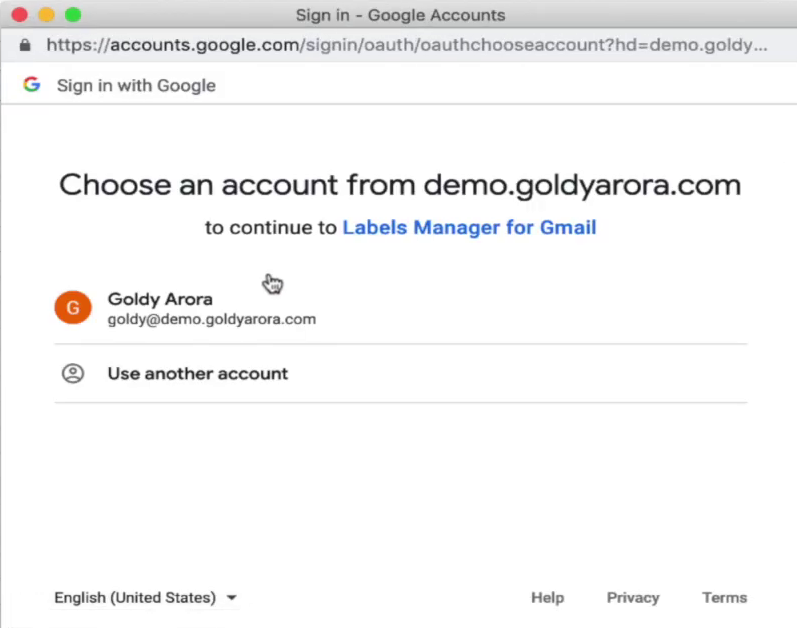
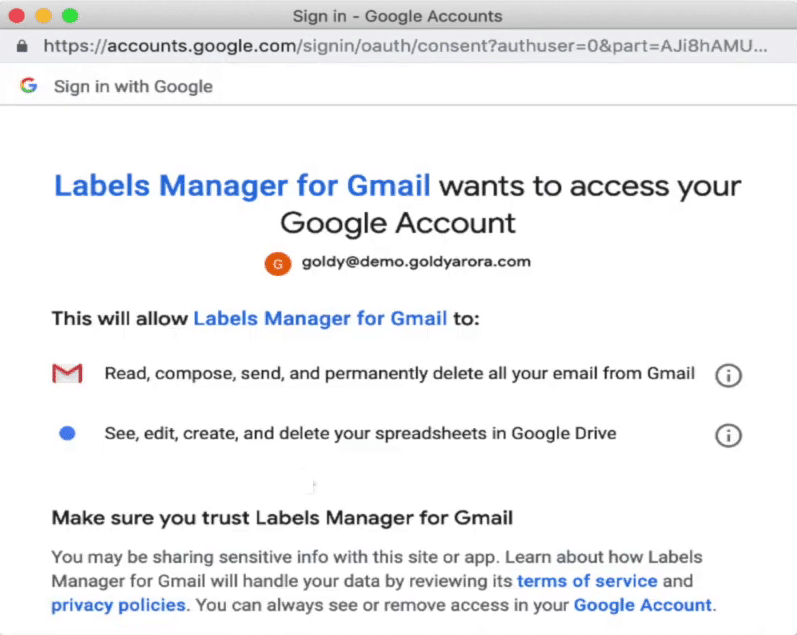
The proceedings screen will tell you what parts of information the “Labels Manager for Gmail” add-on may be able to access through your Google account.
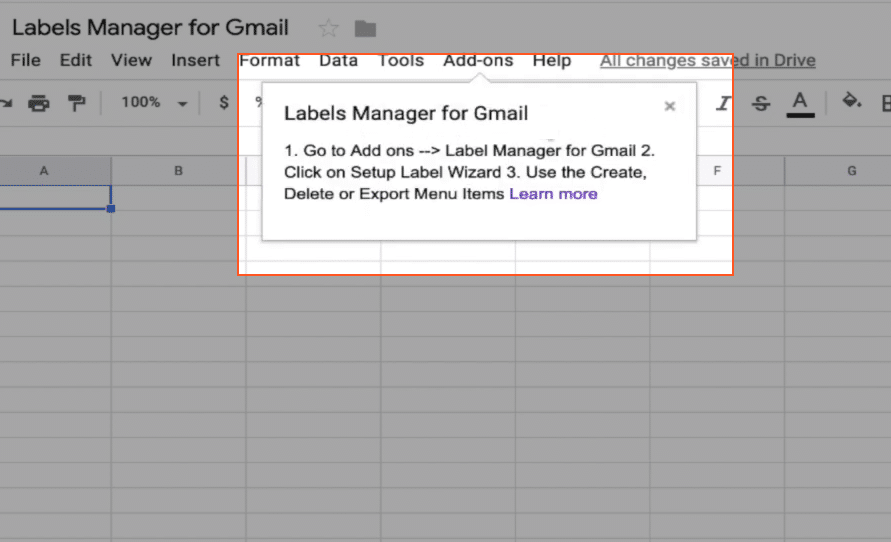
Once the add-on is installed, a small pop-up under the “Add-ons” menu option will notify you that the add-on has been installed.
6 Run the Setup wizard to create all the worksheets that will be used by the “Labels Manager for Gmail” add-on, using the following command path:
Add-ons >> Labels Manager for Gmail >> Setup Wizard >> Create Label Sheets
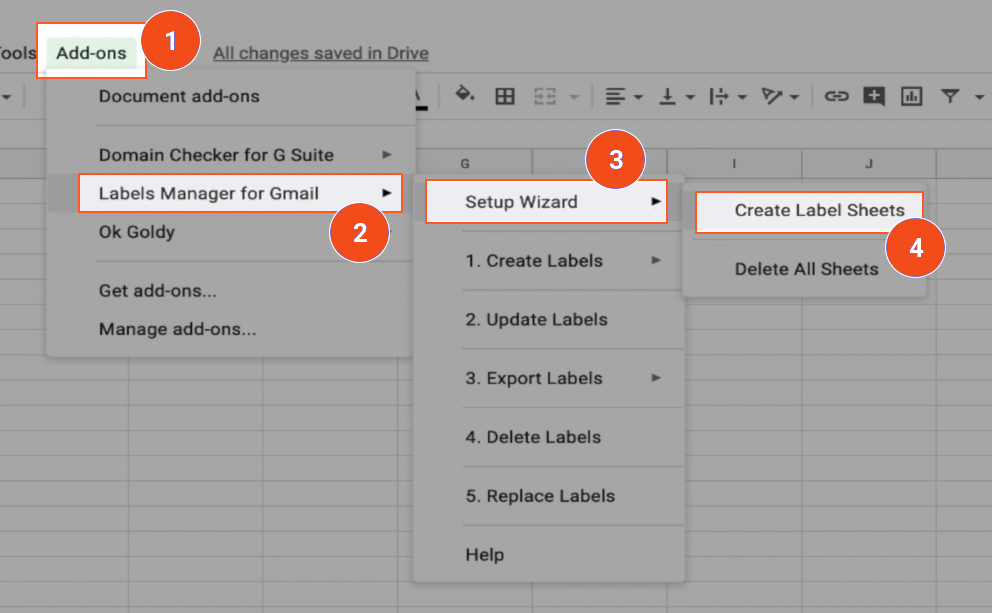
The setup creates multiple worksheets that will be used for various functions provided by the “Labels Manager for Gmail” add-on.
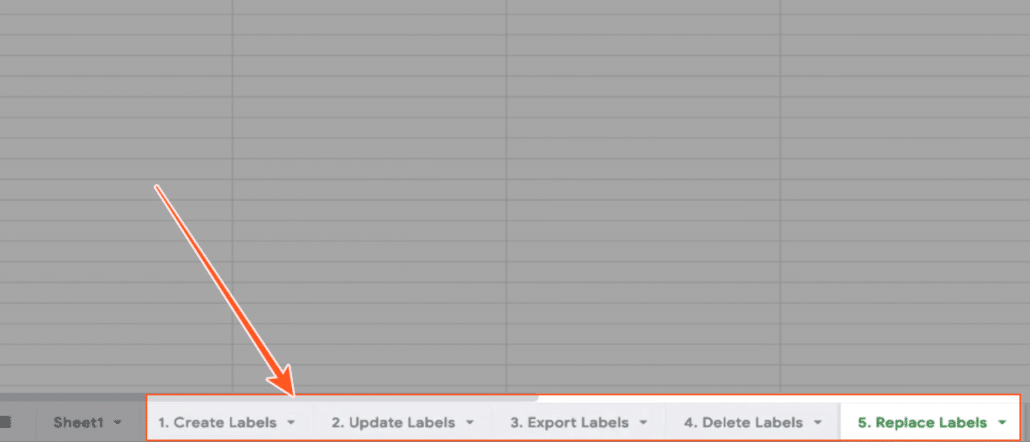
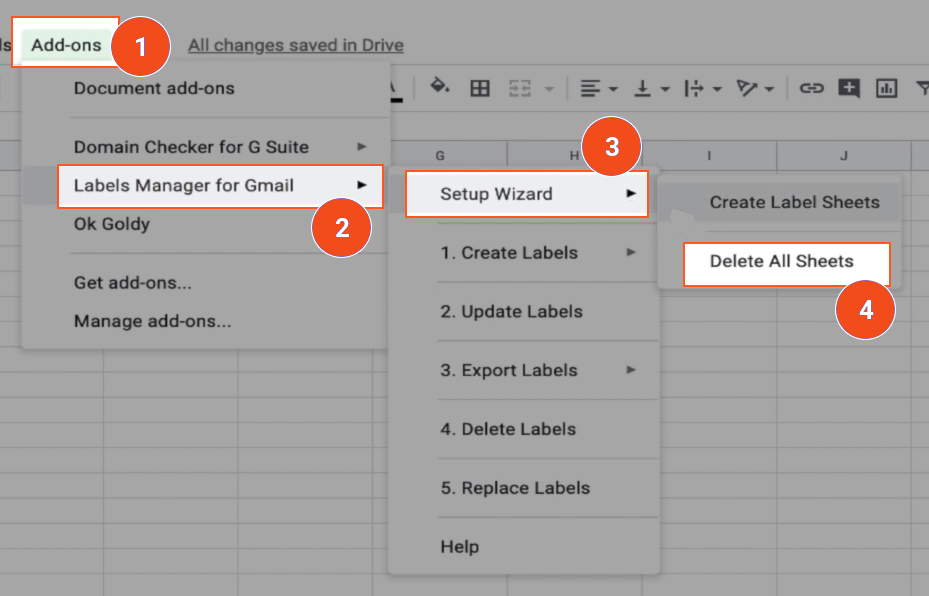
In case something goes wrong with the worksheets and you need to reset the add-on, you can simply delete all the worksheets (so that you can run the setup again) using the following command path:
Add-ons >> Labels Manager for Gmail >> Setup Wizard >> Delete All Sheets
Related Posts
....


