

Google Workspace Catch All - Create Catch All account in Google Workspace
STEP 1 - Login to Google Apps Admin Console

- Go to admin.google.com
- Enter your Google Workspace Admin id and password, and login to google apps admin console
STEP 2 NAVIGATE AND CLICK ON GOOGLE APPS
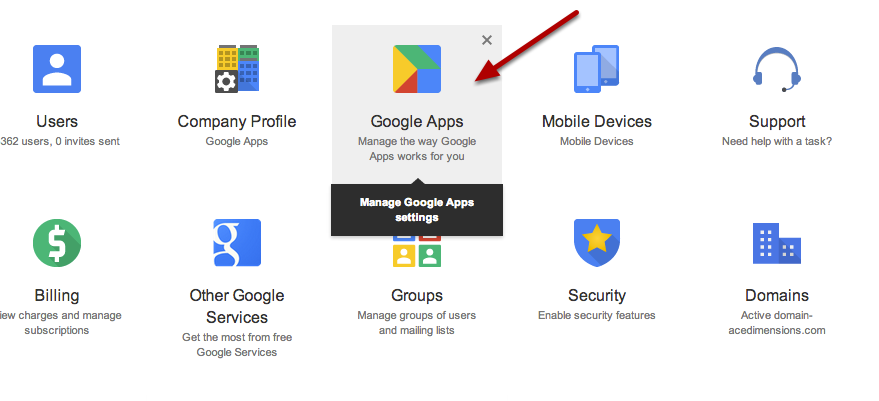
Once you are in your Google Apps control panel, click on “Google Apps” as shown in the screenshot
STEP 3 NAVIGATE AND CLICK ON GMAIL
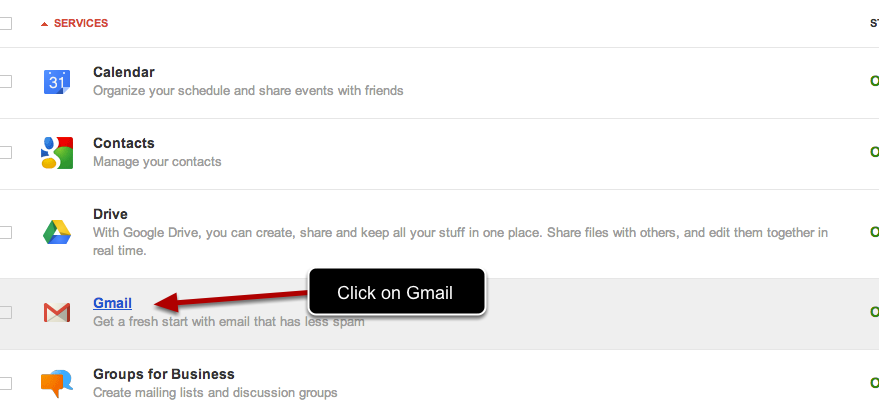
You will all the services offered under Google Apps here, click on GMAIL, as shown in the screenshot
STEP 4 – NAVIGATE AND CLICK ON DEFAULT ROUTING

Once you are in Gmail settings, click on “Default Routing” as shown in the screenshot
STEP 5 – CLICK ON ADD SETTING TO DEFINE RULE
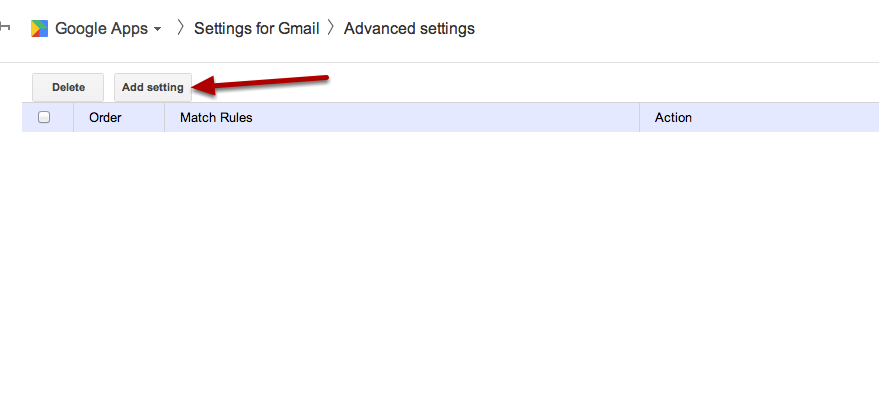
Under default routing click on “Add Setting” as shown in the screenshot
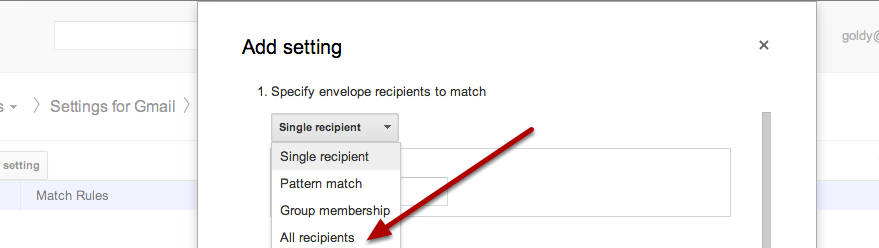
STEP 6 – DEFINE ROUTING FOR ALL RECIPIENTS
Once you are in your Google Apps control panel, click on Google Apps as shown in the screenshot
STEP 7 – CHANGE THE ENVELOPE RECIPIENT WITH YOUR CATCH ALL ID
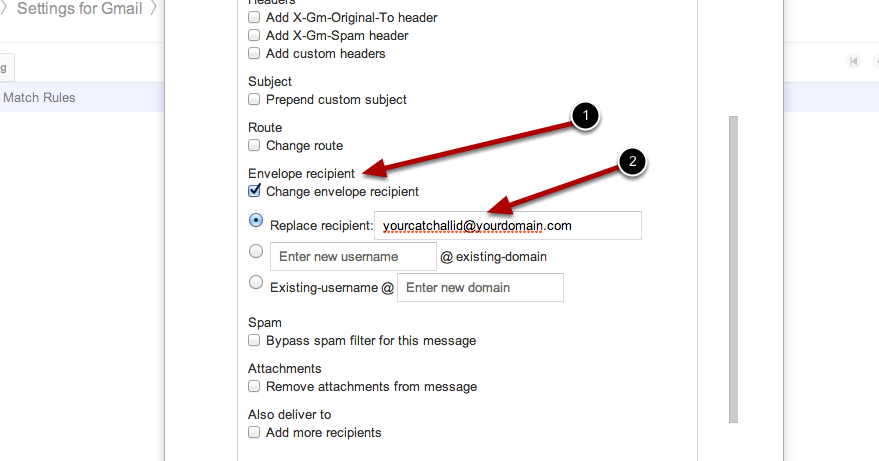
- Under Envelope Recipient, checkmark “change envelope recipient”
- Click first radio button which says “Replace recipient” and put your catch all email address here
- Look at the screenshot for reference
STEP 8 (last step) – Apply this rule only for users which does don't exist

- Under Envelope Recipient, checkmark “change envelope recipient”
- Click first radio button which says “Replace recipient” and put your catch all email address here
- Look at the screenshot for reference
- Understanding what exactly we did-: We created a server side rule in Google Apps which says “If any email comes for any of your domains for a user whic does NOT exists in your Google Apps, then change its recipeint id to yourcatchallaccount@yourdomain.com
- Congratulations, you have now configured catch all address in Google Apps which will work with your primary and secondary domains in Google Apps, other benefits you have earned after configuring your catch all account
Google Apps Wildcard Email –:
You have configured the catch all email address to make your Gmail for business work as “Google Apps Wildcard Email”.
Catch All Domain-:
Sometimes you are just a single user, and would like to receive all the messages sent to any id on your domain, by configuring catch all email id, your whole domain becomes a “Catch all Domain”
Related Posts
....