Google Workspace to Office 365 SSO and Provisioning Guide
Google Workspace to Office 365 SSO & Provisioning
Topic Overview & Expected Output
- There might be use cases where you would like to setup Google Workspace SSO to office 365
so your Office 365 users can authenticate via their Google Workspace or Google Cloud Identity accounts.
A couple of use cases that I have seen are-:
- Your organization has moved to Google Workspace, but a few users still have accounts in Office 365.
- Your organization has moved to Google Cloud Identity as your Identity provider and now needs to authenticate to target applications including Office 365.
Google Cloud Identity is very flexible and it can be used as “Service Provider”, Identity provider or even both.
In this blog post, I would show you how you can use Google Cloud Identity or Google Workspace as identity provider and use Google Workspace SSO to sign in Office 365 via SAML 2.0 (or WS-Fed).
Let’s start with our expected output, we should see following after our setup-:
- Our users should see the Office 365 application icon in their Google Workspace or Cloud Identity dashboard and launcher, and when they click on it, they should be logged into Office 365 (via their Google Identity) without being asked for credentials.
- If our users directly go to Office 365, they should be redirected to their Google Cloud Identity (or Google Workspace) login page, and then back to Office 365 after success Google login.
- Users should be automatically provisioned (and de-provisioned) in Office 365 when they are provisioned (and de-provisioned) in Google Workspace or Google Cloud Identity.
System Requirement
Lets look at the system requirements which you should complete for seamless federation and user lifecycle management from Google Workspace to Office 365.
Google Workspace to Office 365 SSO : System Requirements
Office 365 requirements :
- Verified Domain (e.g yourdomain.com)
- Global Administrator role
- PowerShell (with Microsoft Azure Active Directory Module) installed
- One Test user (user@yourdomain.com)
Notes :
1. If you have Azure Active Directory Premium, you might be able to create a custom role from Privileged Identity Management instead of assigning Global Admin role (e.g Hybrid Identity Administrator, Directory Synchronization Accounts).
2. You do not own the default Microsoft domain (e.g yourdomain.onmicrosoft.com), and hence can not setup federation on it. You would need to add the domain you own (e.g goldyarora.com) for it, you can find Microsoft’s documentation to add domain in Office here.
Google Workspace (or Google Cloud Identity) requirements :
- Supported Google Workspace, Cloud Identity or Drive SKU (details below)
- Google Workspace or Google Cloud Identity Super Administrator role
- One Test user provisioned (e.g user@yourdomain.com)
List of Google subscriptions with SSO & Provisioning availability
PlanSSOProvisioningGoogle Workspace BasicAvailableAvailableGoogle Workspace BusinessAvailableAvailableGoogle Workspace EnterpriseAvailableAvailableGoogle Cloud Identity FreeAvailableNot AvailableGoogle Cloud Identity PremiumAvailableAvailableGoogle Drive EnterpriseAvailableNot AvailableGoogle Workspace EducationAvailableAvailableGoogle Workspace Education EnterpriseAvailableAvailable
Undestanding Office 365 ImmutableId
In this section, let’s understand Office 365 immutableId attribute, how does it impact our Google Workspace to Office 365 SSO, and how to fix it with a few PowerShell commands
Understand & Fix Office 365 ImmutableId
Office 365 has an immutableId attribute to uniquely identify users (primaryKey). It is similar to objectGUID in Active Directory.
Now what your users’ immutableId would look like depends on how you provision your users, lets look at various provisioning options along with their impact on immutableId-:
- You have just setup Office 365 and the only user you have is someuser@somename.onmicrosoft.com : You do not need to worry about ImmutableId as you have not created users in Office 365 (except your default .onmicrosoft.com one), you can simply go to next section as you don’t need to fix immutableId).
- Users created directly in Office 365 Admin Console on “Non-Federated” domain : ImmutableId would be blank.
- Users created via Azure AD Sync : ImmutableId would be the base64 encoded version of Active Directory’s objectGUID (based on default directory sync configuration, but can be changed).
- Users created via Identity Provider (e.g Okta) on a federated domain : ImmutableId would be the value you send to Office 365 when making create user API call via your IdP.
If you are in #2, #3 or #4 category, please read following carefully :
As your Office 365 users have immutableId which is different than their Office 365 UPN
You have two options to deal with it :
Option 1 : Custom Attribute in Google with your ImmutableId
Create a custom attribute in Google (e.g immutableId) → populate it with users’ office 365 immutableId → and then configure Google to send this custom attribute when responding to SAML request.
However, this option would be painful as it requires you to keep managing and populating Google users with their respective Office 365 immutableId.
If you decide to go with this option, you can skip the rest of this section, and go to next one where I show you how to setup Google Workspace to Office 365 SSO.
If you use Google Cloud Directory SyncGoogle Cloud Directory Sync does not provide attribute transformation option, so you can not send AD objectGUID → base64 encoding → send to Google custom attribute.×Dismiss this alert.
Option 2 : Change your users’ ImmutableId
Now, by definition, immutableId is not meant to be changed, however there might be scenarios like this where you might consider to change it.
You may keep reading if you decide to go with this option, as I would now show you how to change your Office 365 users’ immutableId.
Consult your team before changing ImmutableIdYou should consult with Microsoft or your internal Office 365 team to understand how changing immutableId would impact your other scenarios.×Dismiss this alert.
Change ImmutableId
You would need to disable Directory Sync to be able to change ImmutableId, you can do it with following PowerShell command :
Set-MsolDirSyncEnabled -EnableDirSync $false
1. Run the following Powershell command to see all your users UPN, ImmutableId, whencreated and last directory sync time.
Command to view users in PowerShell :
Get-MsolUser -All | Select-Object UserprincipalName,ImmutableID,WhenCreated,LastDirSyncTime
Command to download in csv :
$exportUsers = Get-MsolUser -All | Select-Object UserprincipalName,ImmutableID,WhenCreated,LastDirSyncTime | Export-Csv C:\csvfile
2. If your users’ immutableId is not equal to their Office 365 UPN, then run the following Powershell command to temporarily change their UPN to a non federated domain.
PowerShell command to change UPN of a single user (Change orange part to yours) :
Set-MsolUserPrincipalName -UserPrincipalName admin@id.goldyarora.com -NewUserPrincipalName admin@second.ci.goldyarora.com
PowerShell Command to change UPN of all users except where UPN starts with admin (Change the orange part to yours):
Get-MsolUser -all | Where { -Not $_.UserPrincipalName.ToLower().StartsWith(“admin“) } | ForEach { Set-MsolUserPrincipalName -ObjectId $_.ObjectId -NewUserPrincipalName ($_.UserPrincipalName.Split(“@”)[0] + “@second.ci.goldyarora.com“) }
3. Run the following PowerShell command to change ImmutableId of your users whom UPN is now temporarily changed to non federated domain.
PowerShell command to change ImmutableId of a single user (Change the orange part to yours) :
Set-MsolUser -UserPrincipalName admin@second.ci.goldyarora.com -ImmutableId admin@id.goldyarora.com
PowerShell Command to change ImmutableId of all users except where UPN starts with admin (Change the orange part to yours) :
Get-MsolUser -all | Where { -Not $_.UserPrincipalName.ToLower().StartsWith(“admin“) } | ForEach { Set-MsolUser -ObjectId $_.ObjectId -ImmutableId ($_.UserPrincipalName.Split(“@”)[0] + “@id.goldyarora.com“) }
4. Run the following powerShell command to change the UPN back to original as we have now changed the ImmutableId.
PowerShell command to change UPN of a single user (Change the orange part to yours):
Set-MsolUserPrincipalName -UserPrincipalName admin@second.ci.goldyarora.com -NewUserPrincipalName admin@id.goldyarora.com
PowerShell Command to change UPN of all users except where UPN starts with admin (Change the orange part to yours) :
Get-MsolUser -all | Where { -Not $_.UserPrincipalName.ToLower().StartsWith(“admin“) } | ForEach { Set-MsolUserPrincipalName -ObjectId $_.ObjectId -NewUserPrincipalName ($_.UserPrincipalName.Split(“@”)[0] + “@id.goldyarora.com“) }
5. Run the following PowerShell command to confirm that ImmutableId for our users have been changed and now matching the UPN.
Command to view users in PowerShell-:
Get-MsolUser -All | Select-Object UserprincipalName,ImmutableID Command to download in csv-:
$exportUsers = Get-MsolUser -All | Select-Object UserprincipalName, ImmutableID | Export-Csv C:\csvfile
Now you are ready to move to next step where we will setup Google Workspace to Office 365 Single Single On (SSO).
Google Workspace to Office 365 SSO Setup

Setup Office 365 as Service Provider in Google Workspace
1. Login to Google Workspace or Google Cloud Identity Admin Console (admin.google.com)
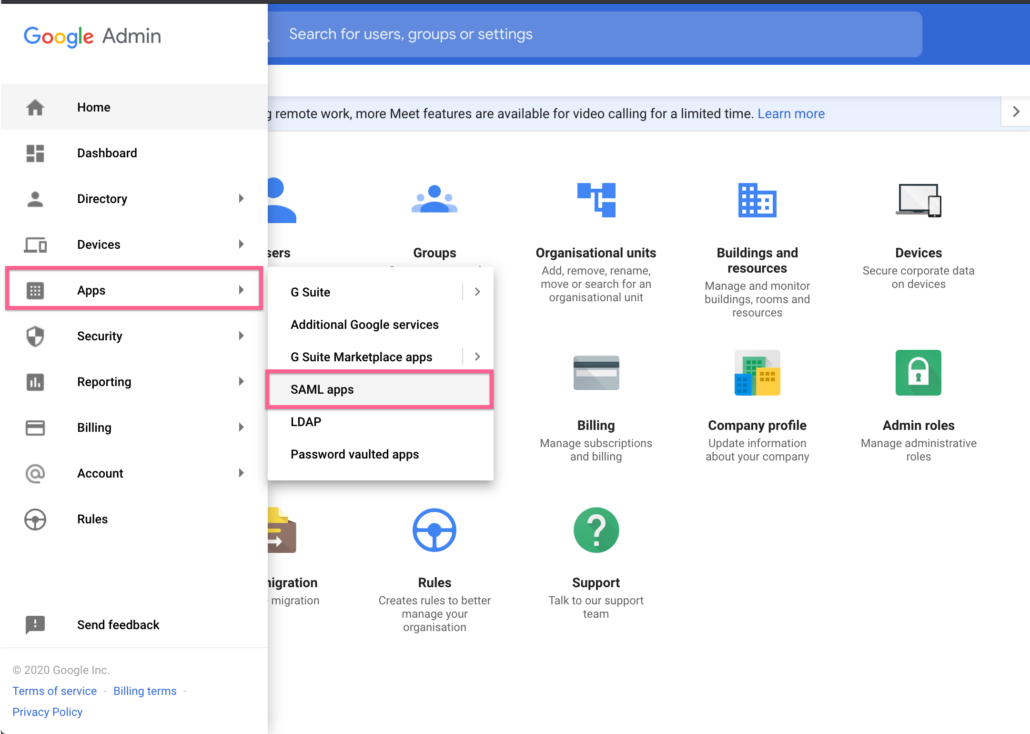
2. Go to Apps, and then click on SAML apps as shown in the screenshot below
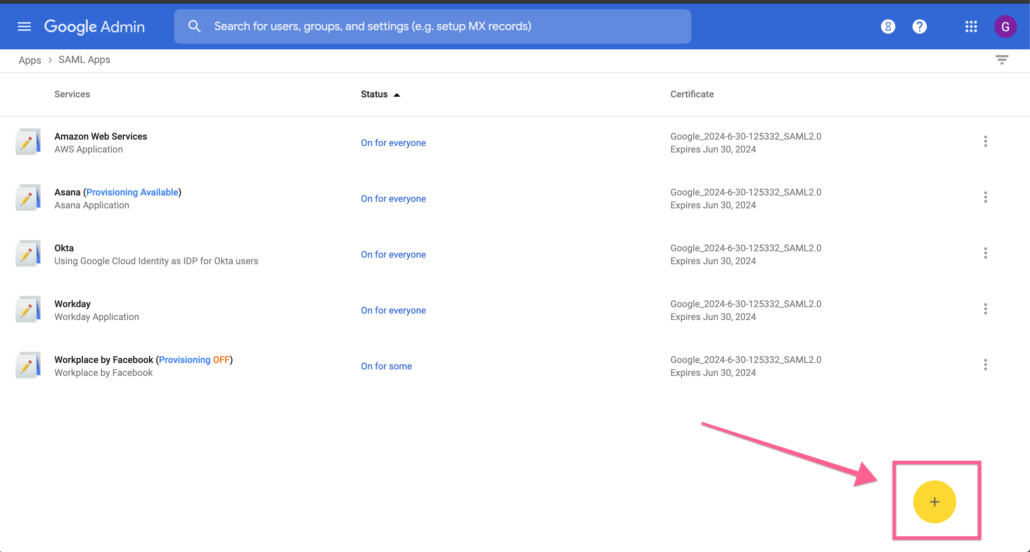
Click on + icon to search and add Office as SAML application.
- Search Google’s SAML apps catalogue for Office 365.
- Go to Microsoft Office 365 from the search results.
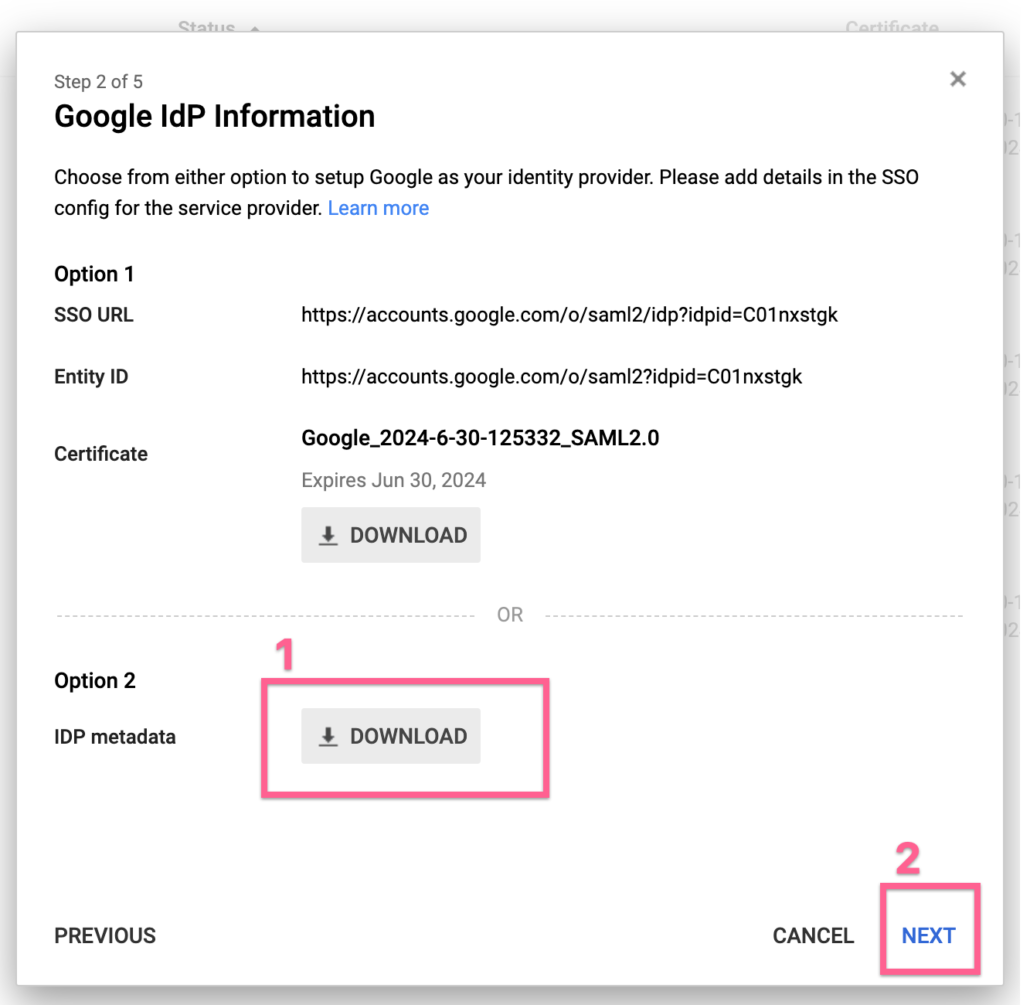
- Click on the right arrow (shown as #3 in screenshot below) to configure Office 365 as SAML application.

- Download IDP metadata from option two (we will use the values from it when configuring Google as IDP in Office 365 later).
- Click on Next after your downloaded metadata.
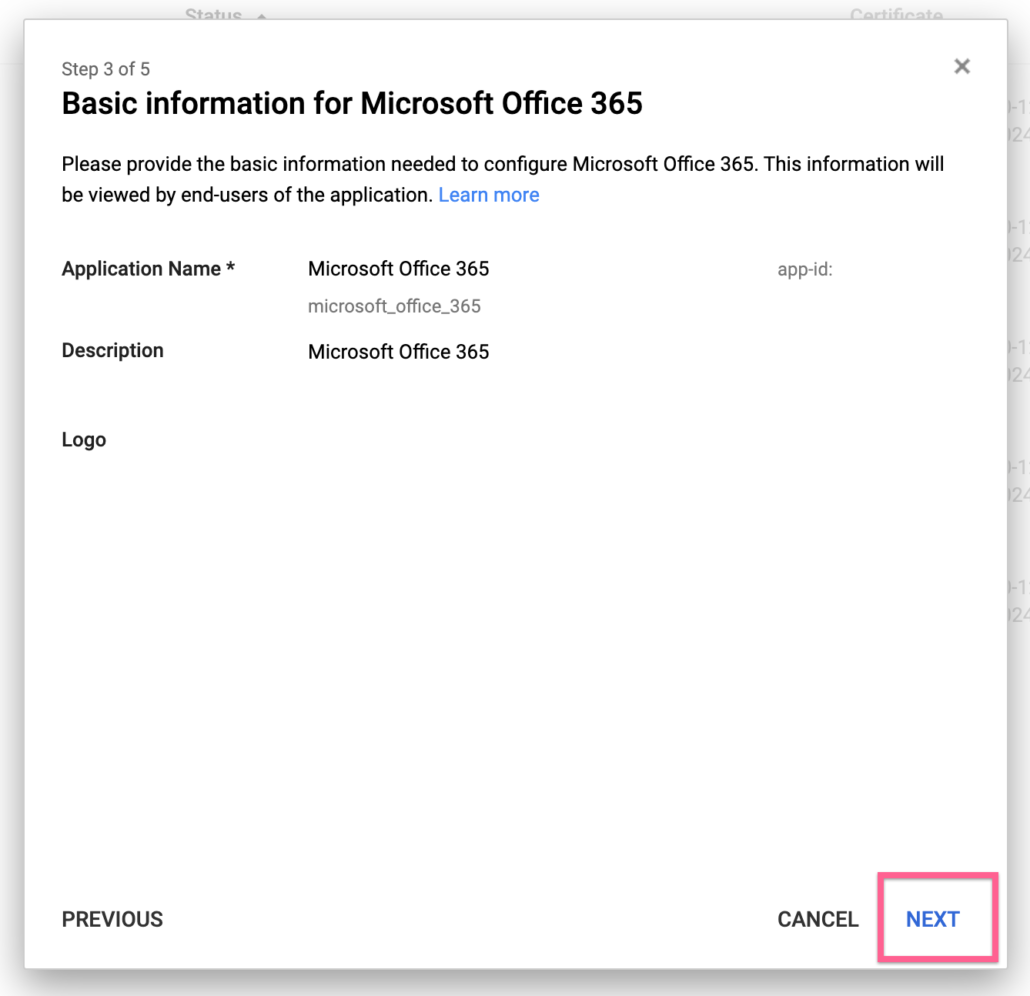
- You may leave the default values for Application name and click on next
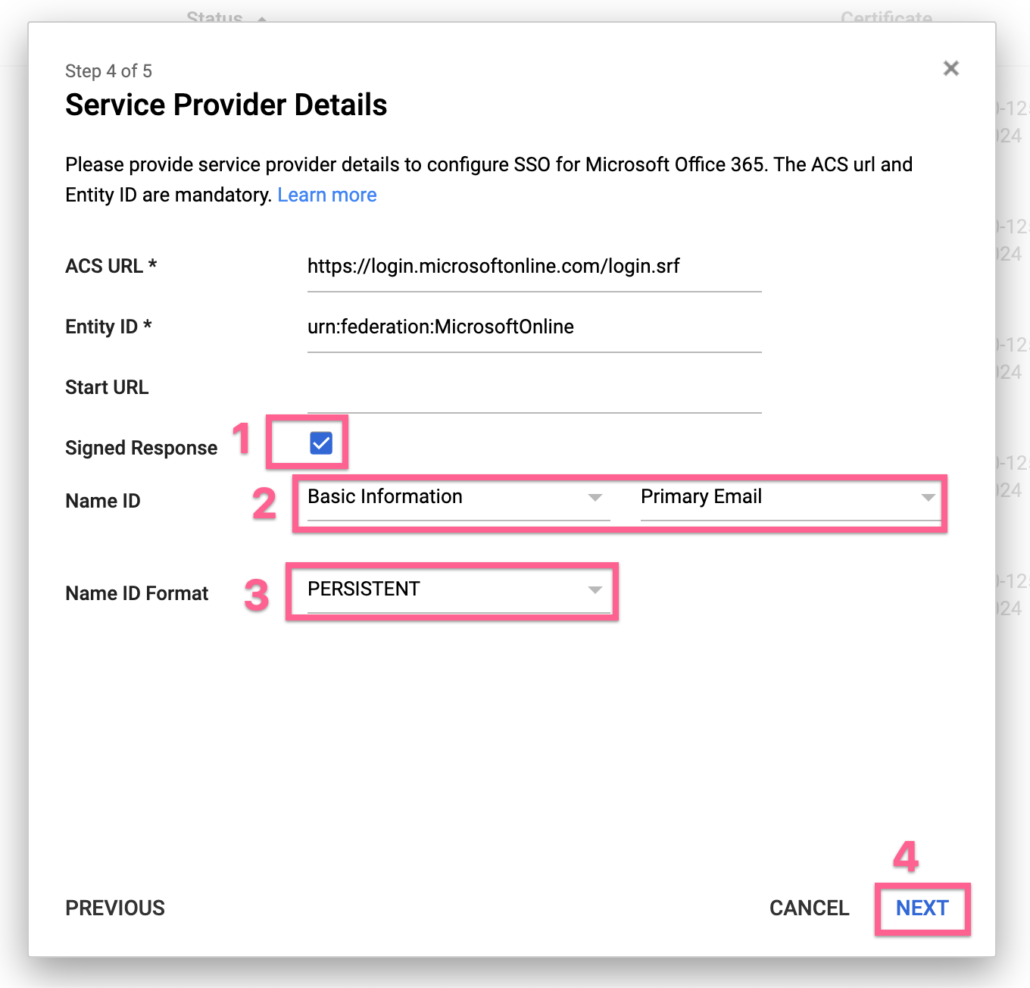
1. Enable Signed Response by checking the box as shown in the screenshot below.
2. Select Basic Information –> Primary Email to be sent in Name ID
3. Select “Persistent” as the Name ID format.
Note : If you did not change your Office 365 users’ immutableId to UPN, and rather decided to go with immutableId itself, then select your custom attribute which contains users’ immutableId here, and not primary email.
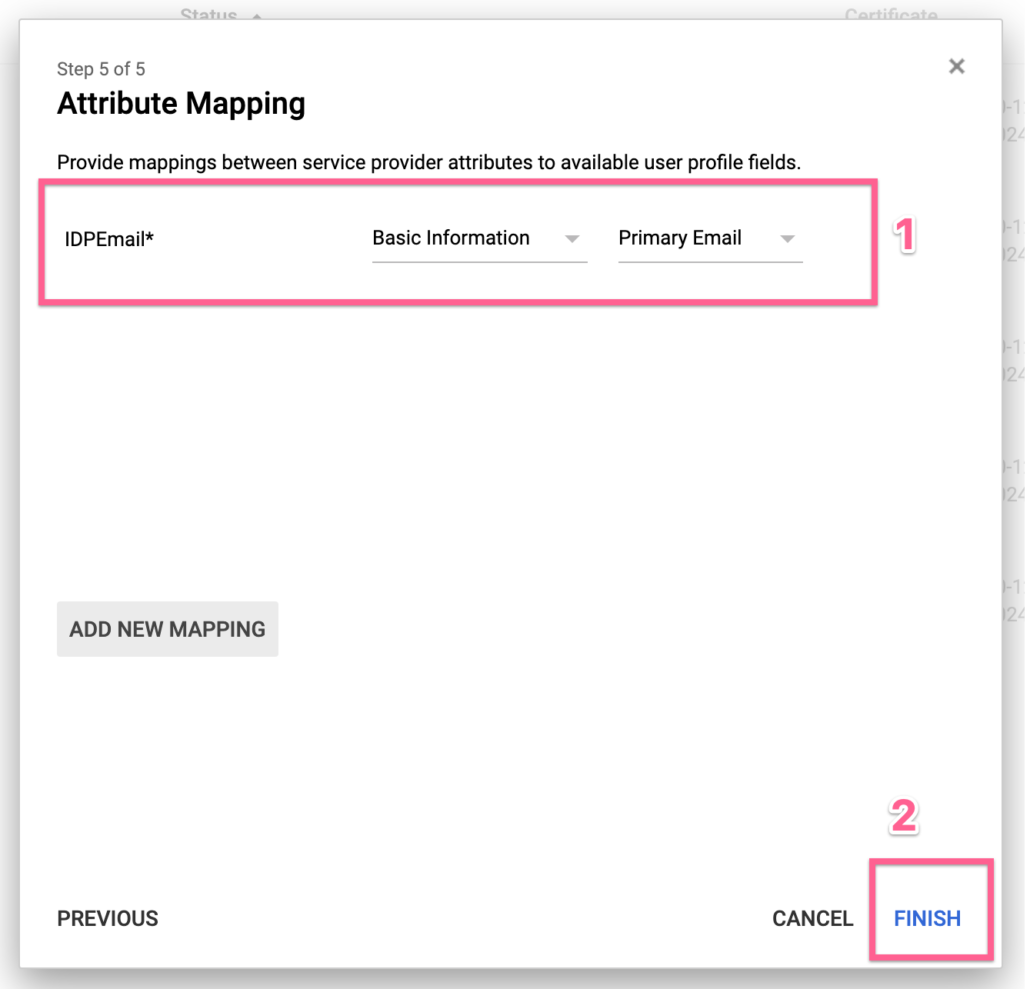
- Select Basic Information –> Primary Email for the IDPEmail attribute mapping.
- Click on “Finish” to complete SAML application setup for Office 365.
Create Powershell variables for Office 365 SSO
Office 365 needs a few properties for federation setup so it can securely send SAML request to Google, and can also parse the the response.
Property NameWhy we need it?Property ValueDomain NameThis will our Office 365 domain name that we want to federate to Google.Domain Name that we want to federate.AuthenticationWe would need to tell Office 365 our authentication method.FederatedFederation Brand NameThis is for our reference, we can provide any contextual name here (e.g Google)Google Cloud IdentityIssuer URIMicrosoft needs to know who issued the SAML response, here we would put our Google Entity ID here.Entity ID
(Available in the IDP metadata that we downloaded from Google)Active and passive logon URIThis would be the Identity provider (Google in our case) URL, which Office 365 would refer to as SSO URL.Google SSO URL
(available in the IDP metadata file that we downloaded from Google)LogOffUriTo specify where should Office 365 redirect our users when they log out.
You can put URL any URL here.https://accounts.google.com/logoutSigning CertificateThis would be the public key which Google provided us, Office 365 would use this to identity itself in the SAML request, and also to parse SAML response.X509Certificate Value
(available in the IDP metadata file that we downloaded from Google)PreferredAuthenticationProtocolTo specify the preferred authentication protocol.SAMLP
Your variables would look like this (with your own values for domain name, federated brand name, issuerUri, activeLogOnUri, PassiveLogOnUri, Signing Certificate)
Watch video above for clarityYou can also watch the video above to see if need step by step instructions.×Dismiss this alert.
$domainName = “id.goldyarora.com”
$Authentication = “Federated”
$FederationBrandName = “Google Cloud Identity”
$IssuerUri = “https://accounts.google.com/o/saml2?idpid=C03a9sjs9”
$PassiveLogOnUri = “https://accounts.google.com/o/saml2/idp?idpid=C03a9sjs9”
$ActiveLogOnUri = “https://accounts.google.com/o/saml2/idp?idpid=C03a9sjs9”
$LogOffUri = “https://accounts.google.com/logout”
$SigningCertificate = “MIIDdDCCAlygAwIBAgIGAXEQDuMqMA0GCSqGSIb3DQEBCwUAMHsxFDASBgNVBAoTC0dvb2dsZSBJbmMuMRYwFAYDVQQHEw1
Nb3VudGFpbiBWaWV3MQ8wDQYDVQQDwZHb29nbGUxGDAWBgNV
BAsTD0dvb2dsZSBGb3IgV29yazELMAkGA1UEBhMCVVMxEzARBgN
VBAgTCkNhbGlmb3JuaWEwHhcNMjAwMzI1MDQ1OTAxWhcNMjUw
MzI0MDQ1OTAxWjB7MRQwEgYDVQQKEwtHb29nbGUgSW5jLjEWMB
QGA1UEBxMNTW91bnRhaW4gVmlldzEPMA0GA1UEAxMGR29vZ2xlM
RgwFgYDVQQLEw9Hb29nbGUgRm9yIFdvcmsxCzAJBgNVBAYTAlVTM
RMwEQYDVQQIEwpDYWxpZm9ybmlhMIIBIjANBgkqhkiG9w0BAQEFAA
OCAQ8AMIIBCgKCAQEA6GfDWaCspEWgMKE8aTpUq3W95p9JulrT4UE
ROj6s3/RJDpyCeZQYOPOcFiJqEIPwiEK5QFkQFHOZUEgjqhHAcyDUf1D”
Now let us copy our variables, and run them in Powershell
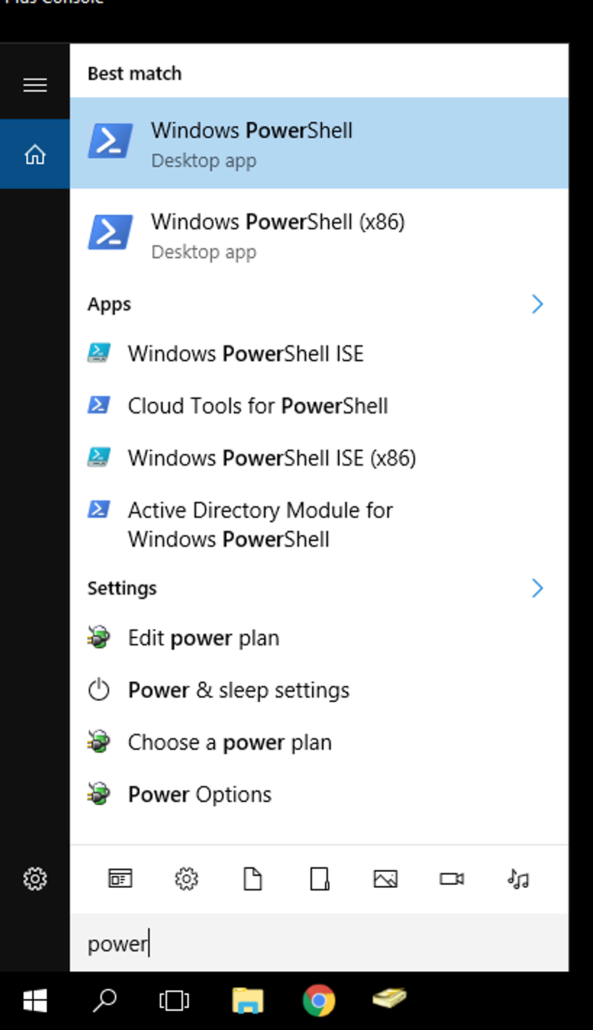
- Open Microsoft Powershell
- Connect to Office 365 with the command Connect-MsolService

- Now a window would pop up asking for your Office 365 credentials.
- Enter your Office 365 Administrator Email Id.
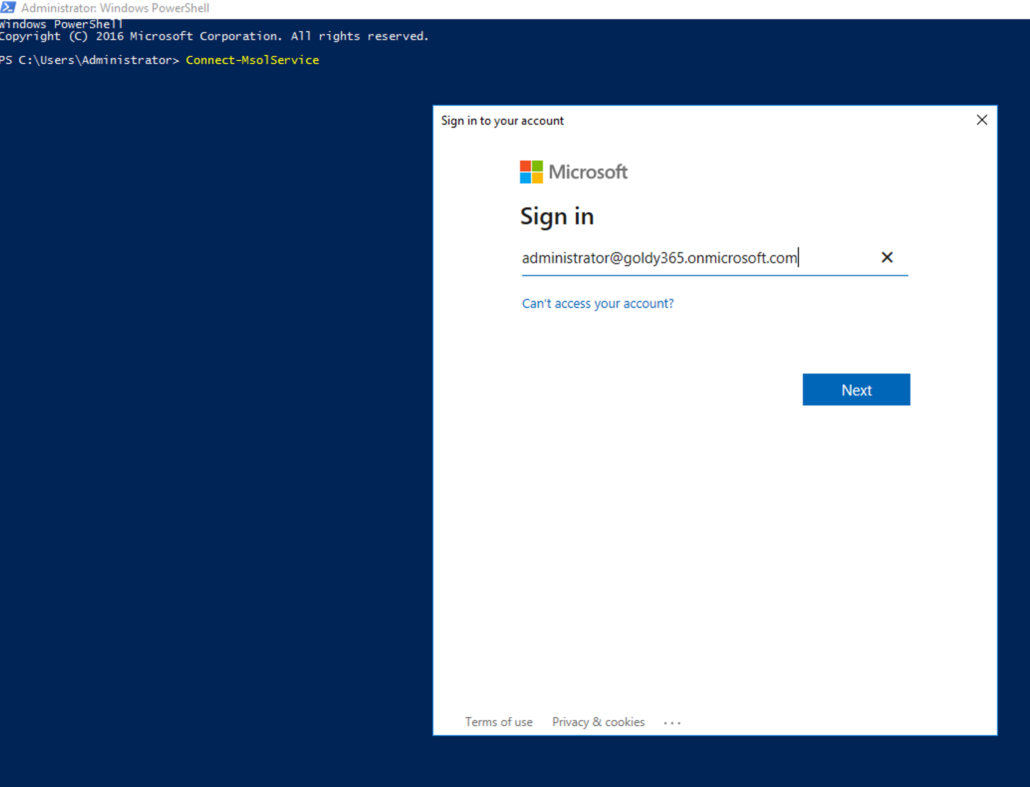
- Enter your Office 365 Administrator Password.

- If you are enrolled in to MFA, verify your identity by authentication via MFA.
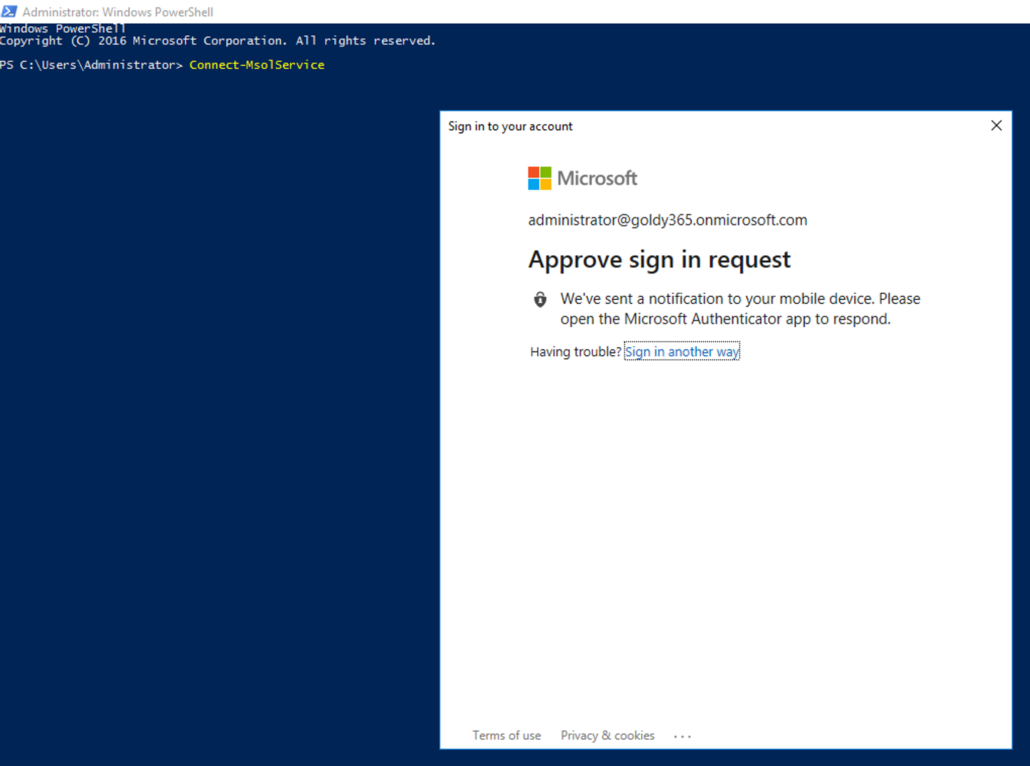
- Now paste the copied variables that you created above as shown in the screenshot and press enter.
- If everything went fine here, you won’t see any error, and Powershell would be ready to take next command.

- Now we need to run command to setup federation (or change it if you already have federation setup) which would ask PowerShell to fetch values of the federation properties from the variables we just defined.
- You can also run this command to check whether your domain is already federated or not.
- Get-MSolDomainFederationSettings -DomainName id.goldyarora.com | Format-List *
Run the following PowerShell command IF this is the first time you are setting up federation on this domain:
Set-MsolDomainAuthentication -DomainName $domainName -Authentication $Authentication -FederationBrandName $FederationBrandName -IssuerUri $IssuerUri -ActiveLogOnUri $ActiveLogOnUri -PassiveLogOnUri $PassiveLogOnUri -LogOffUri $LogOffUri -SigningCertificate $SigningCertificate -PreferredAuthenticationProtocol SAMLP
Run the following PowerShell command IF you already have federation on this domain, and now need to change it to Google :
Set-MsolDomainFederationSettings -DomainName $domainName -Authentication $Authentication -FederationBrandName $FederationBrandName -IssuerUri $IssuerUri -ActiveLogOnUri $ActiveLogOnUri -PassiveLogOnUri $PassiveLogOnUri -LogOffUri $LogOffUri -SigningCertificate $SigningCertificate -PreferredAuthenticationProtocol SAMLP

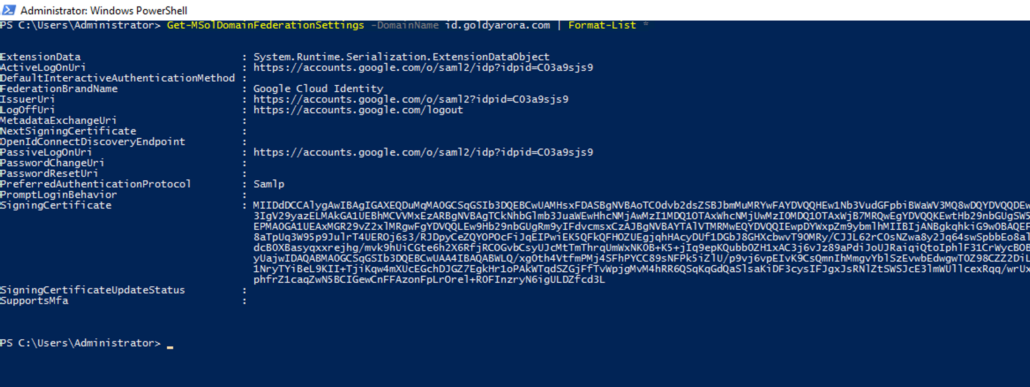
- Now let us test to ensure federation settings are set for our domain.
- Run the following Powershell command replacing id.goldyarora.com with your own domain.
- Get-MSolDomainFederationSettings -DomainName id.goldyarora.com | Format-List *
- You should see the values of your variables against the federation properties as shown in the screenshot below.
Provide Office 365 SAML application access to our Google users
Now, as we are done with Google Cloud Identity or Google Workspace to Office 365 SSO setup, we need to assign Office 365 SAML application to our required users.
You can either assign this application to all of your users in Google tenant, OR only to a subset of users via their OrgUnit or Group membership.
I would recommend you to put one test user in a group (lets called Office365testgroup), and then give Office 365 SAML app access only to this group.
This way we would be able to test our SSO before we roll it out to broader audience.
Once you create your Group and add a test user in it, assign Office 365 app to this group as shown in below screenshot :
(Note -: The test user you add in this group, should already be provisioned in Google)
- Go to Office 365 SAML app that you created in Google.
- In the left hand navigation, search for your Group.
- Enable the App for this group.
- Save changes.

Testing our SSO (Google / Identity Provider Initiated)
- Login to Google with your test user and to https://gsuite.google.com/dashboard
- Here you should see Office 365 application as it has been assigned to you via test group membership.
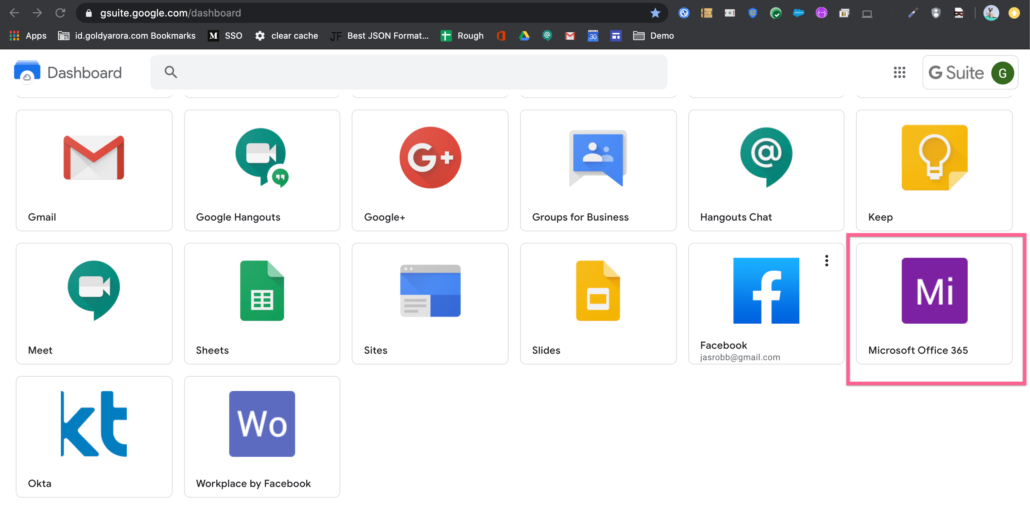
- As you are already logged in to your Google account, Google would send the SAML assertion to Office 365 when you click on the application icon.
- You should have been logged in successfully to your Office 365 application.
Note-: If your Office 365 Administrator has enabled MFA, and if you haven’t set it up yet, you would be asked to register it.

Testing our SSO (Office 365 / Service provider Initiated)
Now, as we have federation in place, when our user tries to login directly to Office 365, he should be redirected to Google.
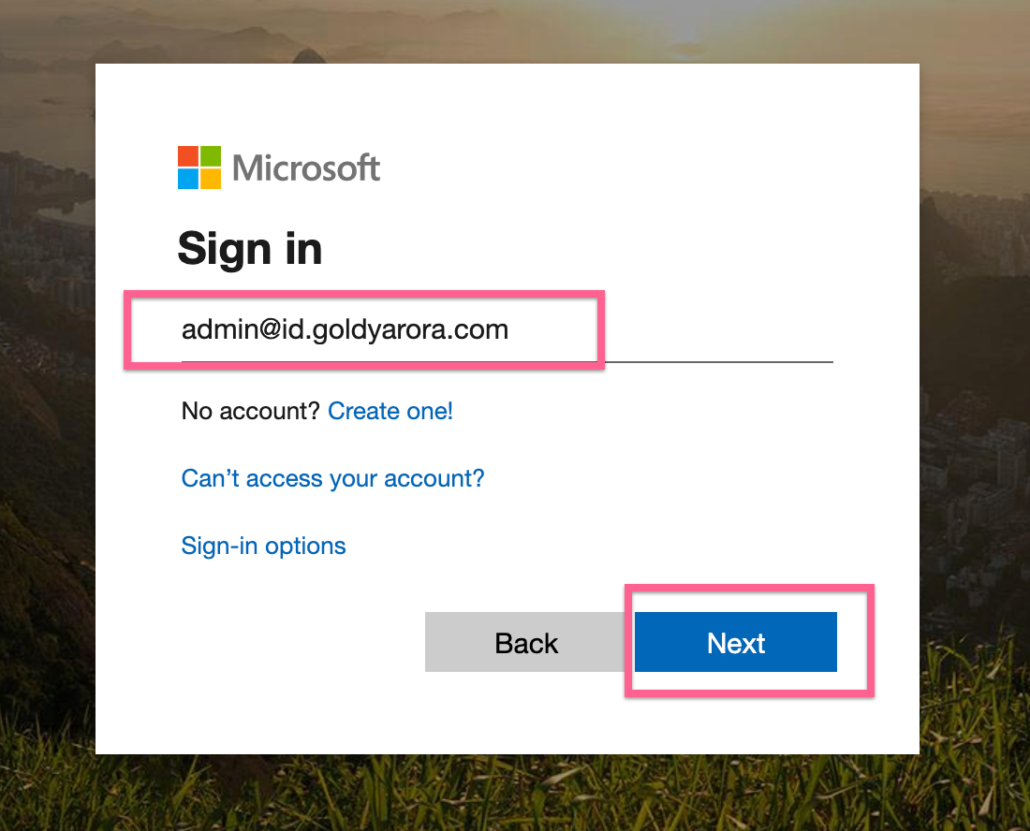
Office 365 is redirecting our user to Google as we have setup Google as our identity provider.
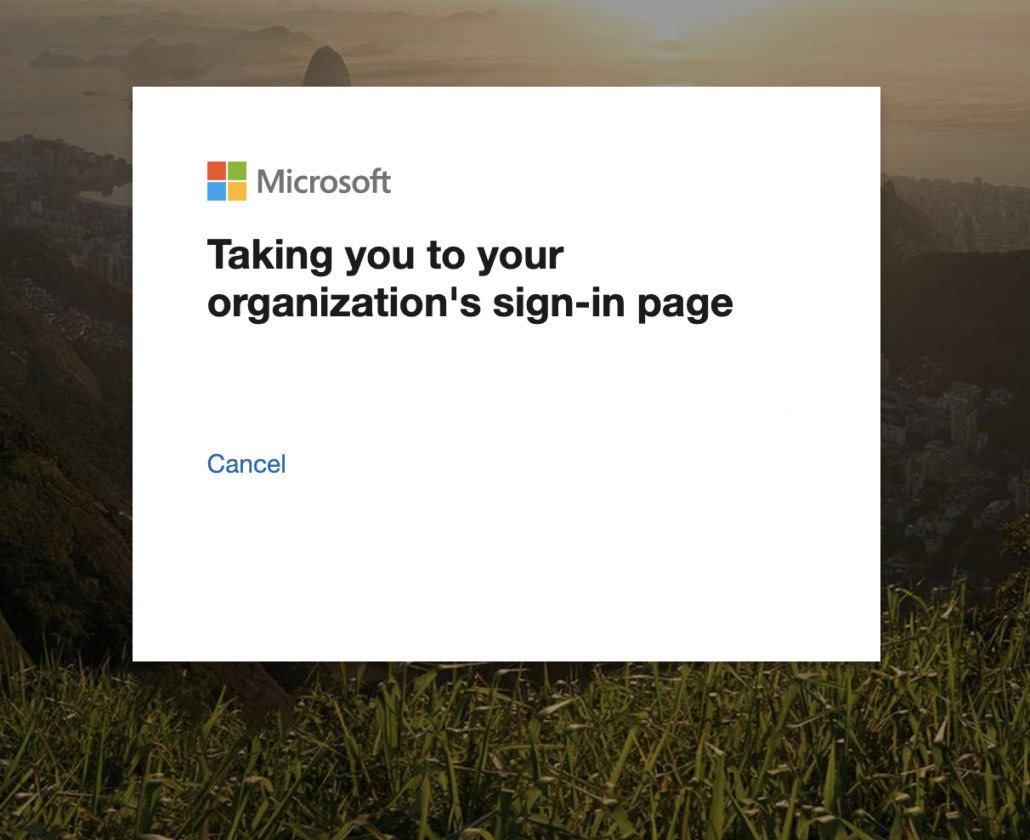
Now if the user is already logged into Google, then user would straight away land to Office 365 page.
If the user is not already logged into Google, then would require to login to Google first.
Then, if our user would be asked to login to Google (if not already logged in), and should landing at Office 365 after successful login to Google.
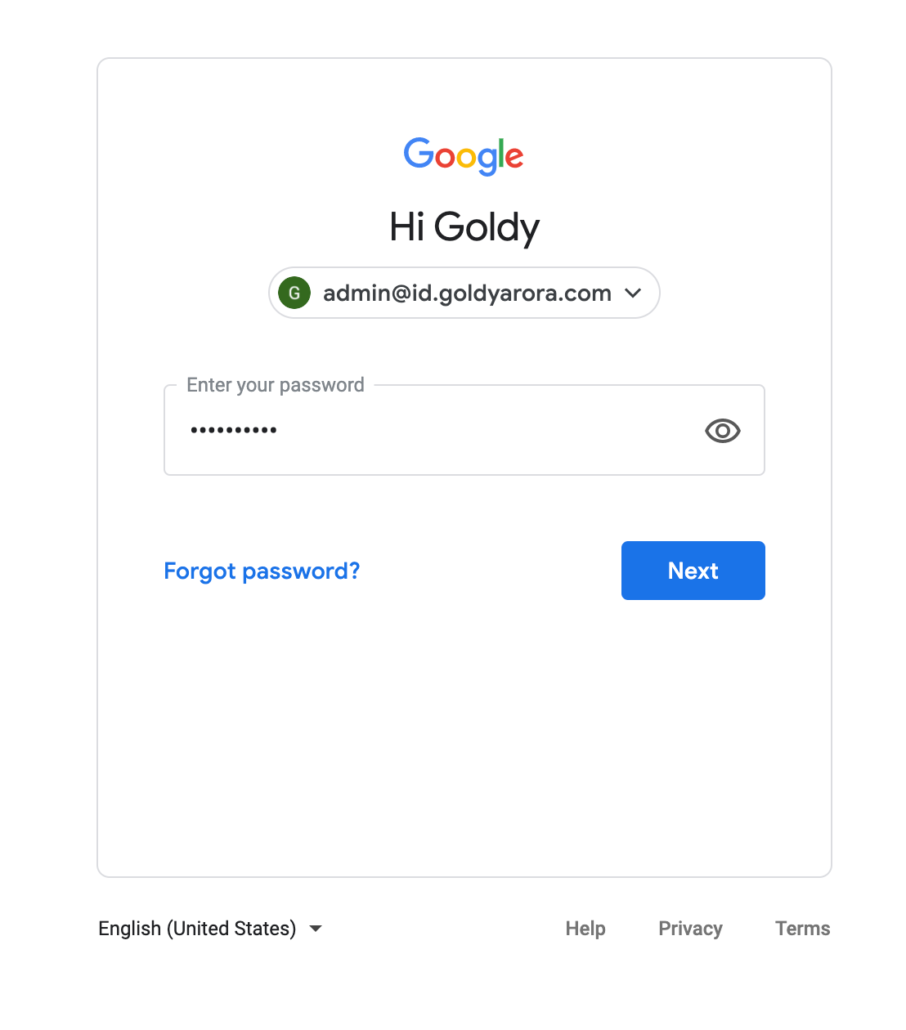
Now, Google would send the SAML response to Office 365, and user should be logged into Office 365.

As you have now successfully tested both IdP initiated and SP initiated sign on, feel free to assign Office 365 application to all / required users.
You can turn off SSO if required (may be for troubleshooting) with following command (replace my domain name with yours) :
Set-MsolDomainAuthentication -DomainName id.goldyarora.com -Authentication managed
Google Workspace to Office 365 Provisioning
In this section, let us understand how we can manage our Office 365 users lifecycle via Google Cloud Identity (or Google Workspace).

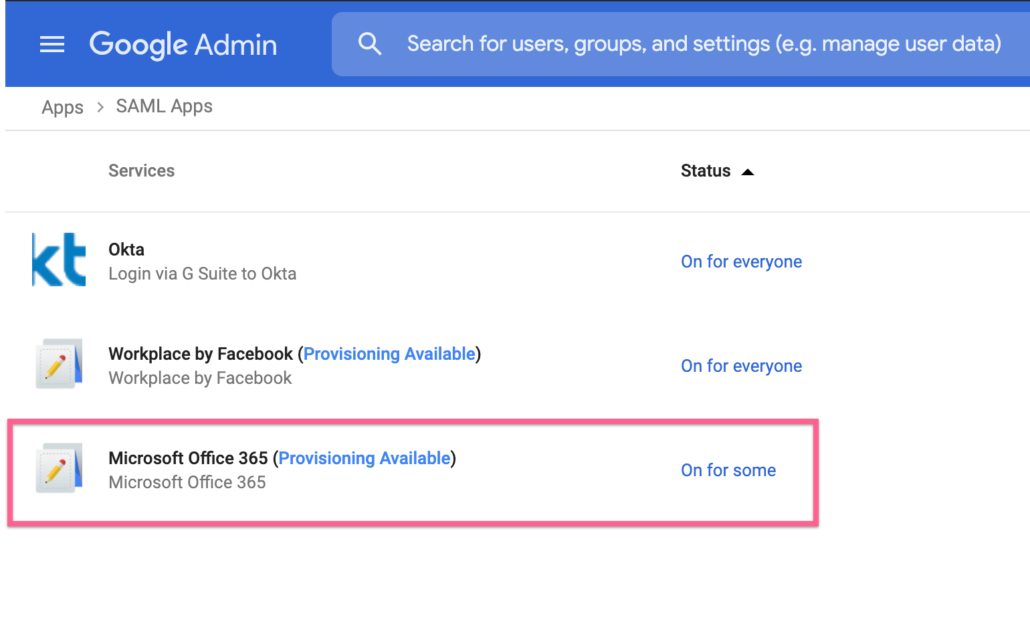
Click on the Office 365 application that you created earlier (Google Workspace Admin Console –> SAML Apps –> Office 365) as shown in the screenshot below.
Click on User Provisioning to start the configuration of Google Workspace to Office 365 provisioning.
Note : If you do not see User Provisioning here, that means you either do not have Super Admin role in Google, or you have Google Workspace or Google Cloud Identity plan that does not offer auto user provisioning.
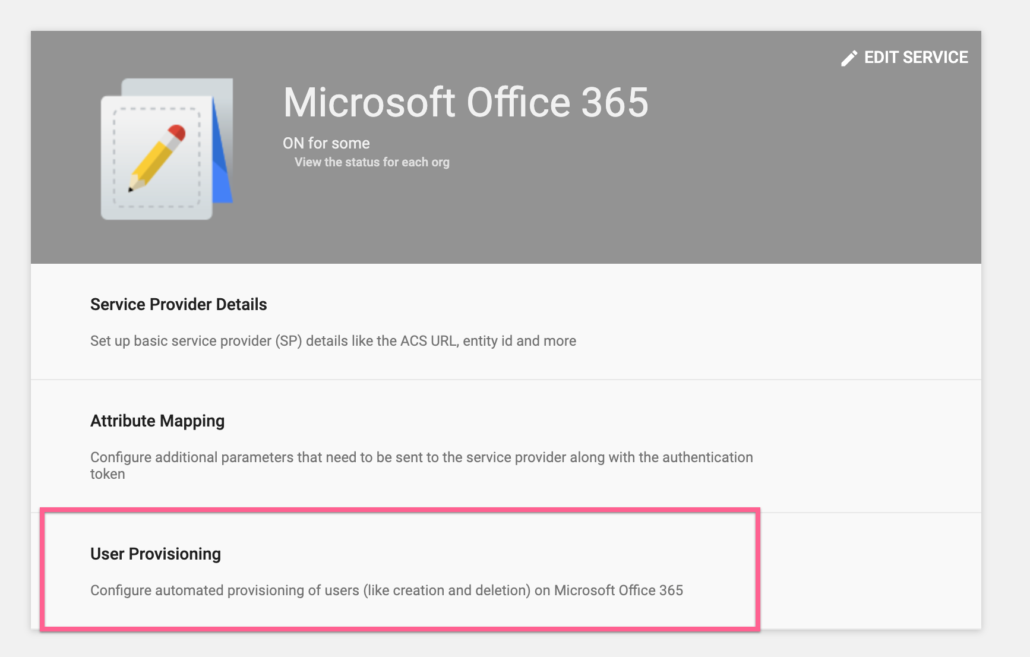
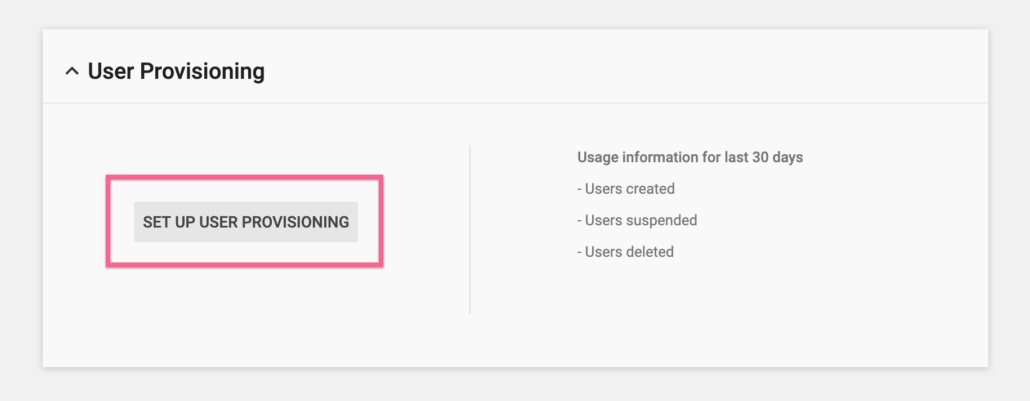
Click on “Set up user provisioning”.
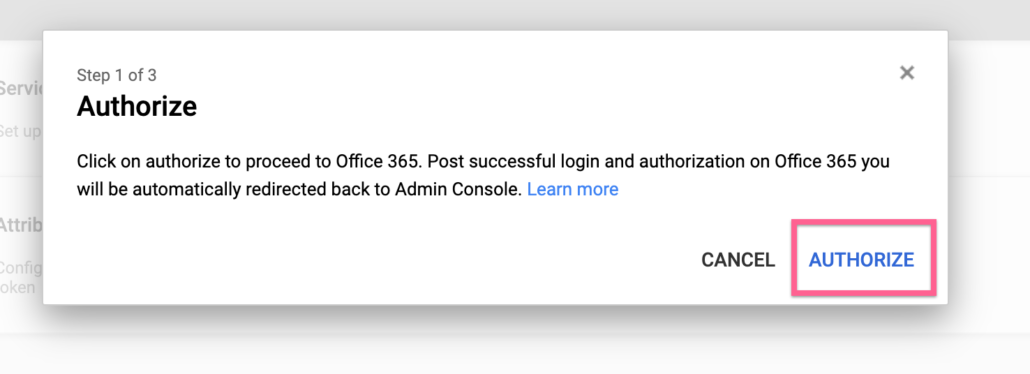
You would need to authorize Google to be able to create and manage users in Office 365, click on “Authorize”.
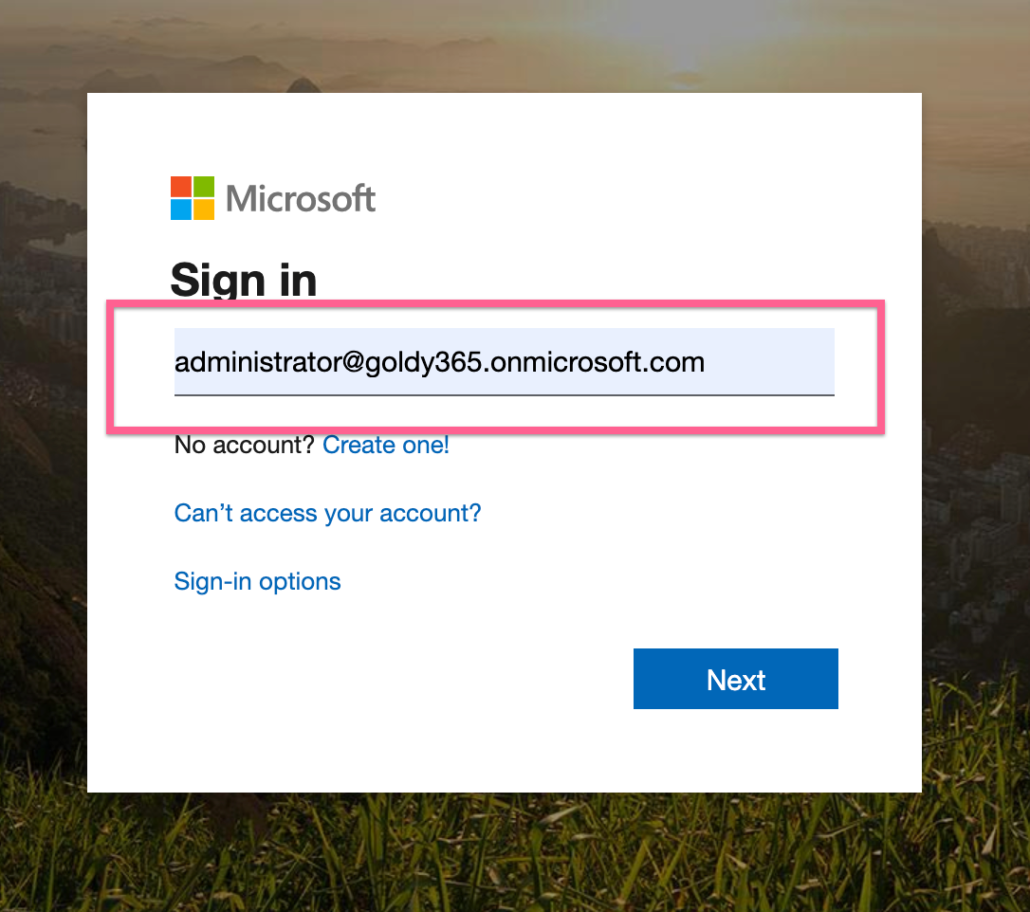
Login in to Office 365 with your Administrator Email
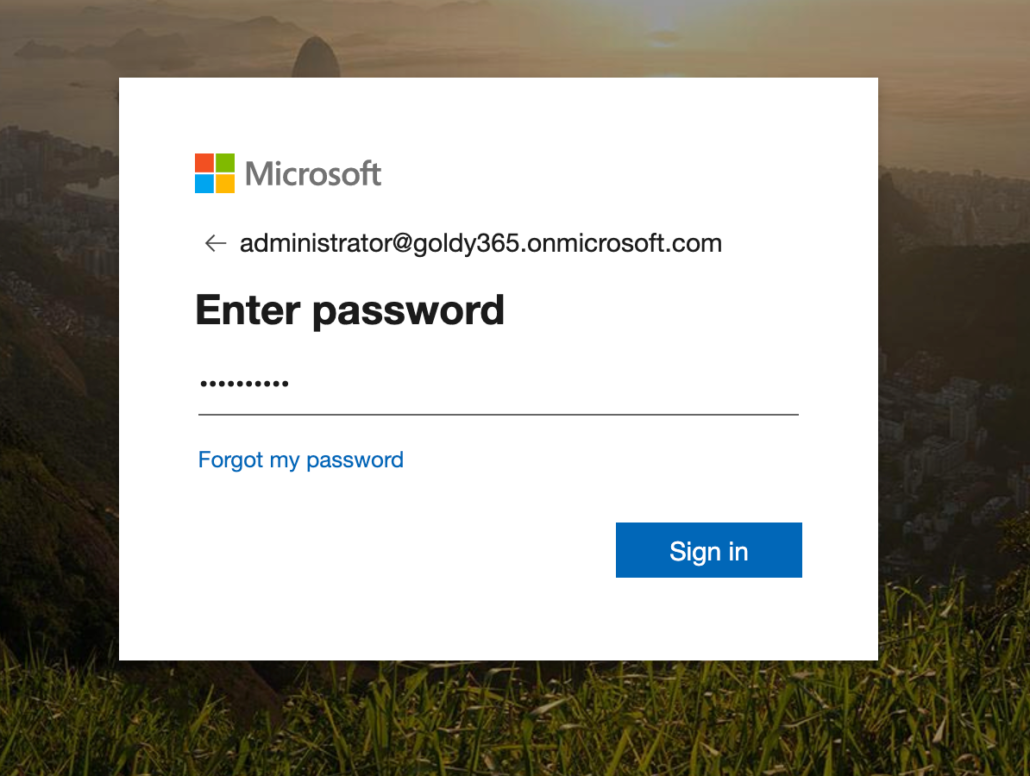
Enter your Office 365 Administrator password
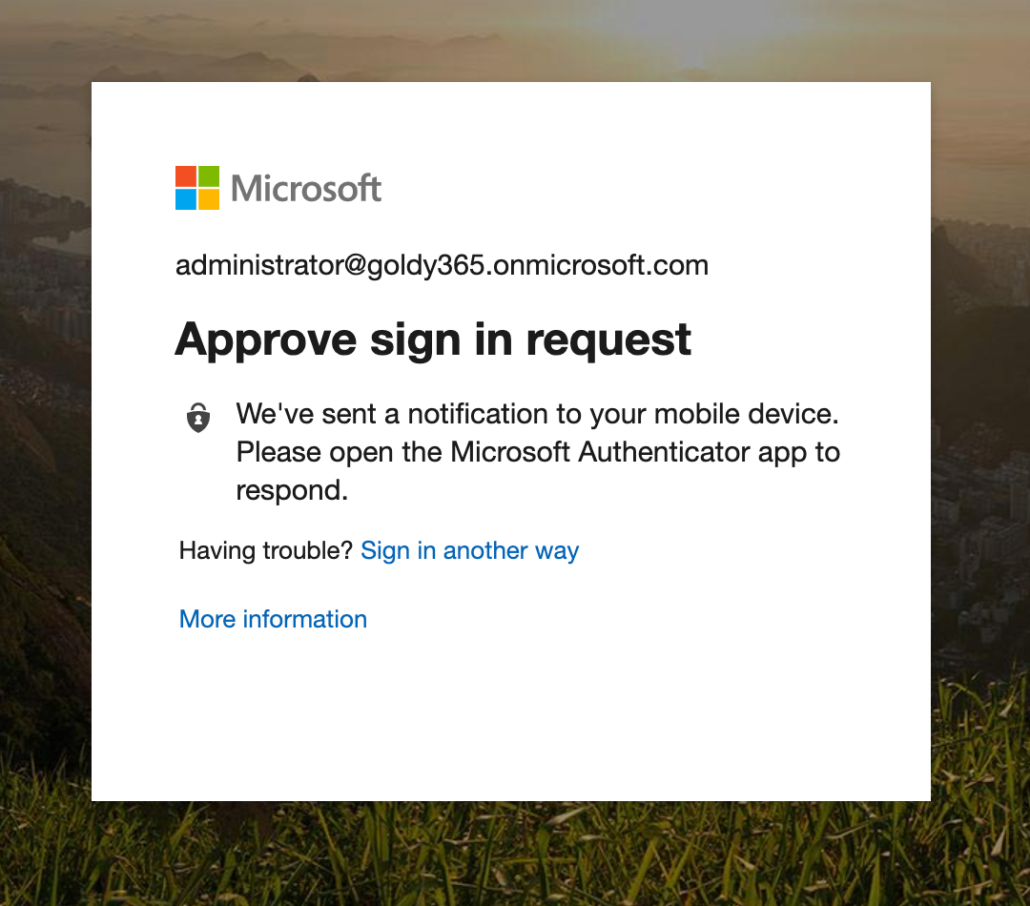
Approve the sign in request if you have MFA enabled on your Office 365 Admin account.
Attribute Mapping :
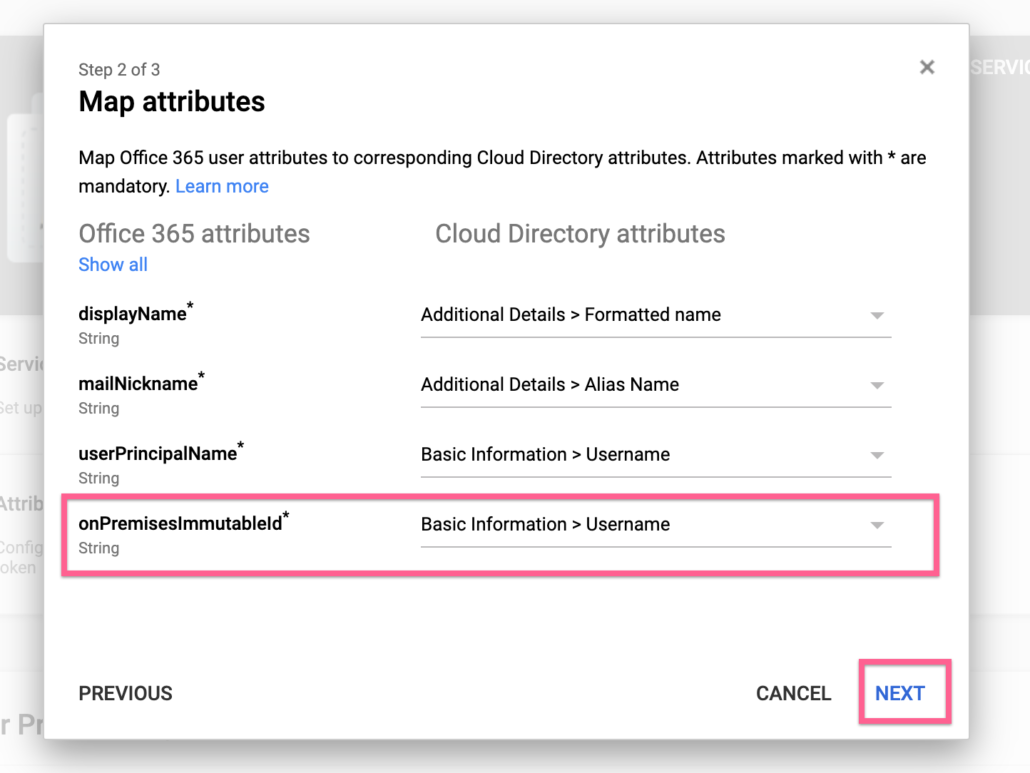
- You would now need to map attributes (e.g which attributes should Google send to Office 365 to create and manage your users.
- These 4 attributes shown below are required ones including “onPremisesImmutableId” where you would need to provide mapping.
- You can any value that you want for immutableId, I would go with Google Workspace user’s primary email for it.
- You can also click on “Show All” to map other optional attributes.
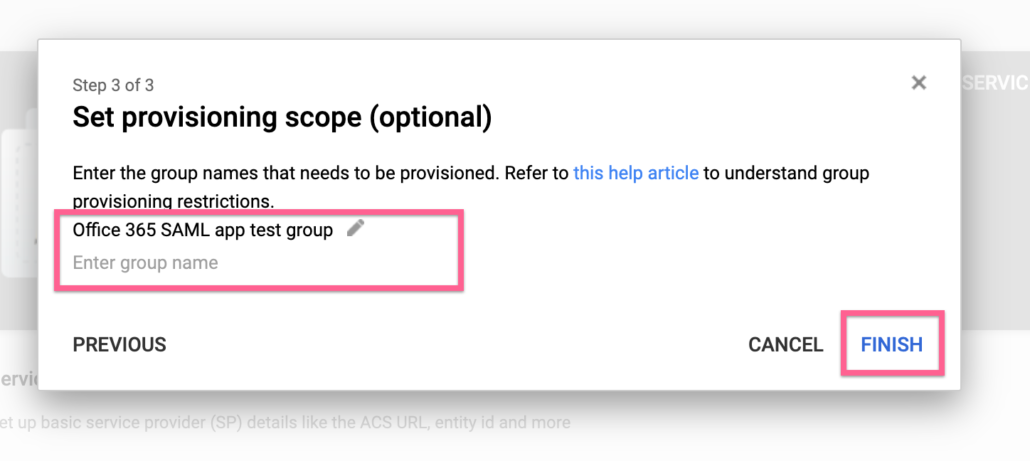
Here you should add your Google group which you would be using for provisioning to Office 365.
Whoever is in this group, would be created as user in Office 365.
Click Ok
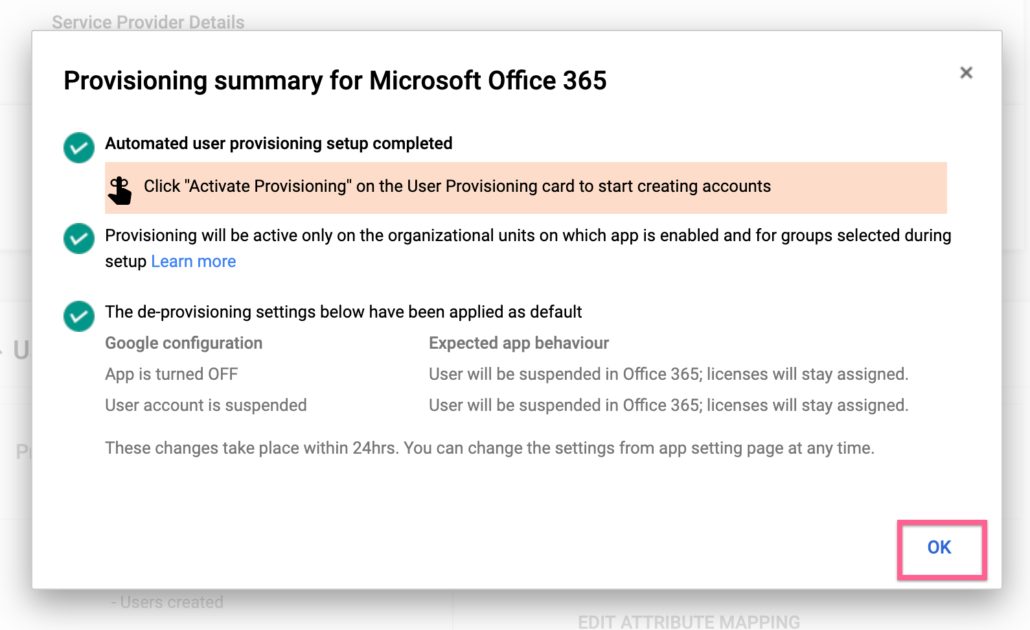
Now as we have mapped the attributes along with defining our provisioning scope via Google group, we are all set to activate provisioning from Google Workspace to Office 365.
Click on “Activate Provisioning” as shown in the screenshot below.

At this stage, Google would inform us one more time to ensure we have mapped the attributes correctly along with defining our provisioning scope, because once we turn on Activate here, Google would start the provisioning right away.
As we are all set with these requirements, let us go ahead and activate provisioning by clicking on “Activate” button.
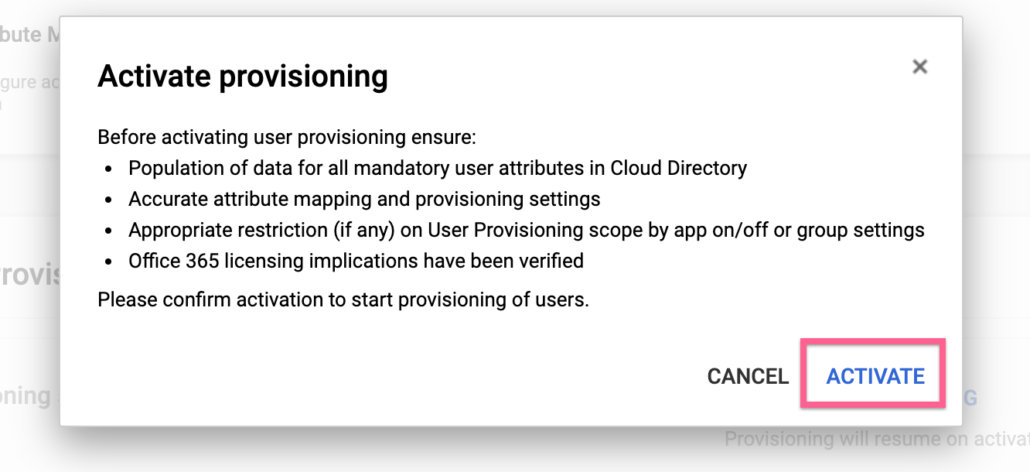
At this time, users in your scoping group should be created in Office 365.
These actions (including create, suspend or update users) would be logged in your Google Admin Console –> Reporting –> Audit –> Admin.
You should also go to your Office 365 Admin console to confirm that you users are created and/or updated there.
FAQs
Here am listing some of the frequently asked questions about Google Workspace to Office 365 SSO & User Lifecycle management, please comment in the bottom if you have any question, and I will add it (along with the answer) to FAQs.
HOW CAN WE PROVISION GROUPS & MEMBERSHIPS?
Google does not provide an option to provision / manage groups and memberships to Office 365.
I DO NOT SEE AN OPTION TO ADD SAML APPLICATION
Only Google Workspace or Google Cloud Identity Super Administrators can add SAML applications.
Please make sure you are assigned Super Admin role.
CAN WE CONFIGURE 3RD PARTY MFA (E.G DUO)?
No, Google does not support 3rd party MFA integration.
However you should be able to leverage Google’s MFA (which supports multiple MFA methods including security key).
Google’s MFA is available to Google Workspace and Google Cloud Identity customers without any additional cost.
WHAT KIND OF LOGS DOES GOOGLE PROVIDE FOR SAML APPS?
Google Cloud Identity (or Google Workspace) Administrators with Reporting priveleges can look at SAML and Provisioning logs.
Following SAML Login logs are available at this path Admin Console –> Reports –> Audit –> SAML
SAML Login Logs :
- Event Nama – (e.g Successful login)
- Event description (e.g Goldy Arora logged in)
- User (e.g admin@id.goldyarora.com)
- Application Name (e.g Microsoft Office 365)
- Organization name (user’s orgUnit name like /Contractors)
- Initiated by (who initiated the login e.g Service provider or Identity Provider)
- Failure type (if any failure, e.g Application not configured)
- Response status (e.g SUCCESS_URI)
- Response second level status
- IP Address (login user’s IP address, e.g 96.248.xxx.xx)
- Date (date and time of user login, e.g 3 Feb 2020, 08:47:59 GMT-5)
Following provisioning (and deprovisioning) logs are available at this path Admin Console –> Reports –> Audit –> Admin
- Event Name (e.g Update Auto Provisioned User)
- Event Description (e.g User admin@id.goldyarora.com was updated on application Microsoft Office 365 by auto provisioning)
- Admin (which Admin performed this operation)
- Date (date and time when this operation was performed, e.g 24 Apr 2020, 13:59:30 GMT-4)
- IP (IP address of the Admin who performed this operation, e.g 96.248.XXX.XX)
Related Posts
....


