

Create Google Workspace Aliases in Bulk with this Script
Here is a video guide where I take you through from start to finish on how to quickly create hundreds or even thousands of email aliases in just minutes using this script.
1. Create new Google sheet
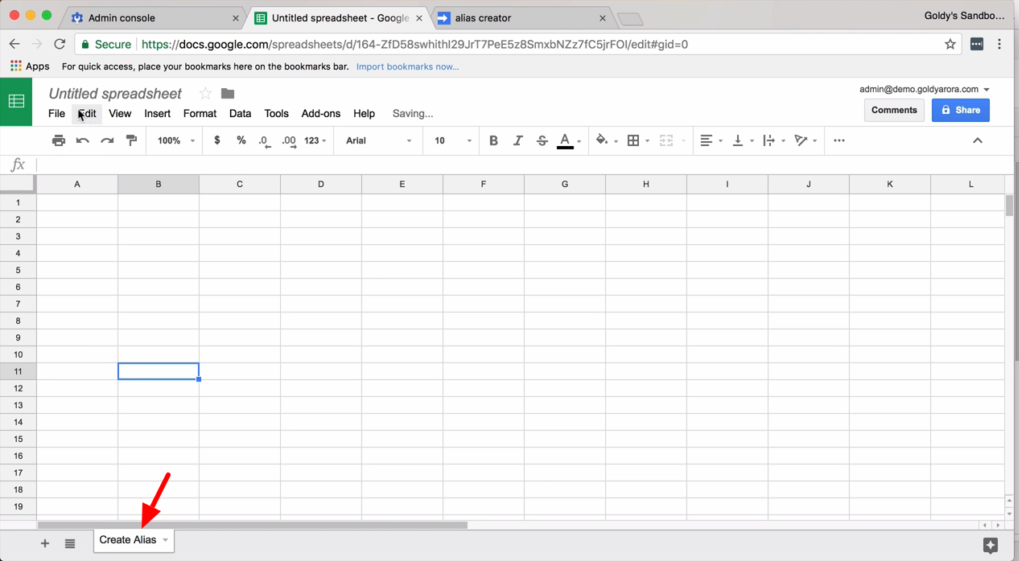
So first step is for you to create a new Google spreadsheet. Then rename your sheet to ‘Create Alias‘.
This is because the script will be looking for a spreadsheet with the same exact name, so it is important you copy and paste the name correctly.
2. Go to script editor

Next, from the new sheet you just created, go to ‘Tools‘ then click on ‘Script editor‘ to create a new script.
3. Copy and paste script
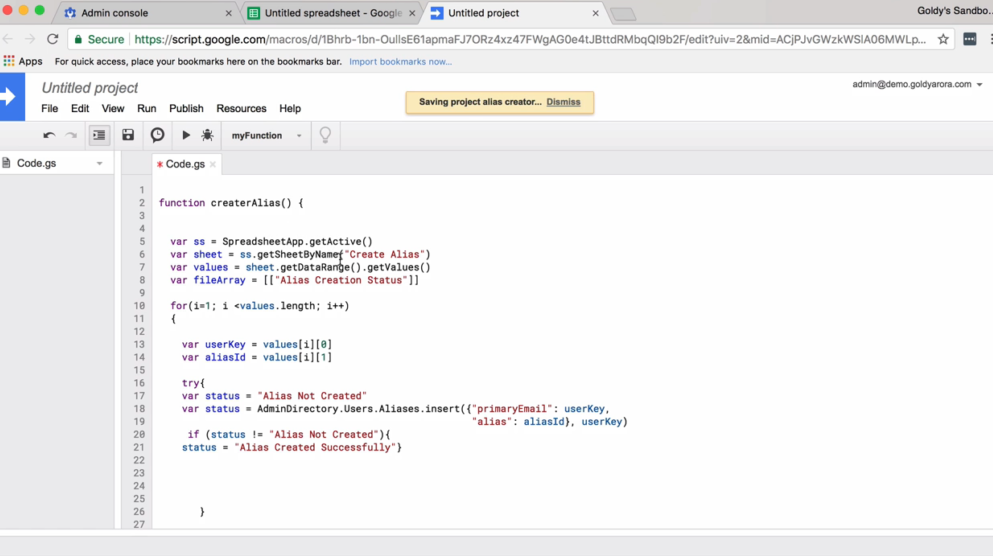
Now copy and paste the following script into your script file. After pasting the script, don’t forget to save where you get also get prompted to provide project name.
----------------------------------------------------------------------------
function createrAlias() {
var ss = SpreadsheetApp.getActive()
var sheet = ss.getSheetByName("Create Alias")
var values = sheet.getDataRange().getValues()
var fileArray = [["Alias Creation Status"]]
for(i=1; i <values.length; i++) {
var userKey = values[i][0]
var aliasId = values[i][1]
try{
var status = "Alias Not Created"
var status = AdminDirectory.Users.Aliases.insert({"primaryEmail": userKey,"alias": aliasId}, userKey)
if (status != "Alias Not Created") {
status = "Alias Created Successfully"}
} catch (e) { Logger.log(e.message)
var status = e.message }
fileArray.push([status]) } var range = sheet.getRange(1, 3, fileArray.length, 1).setValues(fileArray)
}
----------------------------------------------------------------------------
Script overview
So, here is an overview of how the script essentially works:
- The script will look for two values from the first two columns of the spreadsheet.
- The first column should be ‘User key”, which is the user’s primary email address.
- The second column is a user’s alias id which is also the nickname.
- In the third column, the script will report whether or not an alias was successfully created.
4. Prepare spreadsheet
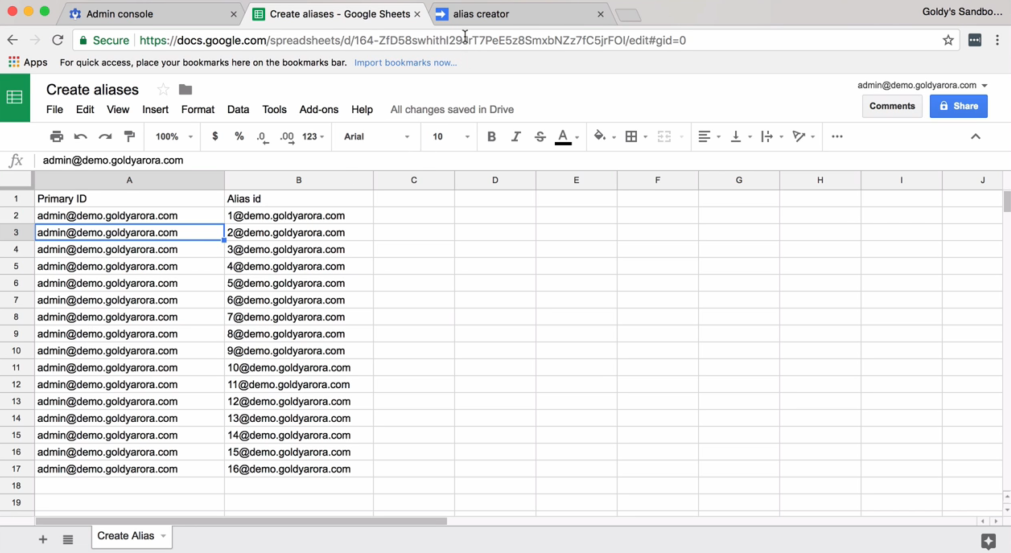
As explained above, you will need to provide two columns with the first column being a user’s primary email address and in the second, an alias ID you want to create for that specific user.
In my case, I am creating aliases for just one email address however, you can create for several different users be it 500 or 1000 different email IDs whichever you like.
5. Enable ‘Admin Directory API’
Now before you can run the script, you need to do one more thing. That is to enable Admin Directory API.

So to enable Admin Directory API, go back to the script page, click on ‘Resources‘ then from the drop down menu click on ‘Advanced Google services‘ option.
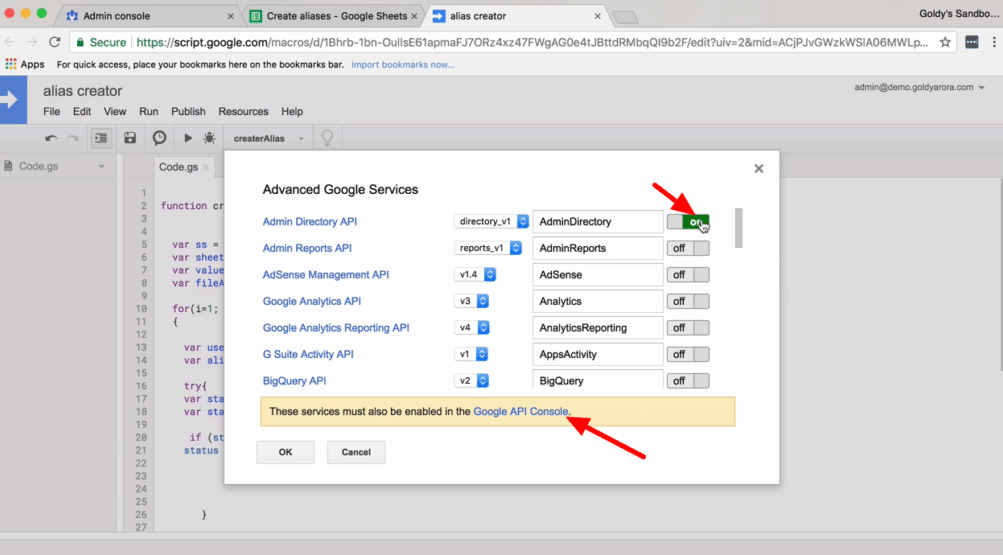
Toggle the on-off button to enable Admin directory API. Then, click on ‘Google API Console’ link.
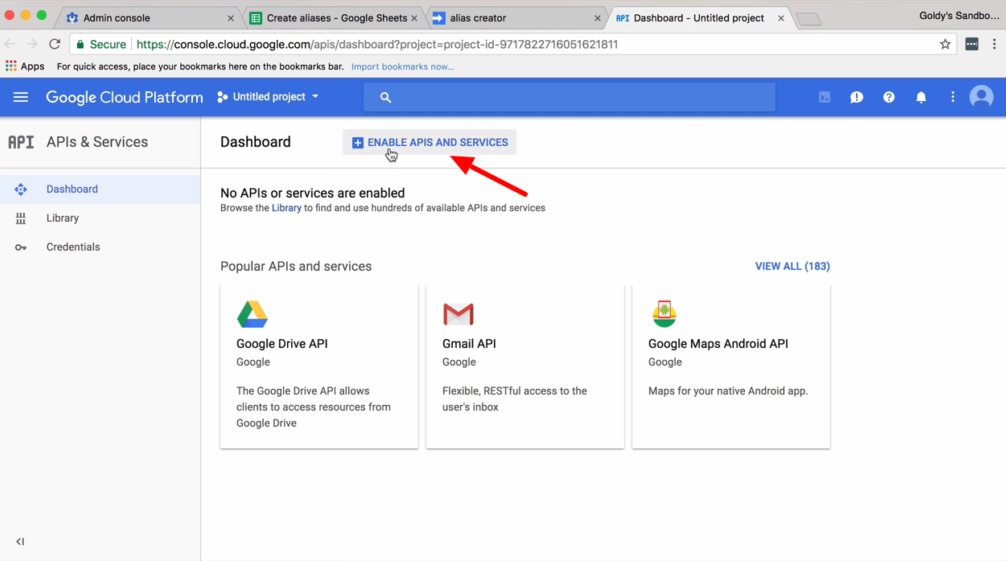
On the next screen, click on ‘Enable APIS and Services’ button

Now, search for ‘admin sdk’ and then click on ‘Admin SDK‘ from the results
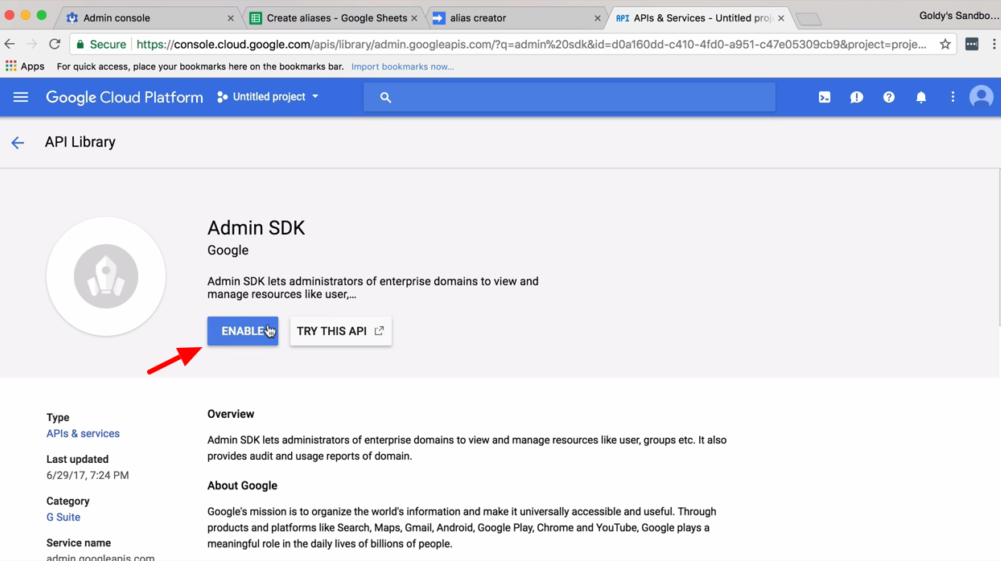
Click on ‘Enable‘ button to turn on admin SDK.
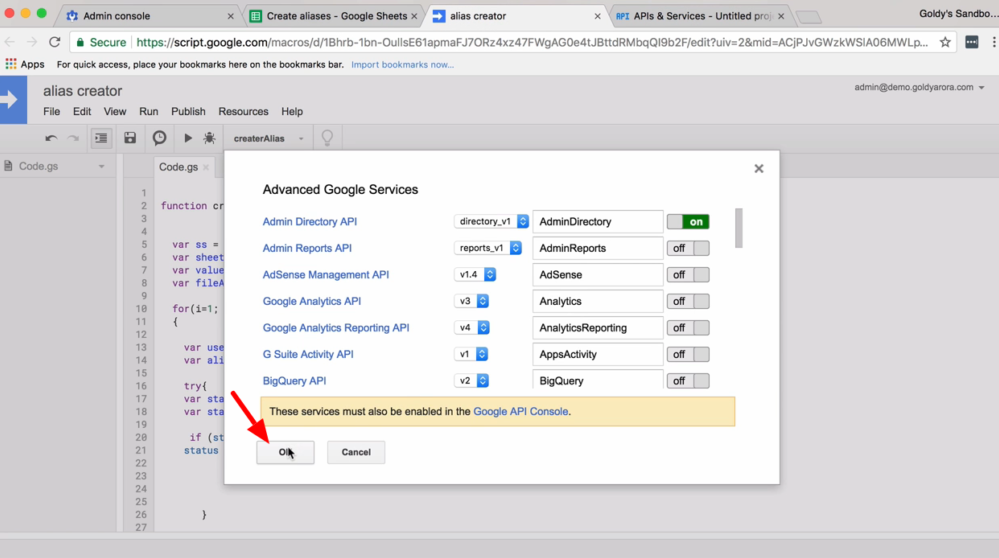
After enabling admin SDK, you then come back to ‘Advanced Google services‘ page then click on ‘OK’ button then Google will update the changes.
6. Run script
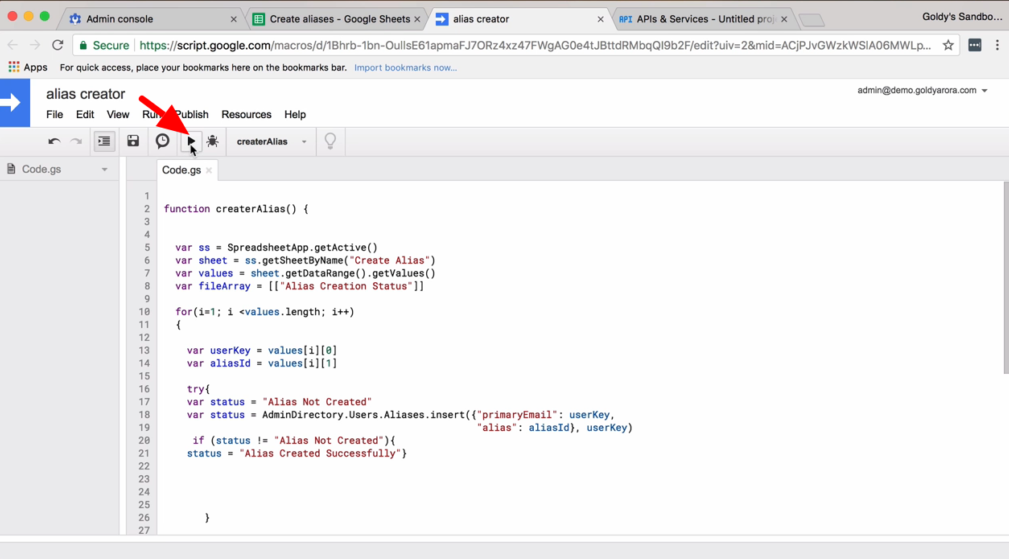
Now you’re all set and ready to run your script. Click on the ‘play’ button to execute the script.
Because you’re running the script for the first time, Google will ask you to give permissions using your account.

All you have to do is choose an account (if you have multiple account signed in) then click on ‘Allow’ button to give your project permissions to services such as spreadsheet, and user management.
Now the script will run for a few seconds or more depending on the number of email aliases on the spreadsheet.
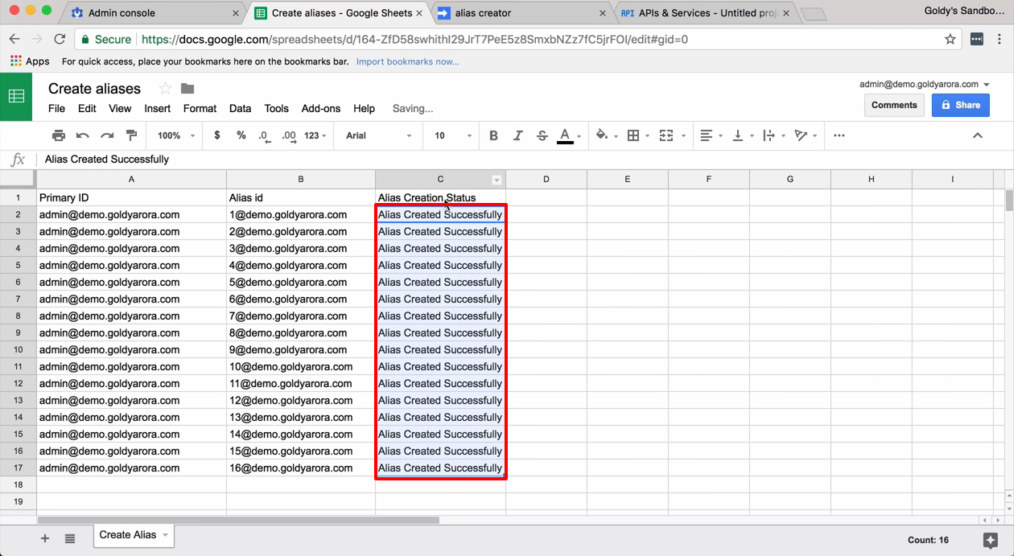
So, you should see a script response on the third column of the spreadsheet after aliases have successfully been created.
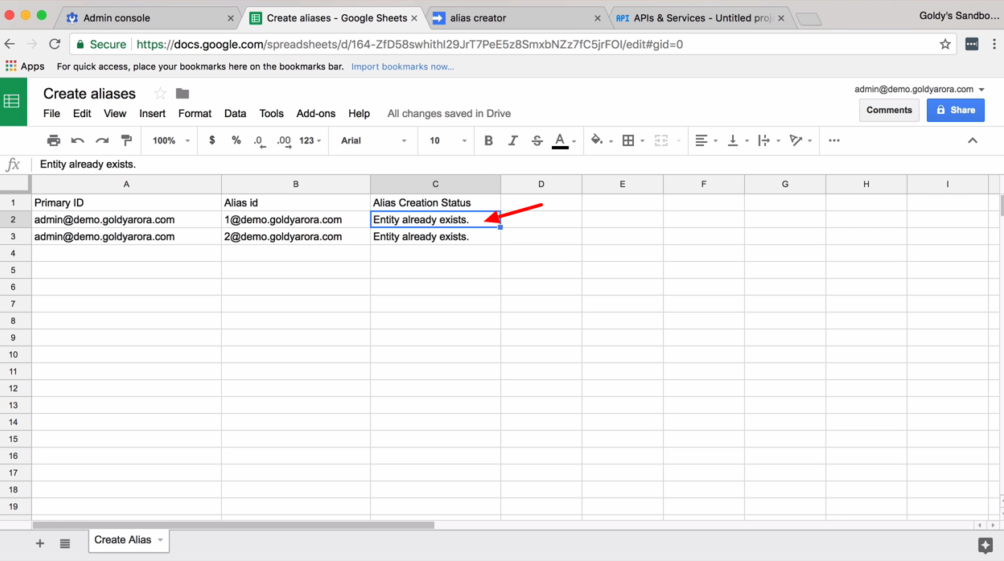
The script will also be able to notify you if an alias you’re trying to create already exists with ‘Entity already exists‘ message response.
That’s all!
That’s all to it. You can quickly create hundreds of email aliases by simply running a Google apps script.
I hope you found it helpful, for questions and comments, please leave them in the comment section below and I will be more than glad to help.
Related Posts
....