
Gmail Forwarding Filter Setup - Forward selective emails in Gmail
Gmail Forwarding Filter
- Sometimes you need to forward your Gmail emails to another email account, either to yourself or to someone else.
- In my use case today, Instead of forwarding all my emails, I only want to forward a few selective ones based on my criteria
- In this video, I will show you how to forward selective emails from your Gmail to other account
Use Case
- Our use case is, I have two email addresses "personal@goldyarora.com" and "work@goldyarora.com"
- So what I want is that when an email is sent to my "work" email, it should be forwarded to my "personal" email only if it marches a certain criteria.
1. Go to Email Settings
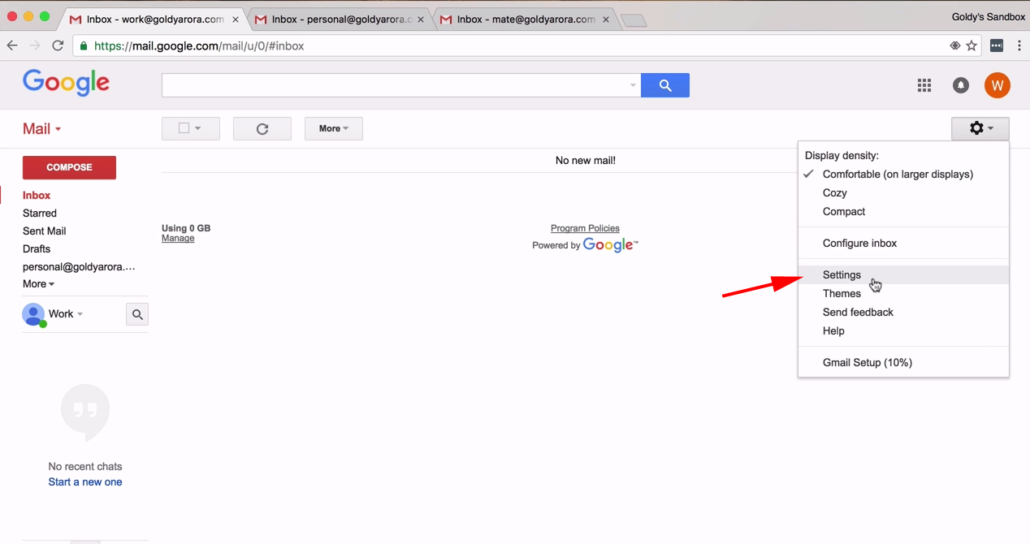
- So our first step is to add a forwarding address to "work" email.
- To do that, go click on the settings icon at the top right corner.
- Click on "Settings" from the drop down menu.
2. Go to "Forwarding and POP/IMAP"
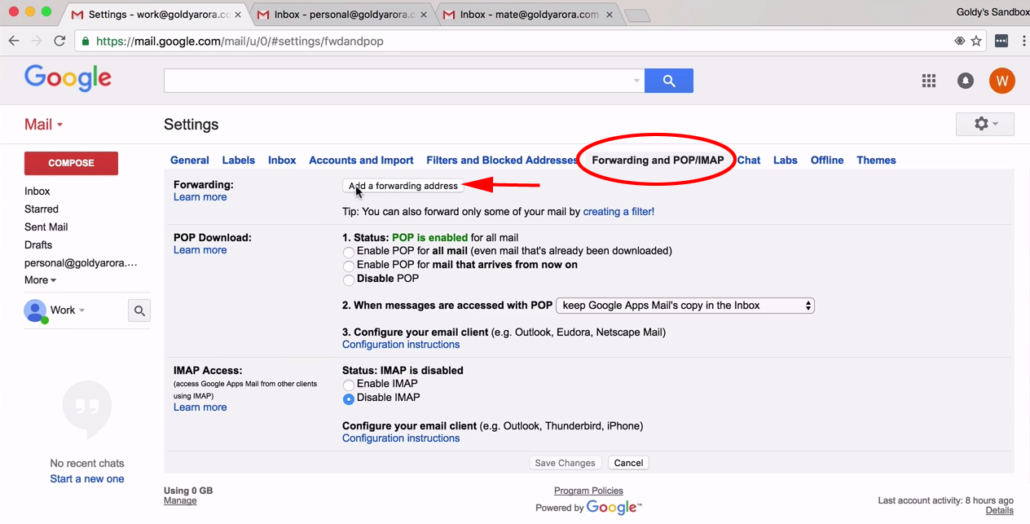
- On your mailbox's settings page, switch to "Forwarding and POP/IMAP" tab.
3. Add Forwarding Address
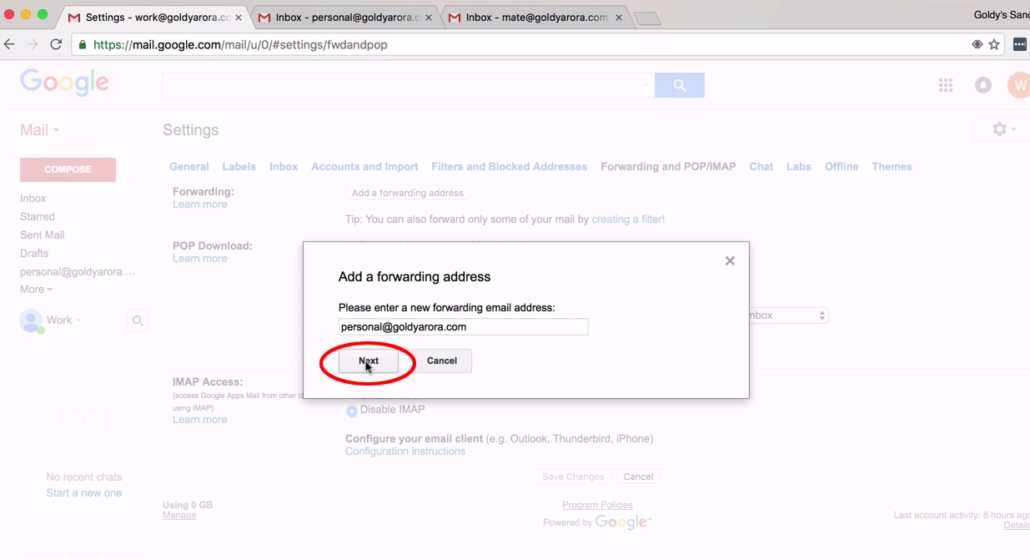
- Under "Forwarding and POP/IMAP" settings, click on "Add a forwarding address".
- Add your the email address you would want the emails forwarded to, which is "personal@goldyarora.com" in my case.
- Click "Next", then "Proceed" to complete address addition process.
4. Email Verification
- Now in my case, because the email address am adding is on the same domain, Gmail doesn't require me to verify.
- However in your case, you may be required to verify your email address.
- In that case, Gmail sends a confirmation code which you then have to copy and paste here in order confirm ownership or that you have authorization to forward emails to that address.
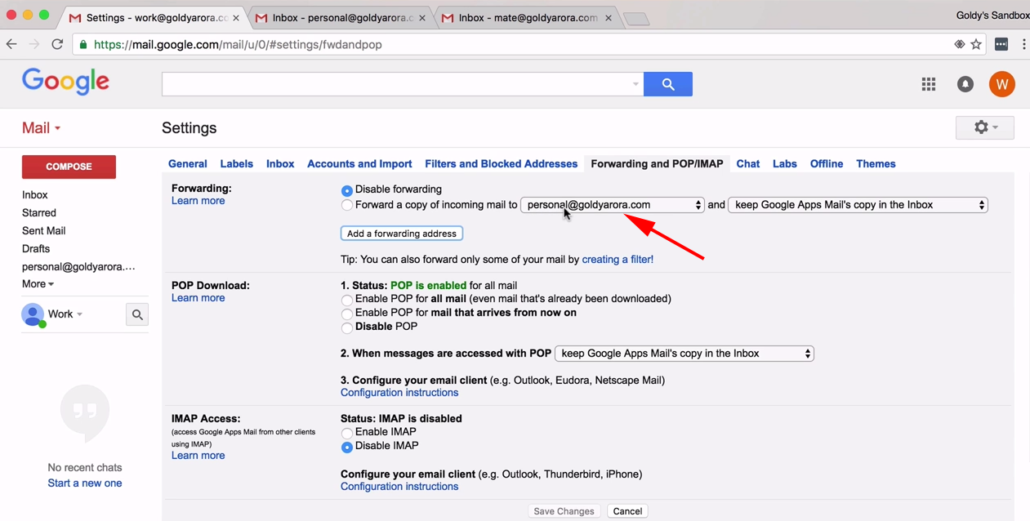
5. Keep "Forward a copy" unchecked
- Make sure "Forwarding a copy of incoming mail to" is not checked.
- Unless you really want to forward each and every email (which is not what we want here), you want to keep that unchecked.

6. Create new Filter
- Now we're going to create a forwarding filter from "work" email.
- To do that, head over to the mailbox settings again, then switch to "Filter and Blocked Address" tab.
- Under "Filter and Blocked Address", click on "Create a new filter" link.

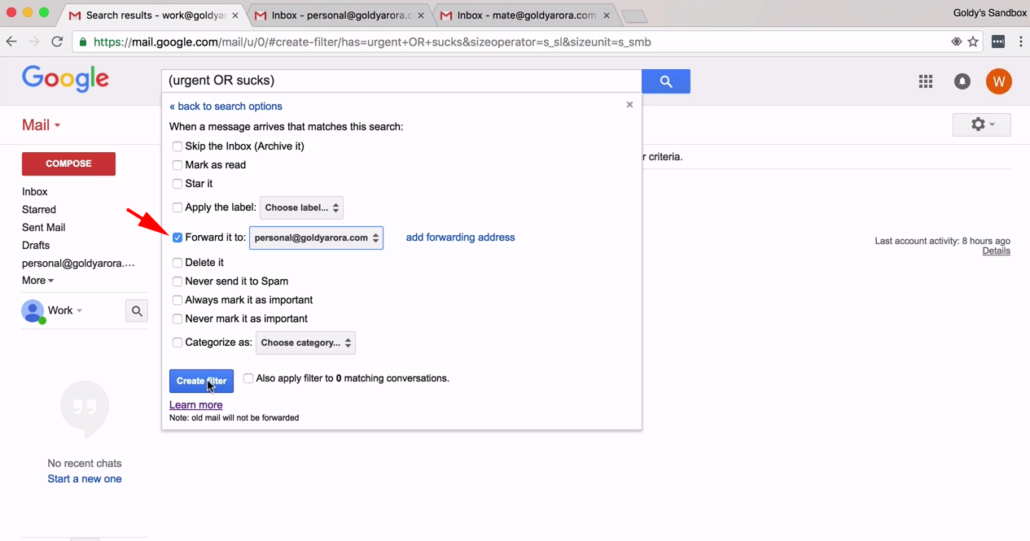
7. Setting up criteria
- On clicking "Create a new filter", Gmail allows you to now define a forwarding criteria.
- For instance, in my case I would an email to be forwarded to my "personal" email only if they contain words "urgent" or "sucks".
- Obviously, you can define other criteria such as "From", "Doesn't have" etc. Click "Create filter with this search" to continue.

8. Complete filter creation
- Next, check "Forward it to" option and choose the email address in added in step 3.
- Then, click on "Create filter" button to finish.
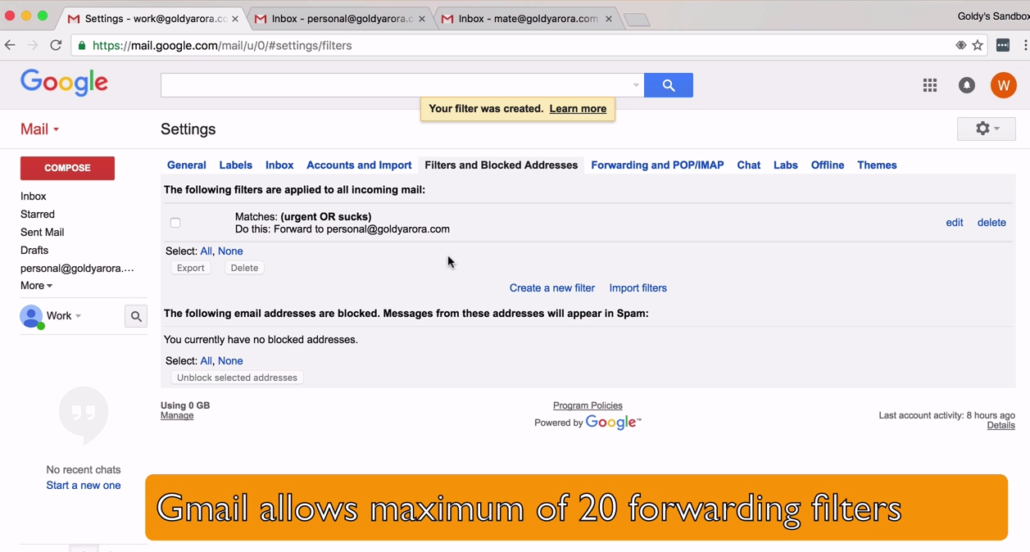
Gmail maximum filters
- Just a caution here; Gmail allows a maximum of 20 forwarding filters.
Testing forwarding filters
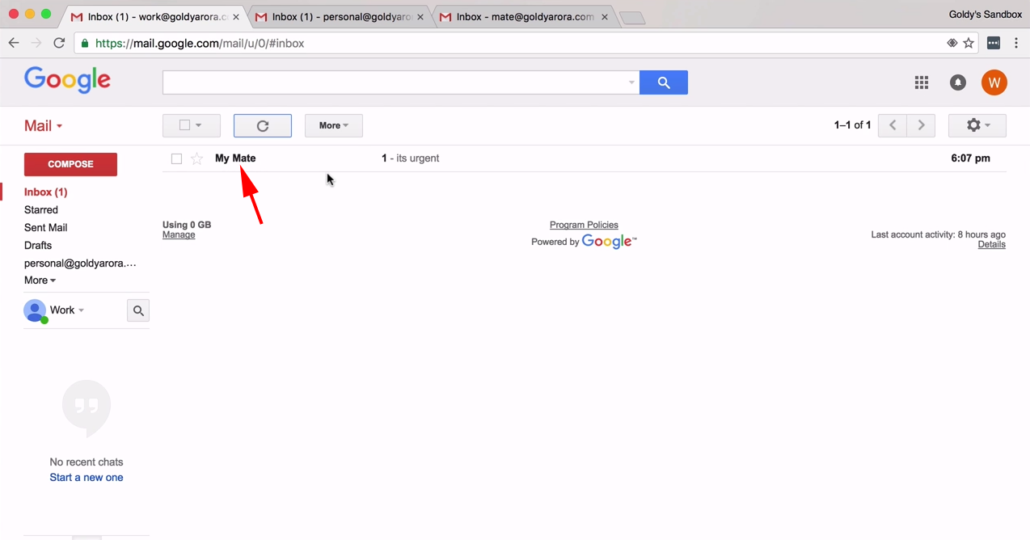
- Now, we you can go ahead and test your forwarding filters you just created.
- In my case, if I send an email to my "work" email address, and that email contains words "urgent" or "sucks", that email is forwarded to my "personal" email. But if an email doesn't contain any of those words, it is not forwarded.
- I hope it helps, if you have some questions feel free to put them in the comment section and I'll be happy to help. Thank you so much!
Related Posts
....
....